


21
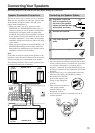
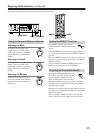
Connecting Your Components—Continued
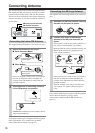
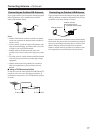
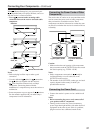
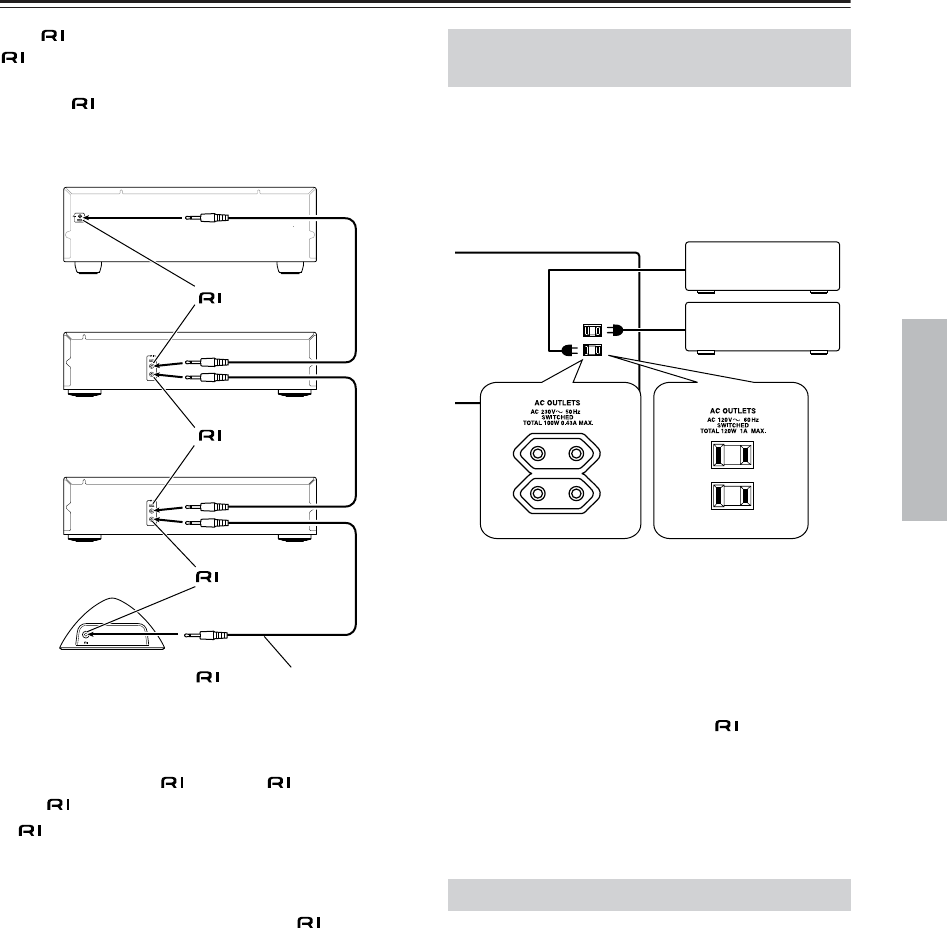
With (Remote Interactive), you can control your
-compatible Onkyo CD player, RI Dock, and so on
with the receiver’s remote controller.
• To use , you must make an analog audio
connection between the receiver and each audio
component.
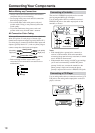
Notes:
• Push each plug in all the way to make a good
connection.
• Use only dedicated cables for connections
(no cables are supplied with the receiver).
• jacks should be connected only to Onkyo
components. Connecting them to another
manufacturer’s component may cause the receiver to
malfunction.
• Some components may not support all functions.
See the manuals supplied with your other Onkyo
components for more information.
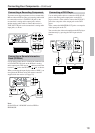
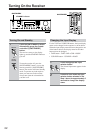
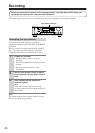
The receiver has AC outlets on its rear panel that can be
used to connect the power cords of other components
that you intend to use with the receiver. These
components can then be left turned on so that they turn
on and off as and when the receiver is turned on and set
to Standby.
Caution:
• Make sure that the total capacity of the components
that you connect to the AC OUTLETS does not exceed
the stated capacity (e.g., TOTAL 120 W).
Notes:
• Onkyo components connected via should be
connected directly to a wall outlet, not an AC
OUTLETS on the receiver.
• The number of AC OUTLETS, socket type, and total
capacity depend on the country in which you
purchased the receiver.
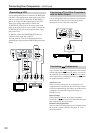
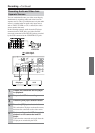
• Connect the receiver’s power cord to a suitable wall
outlet.
Notes:
• Before connecting the power cord, connect all of
your speakers and AV components.
• Turning on the receiver may cause a momentary
power surge that might interfere with other electrical
equipment on the same circuit. If this is a problem,
plug the receiver into a different branch circuit.
Onkyo CD player,
etc.
Receiver
connector
Remote control cable
connector
Onkyo cassette
deck, etc.
Remote Interactive
Dock, etc.
connector
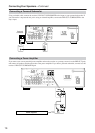
Connecting the Power Cords of Other
Components
Connecting the Power Cord
e.g. European model e.g. North American
model