


C553M-C (3/03) 7
INSTALLING THE LRD41A11 SERIES RECEIVER
NOTE: The LRD41A1 Series receiver accommodates an additional electrical (coax) connection to the camera for camera synchro-
nization, which is necessary when multiple cameras require frame synchronization.
The receiver box attaches to the inside access panel of the mount.
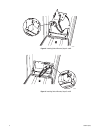
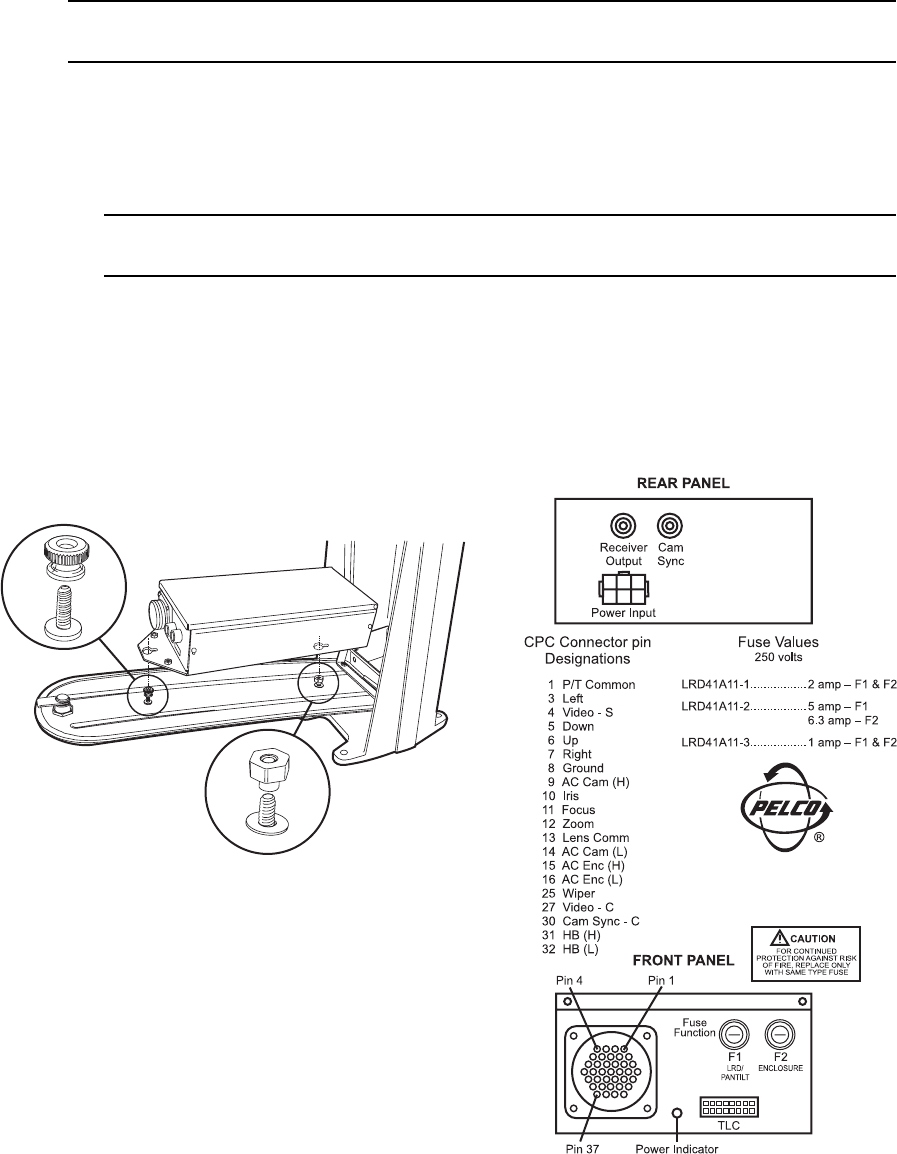
1. Refer to Figure 4 and install the mounting hardware for the LRD41A11 Series receiver.
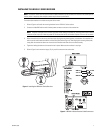
2. Connect the video BNC and the switch bracket power connector to the rear of the receiver box.
NOTE: The power connector clicks and locks into place. After making the connection, move the power switch (located
inside the mount arm) to ON. Check the power LED on the receiver box for confirmation of power. Then turn off the switch.
3. Mount the receiver box to the access panel by simply aligning the two mounting holes on the bottom of the receiver box
with the anchor and thumbnut hardware on the access panel (refer to Figure 4). After aligning the mounting holes/studs,
simply slide the receiver box down over the anchor and thumbnut and allow the box to attach securely.
4. Tighten the locking thumbnut stud to secure the box in place. Make sure the thumbnut is very tight.
5. Refer to Figure 5 and connect the Legacy 37-pin, pan/tilt connector to the receiver box.
Figure 4. Installing the LRD41A11 Series Receiver
Figure 5. LRD41A11 Series Receiver Cable Connectors