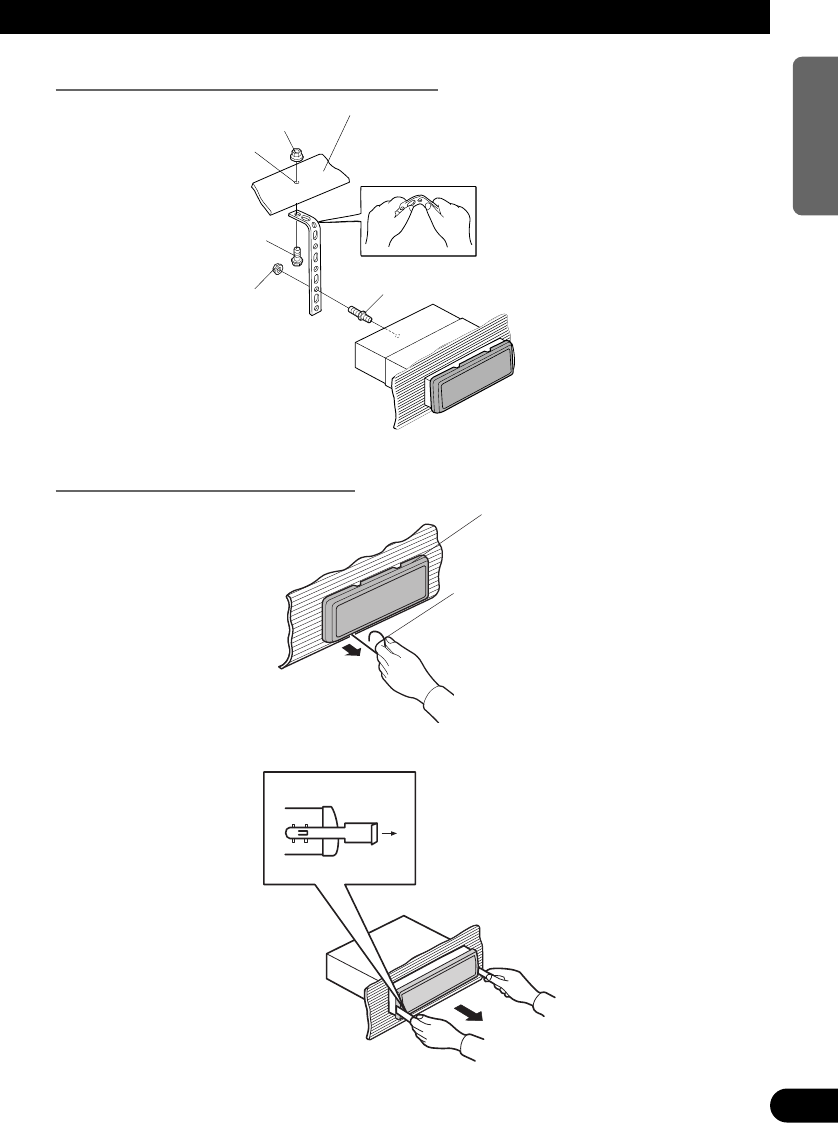
Installation without the rubber bush (Fig. 8)
Fig. 8
Removing the Unit (Fig. 9) (Fig. 10)
Fig. 9
Fig. 10
5
6
Nut (5 mm)
Dashboard
Drill a 5.5 – 6.0 mm
diameter hole.
Screw (5 × 16 mm)
Nut (5 mm)
Screw
Strap
Be sure to use the strap to secure the back
of the unit in place. The strap can be bent
by hand to the desired angle.
76
ENGLISH ESPAÑOL DEUTSCH FRANÇAIS
ITALIANO NEDERLANDS
Insert the release pin into the hole in
the bottom of the frame and pull out
to remove the frame.
(When reattaching the frame, point
the side with a groove downwards
and attach it.)
Frame
Insert the supplied extraction keys
into the unit, as shown in the figure,
until they click into place. Keeping
the keys pressed against the sides of
the unit, pull the unit out.


