[ Installation ]
39
DIReCt ConneCtIons
A direct connection provides better audio performance than a wireless connection and
removes the possibility of interference from local FM broadcasters. There are several ways to
directly connect your Stiletto which are explained in the following sections.
Direct Wired Audio Connection
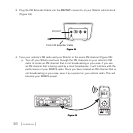
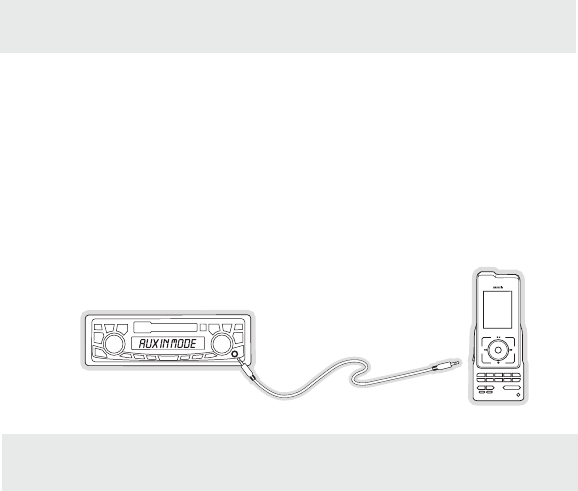
If your vehicle radio offers an “AUX IN” or “LINE IN” connection, it is the best audio connec-
tion available. If the “AUX IN” or “LINE IN” connector is located on the front of your vehicle
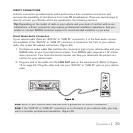
radio, this is also the easiest connection. (Figure 29)
Purchase an audio cable that matches the connection type of your vehicle radio and your
SIRIUS radio at your local electronics retailer. Your SIRIUS radio requires a 1/8” stereo
male connector. Your local electronics retailer can help you determine the proper con-
nection for your vehicle radio.
Plug one end of the cable into the LINE OUT jack on the vehicle dock. (Refer to Figure
12 on page 24.) Plug the other end into your “AUX IN” or “LINE IN” jack on your vehicle
radio.
FM
OFF
1.
2.
Tip: Depending on the model of radio in your vehicle and your level of comfort with in-car
installations, a direct connection may require professional installation assistance. Ask your
retailer or contact SIRIUS customer support for recommended installers in your area.
Tip: Depending on the model of radio in your vehicle and your level of comfort with in-car
installations, a direct connection may require professional installation assistance. Ask your
retailer or contact SIRIUS customer support for recommended installers in your area.
Figure 29Figure 29
Note: Refer to your vehicle radio manufacturer’s guidelines for correct installation.
Note:
If the “AUX IN” or “LINE IN” connection is on the back of your vehicle radio, you may
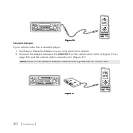
want to consider professional installation. (Figure 30)
Note: Refer to your vehicle radio manufacturer’s guidelines for correct installation.
Note:
If the “AUX IN” or “LINE IN” connection is on the back of your vehicle radio, you may
want to consider professional installation. (Figure 30)


