Dayton Operating Instructions and Parts Manual
6
Dayton Propane
Construction Heater
®
4E769B
Installation
Review and
understand the
warnings in the General Safety Infor-
mation Section. They are needed to
safely operate this heater. Follow all
local codes when using this heater.
Test all gas piping
and connections
for leaks after installation or servicing.
Never use an open flame to check for a
leak. Apply a mixture of liquid soap
and water to all joints. Bubbles
forming show a leak. Correct all leaks
at once.
1. Provide propane supply system (See
Propane Supply, page 5).
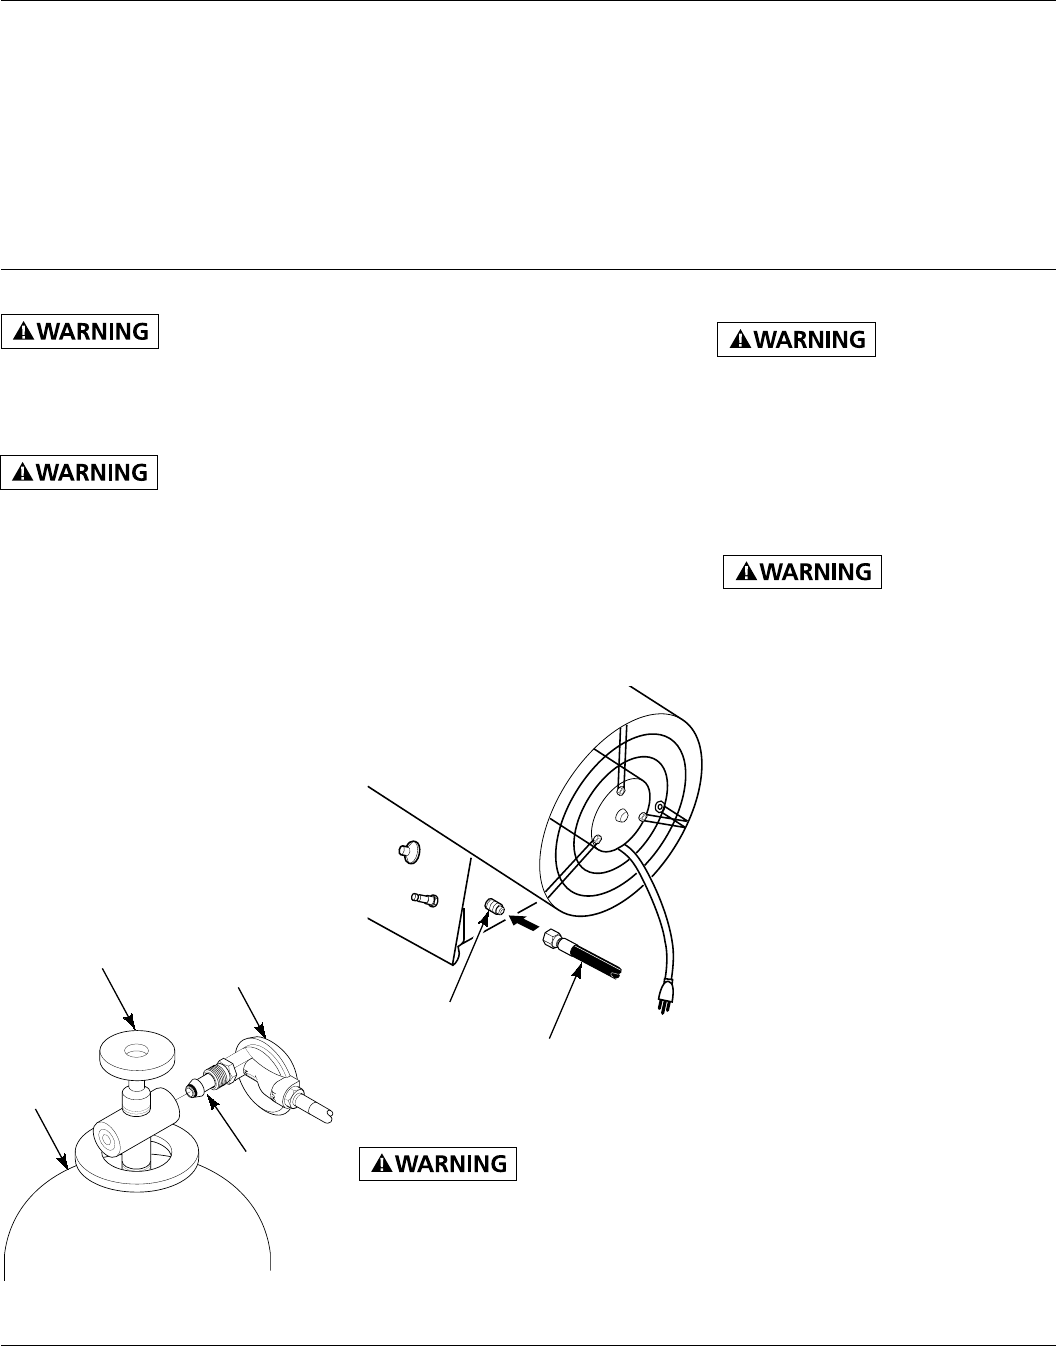
2. Connect POL fitting on hose/regulator
assembly to propane tank(s). Turn POL
fitting counterclockwise into threads on
tank. Tighten firmly using 7/8" wrench.
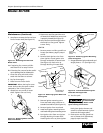
IMPORTANT: Position regulator so that
hose leaving the regulator is in a
horizontal position (See Figure 4). This
places the regulator vent in the proper
position to protect it from the weather.
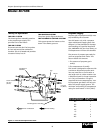
Figure 4 - Regulator Position
Propane Supply Valve
Regulator
POL Fitting
3. Connect hose to inlet connector.
Tighten firmly using a wrench.
IMPORTANT: Use extra hose or piping
if needed. Install extra hose or piping
between hose/regulator assembly and
propane tank. You must use the
regulator supplied with heater.
4. Open propane supply valve on
propane tank(s) slowly.
NOTE: If not opened slowly, excess-
flow check valve on propane tank will
stop gas flow. If this happens, close
propane supply valve and open again
slowly.
5. Check all connections for leaks.
Hose
Never use an open
Flame to check for
a leak. Apply a mixture of liquid soap
and water to all joints. Bubbles
forming show a leak. Correct all leaks
at once.
6. Close propane supply valve.
Figure 5 - Hose and Inlet Connector
Operation
Review and
understand the
warnings in the General Safety Infor-
mation section. They are needed to
safely operate this heater. Follow all
local codes when using this heater.
TO START HEATER
1. Follow all installation, ventilation,
and safety information.
2. Locate heater on stable and level
surface. Make sure strong drafts do
not blow into front or rear of heater.
3. Plug power cord of heater into a three-
prong, grounded extension cord.
Extension cord must be at least six feet
long. Extension cord must be UL listed.
EXTENSION CORD WIRE SIZE
REQUIREMENTS
Up to 50 feet long, use 18 AWG rated
cord.
51 to 100 feet long, use 16 AWG rated
cord.
101 to 200 feet long, use 14 AWG rated
cord.
4. Plug extension cord into a 120 volt/
60 hertz, three-hole, grounded
outlet. Motor will start. Fan will
turn, forcing air out front of heater.
5. Open propane supply valve on
propane tank(s) slowly.
Ventilation
Provide at least a
one-square-foot
opening of fresh, outside air while
running heater. If proper fresh, outside
air ventilation is not provided, carbon
monoxide poisoning can occur. Provide
proper fresh, outside air ventilation
before running heater.
Propane
Tank
Inlet Connector


