


Dayton Operating Instructions and Parts Manual
8
Dayton Propane
Construction Heater
®
4E769B
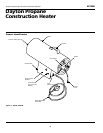
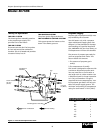
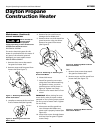
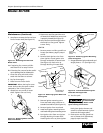
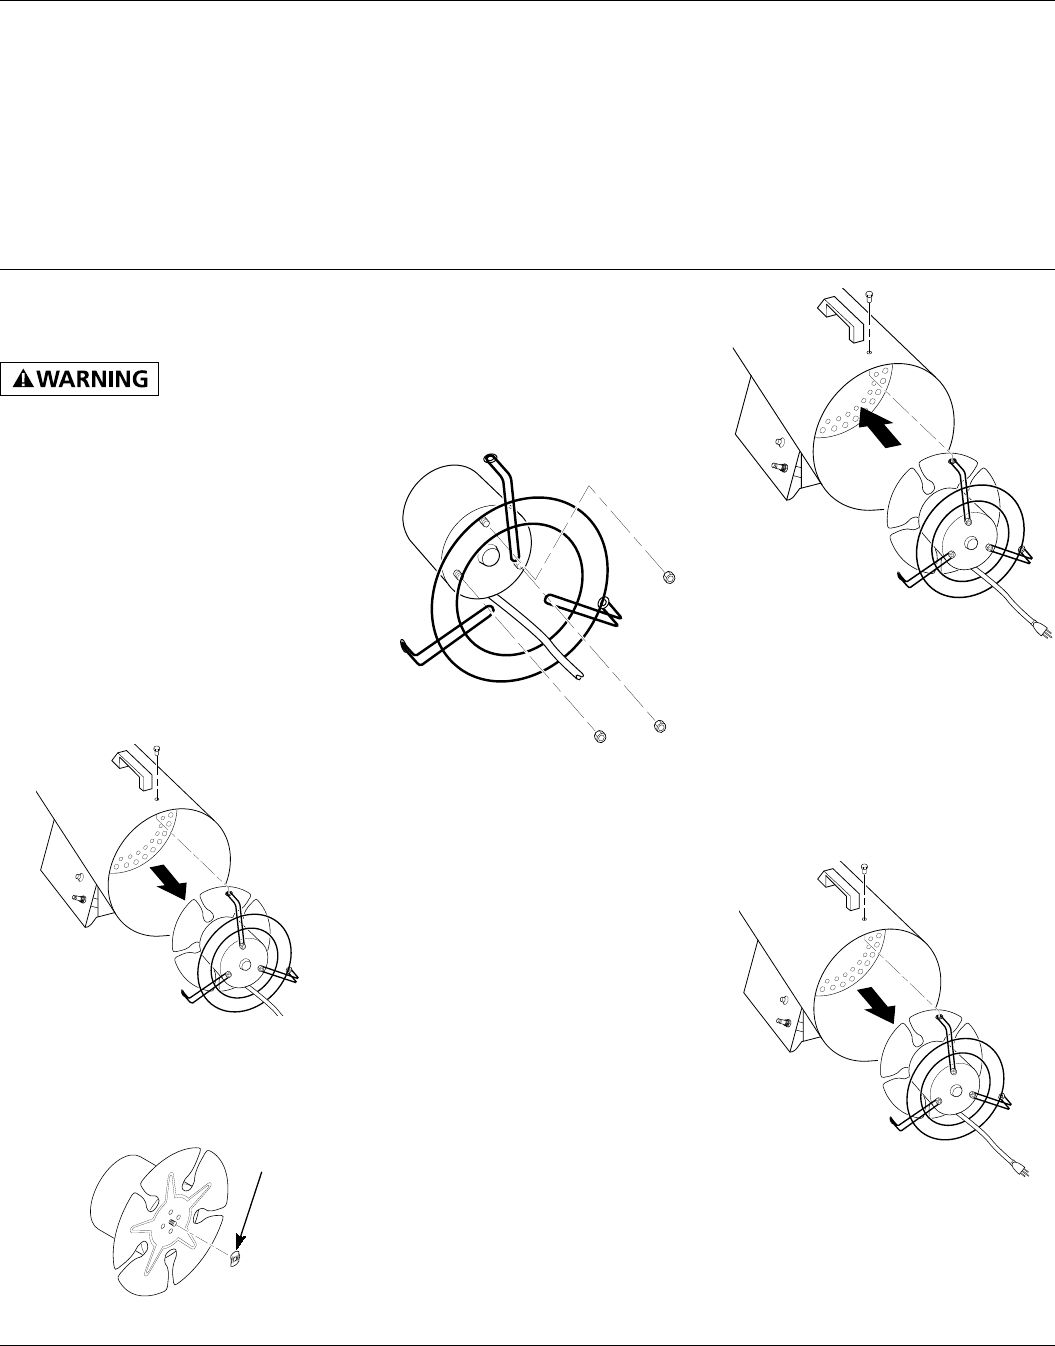
Figure 11 - Removing Motor and Fan
Guard from Heater
Maintenance (Continued)
SERVICE PROCEDURES
Never attempt to
service heater
while it is connected to propane
supply, operating, or hot. Severe burns
and electrical shock can occur.
ELECTRICAL SYSTEM
The entire electrical system for this
heater is contained within the motor. If
any part of the electrical system is
damaged, you must replace motor.
MOTOR REPLACEMENT
1. Remove three screws that attach
fan guard to heater shell.
2. Remove motor and fan guard from
heater shell (See Figure 7).
4. Remove fan. Be careful not to
damage the fan blade pitch.
5. Remove three nuts that attach fan
guard to motor using nut-driver.
Remove fan guard from motor
(See Figure 9).
6. Discard old motor.
7. Attach fan guard to new motor
using three nuts. When attaching
fan guard to motor, you must
position power cord as shown in
Figure 9. Tighten nuts firmly.
8. Place fan onto motor shaft of new
motor.
IMPORTANT: When placing fan onto
motor shaft, make sure part number
stamped on fan is facing motor. Attach
fan nut to end of motor shaft. Tighten
fan nut firmly.
9. Place motor and fan guard into
rear of heater shell. Make sure
power cord is properly located (See
Figure 10).
10. Insert three screws through heater
shell and into fan guard. Tighten
screws firmly.
Figure 9 - Removing or Attaching Fan
Guard from Motor
Figure 10 - Replacing Motor and Fan
Guard into Heater
FAN
1. Remove three screws that attach
fan guard to heater shell.
2. Remove motor and fan guard from
heater shell (See Figure 11).
Fan Nut
Figure 8 - Removing Fan Nut from
Motor Shaft
3. Use pliers to remove the fan nut from
front of motor shaft (See Figure 8).
Figure 7 - Removing Motor and Fan
Guard from Heater