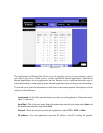
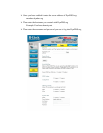
application.
Enable - Click the Enable checkbox to enable port forwarding for the relevant application.
Change these settings as described here and click the Save Settings button to apply your
changes or Cancel Changes to cancel your changes.
Example:
DVR 80 to 80 Both 192.168.1.50 Enable
DVR 1600 to 1600 Both 192.168.1.50 Enable
DVR 37260 to 37260 Both 192.168.1.50 Enable
Note: If your Internet service provider blocks port 80 and you are using a
different port to access the DVR through the DVR’s Network Menu Setup please
open those specific ports in this section of the router.
The following is the address you would type:
http:// IP address of your internet service provider: 8100
Dynamic DNS
The Router offers a Dynamic Domain Name System (DDNS) feature. DDNS lets you assign a
fixed host and domain name to a dynamic Internet IP address. It is useful when you are hosting
your own website, FTP server, or other server behind the Router. Before you can use this feature,
you need to sign up for DDNS service at
www.dyndns.org, DDNS service providers.
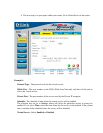
DDNS Service - From this pull-down menu, enter the DDNS service with which you have
membership.
User Name - Enter the User Name for your DDNS account.
Password - Enter the Password for your DDNS account.
Host Name - There is the DDNS URL assigned by the DDNS service.


