


If you enter the wrong code the display will flash the message BAD CODE
and return you to the UNLOCK menu.
Press the key to enter your lock code again. Enter your code again making
sure to place the correct character in the correct position in the display. Blank
spaces count as part of the code so be sure you are entering your code correctly.
If you have tried entering your code several times with no success (several is defined as more than
3...less than 10) then you probably have forgotten your lock code.
You will need to call KICKER directly at (405) 624-8583 and speak to a tech to handle this situation.
You will need to have your amplifier’s serial number AND your receipt by the phone as the guys and gals
answering the phone will need this information from you to be of assistance.
Take the time right now to fill out the first page in this manual and staple your receipt to it. That way if
you ever need service (like forgetting your lock code) you will have all the information you need right
here with the manual.
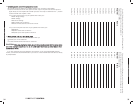
Memory Presets
There are four global memory presets built into the WXRC, each with its own indicator in the ISIS
display and a dedicated memory key to activate it.
Each memory preset stores all the values shown at the right
for each amplifier connected to the WXRC. This gives you the
ability to dial in four completely different system settings and
store them in the memory presets for instant recall at any
time.
STORING A PRESET: To store the current amplifier or group settings in the WXRC
into a memory preset simply press and hold the desired memory key until the ISIS
display flashes
STORED and then release the memory key.
RECALLING A PRESET: To recall a memory preset simply press and release
the desired memory key. The matching indicator in the ISIS display will light
up and the WXRC will display LOADING while it loads all the settings stored
in that preset into each WX Series amplifier.
WXRC Specifications
PPRREESSSS
&&
HHOOLLDD
» GAIN
» EQ
» LO-PASS
» HI-PASS
» PHASE
» MUTE
» LIMITER
» REMOTE VOL
Operating Voltage:
Remote Turn-On Voltage:
Maximum Amplifiers:
DRVC Range:
Power, Ground, Remote Terminals:
Mounting Hardware:
9-16 volts DC
9-16 volts DC
16 units
30 dB
Removable plug will accept up to 12 gauge wire.
Standard DIN 7-3/16 x 2-1/8 (182mm x 53mm)
WXRCREMOTECONTROL
TROUBLESHOOTING
WXRC SECURITY
3332
TroubleShooting
If your WXRC does not appear to be working, check obvious things first such as blown fuses, poor
or incorrect wiring connections, cables and connectors not fully seated, etc.
There is a Green LED located on one end of the WXRC Interface Box. This LED indicates the WXRC is
receiving power and is turned on.
GGrreeeenn LLEEDD ooffff::
Verify the external fuse to the Interface Box is good.
Verify the power plug is fully seated in the Interface Box.
Verify the wiring is correct at the power plug.
With a Volt Ohm Meter’s (VOM) negative probe attached to chassis ground check:
+12 volt power terminal (should read +12V to +16V)
Remote turn-on terminal (should read +12V to +16V)
Ground terminal (should read 0V)
GGrreeeenn LLEEDD oonn,, nnoo ddiissppllaayy oonn WWXXRRCC CCoonnttrrooll HHeeaadd::
Verify the cable from the Control Head is plugged securely into the Interface Box.
If using an extension cable between the Interface Box and the Control Head, Verify the connectors
are plugged in securely on both ends.
If using an extension cable between the Interface Box and the Control Head, Verify the cable is a 6
conductor PS2 type cable.
If using an extension cable between the Interface Box and the Control Head, the cable or
connectors on it may be bad, try bypassing the extension cable and plugging the Control Head
directly into the Interface Box. If this works, then try a new cable.
GGrreeeenn LLEEDD oonn,, ggaarrbbaaggee cchhaarraacctteerrss iinn ddiissppllaayy::
Power cycle your system (turn off, wait 3 seconds, turn on).
Reset the WXRC form the WXRC SETUP menu.
Verify all cables are securely plugged into the Interface Box.
Verify all Network Cables are securely plugged in at the Interface Box and WX Series amplifiers.
Verify all Network cables are good. If you made these cables check that they are properly wired
and terminated.
GGrreeeenn LLEEDD oonn,,
STARTING *
ddiissppllaayyeedd ffoorr aa lloonngg ttiimmee,, aammpplliiffiieerrss nnoott rreessppoonnddiinngg::
Go back and double check your Communications Network cables and make sure they are inserted
properly and ‘snapped’ into place.
If you have purchased different cables, double check that they are 4 Pin S-Video DIN.
If you have made your own cables double check them for secure and proper termination.
Power cycle your system (turn off, wait 3 seconds, turn on).
Reset the WXRC form the WXRC SETUP menu.
WWXXRRCC ddiissppllaayyss
Autosearch function has failed due to a catastrophic failure, loss of communication network, loss of
power during software update.
Go back and double check your Communications Network cables and make sure they are
inserted properly and ‘snapped’ into place.
If you have purchased different cables, double check that they are 4 Pin S-Video DIN.
If you have made your own cables double check them for secure and proper termination.