


23
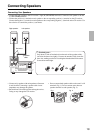
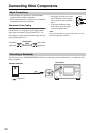
Connecting Other Components—Continued
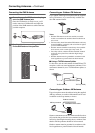
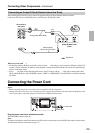
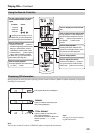
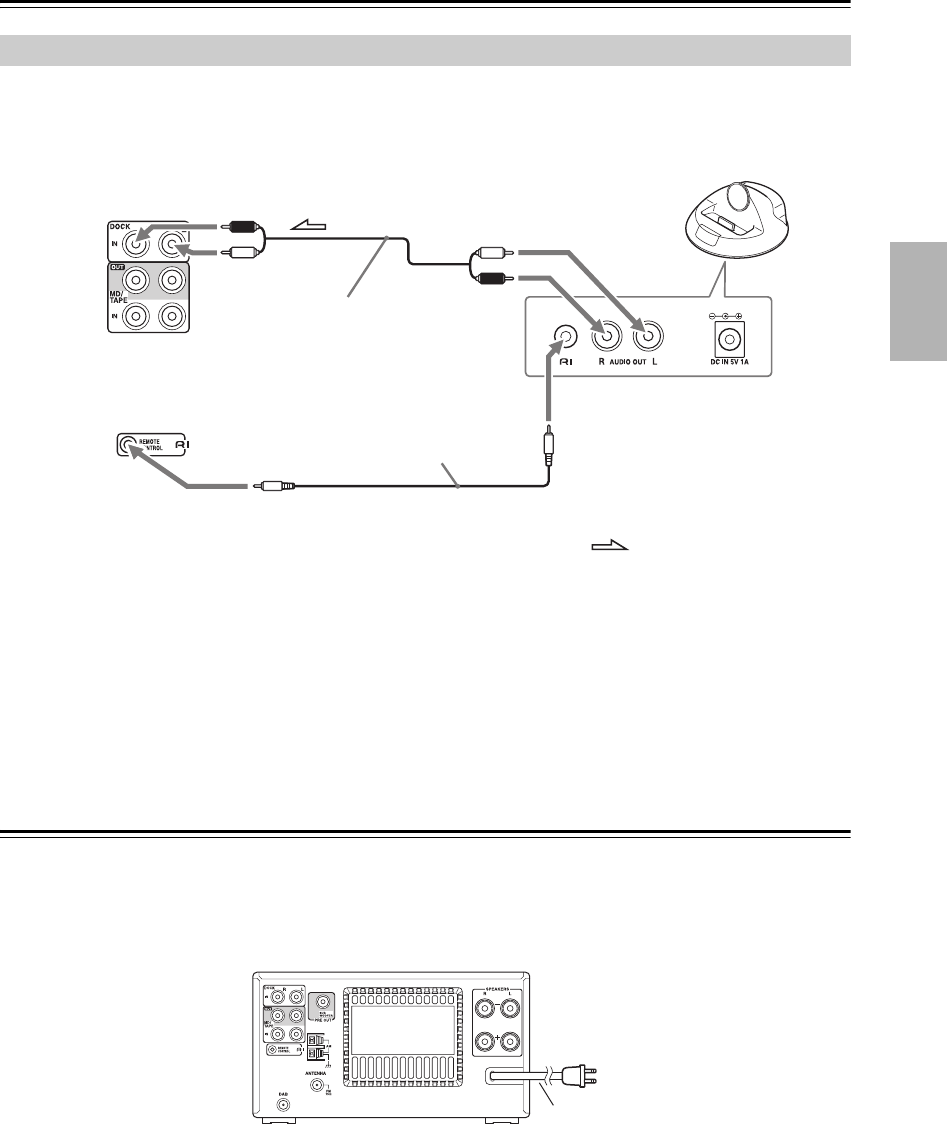
The following diagram shows how to connect an optional Onkyo RI Dock (Remote Interactive Dock).
Connect the CD receiver’s DOCK IN jacks to the RI Dock’s AUDIO OUT jacks.
What can you do with ?
• Connecting an Onkyo RI Dock to the CD receiver with an cable allows you to control the RI Dock with the CD
receiver’s remote controller. In addition, when playback is started on the RI Dock, the CD receiver will automatically
select it as the input source.
• To use , you must connect the Onkyo RI Dock to the CD receiver with an cable and an analog audio cable
(RCA). On the RI Dock, set the RI MODE switch to “HDD” or “HDD/DOCK”. See the RI Dock’s instruction manual
for details.
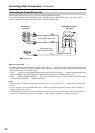
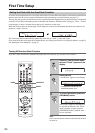
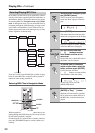
Connecting the Power Cord
Notes:
• Before connecting the power cord, connect all of your speakers and AV components.
• Turning on the CD receiver may cause a momentary power surge that might interfere with other electrical equipment on the
same circuit. If this is a problem, plug the CD receiver into a different branch circuit.
Plug the power cord into a suitable wall outlet.
The STANDBY indicator lights up.
Note:
To set the clock with the AccuClock function, the CD receiver must be able to receive RDS radio stations, which means
an FM antenna must be connected (see page 17).
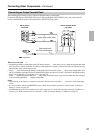
Connecting an Onkyo RI Dock (Remote Interactive Dock)
: Signal flow
CD receiver’s
rear panel
White
Red
Red
White
Analog audio cable (RCA)
cable supplied
with the Onkyo RI Dock
Onkyo RI Dock’s rear
panel
To wall outlet
Power cord