


Note
This product incorporates copyright protection
technology that is protected by method claims of
certain U.S. patents and other intellectual prop-
erty rights owned by Macrovision Corporation
and other rights owners. Use of this copyright
protection technology must be authorized by
Macrovision Corporation, and is intended for
home and other limited viewing uses only unless
otherwise authorized by Macrovision Corporation.
Reverse engineering or disassembly is
prohibited.
About WMA
The Windows Media™ logo printed on the box
indicates that this unit can play back WMA
data.
WMA is short for Windows Media Audio and
refers to an audio compression technology
that is developed by Microsoft Corporation.
WMA data can be encoded by using Windows
Media Player version 7 or later.
Windows Media and the Windows logo are tra-
demarks or registered trademarks of Microsoft
Corporation in the United States and/or other
countries.
Notes
! This unit may not operate correctly depending
on the application used to encode WMA files.
! Depending on the version of Windows Media
Player used to encode WMA files, album
names and other text information may not be
correctly displayed.
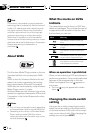
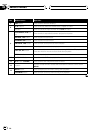
What the marks on DVDs
indicate
The marks below may be found on DVD disc
labels and packages. They indicate the type of
images and audio recorded on the disc, and
the functions you can use.
Mark Meaning
2
Indicates the number of audio sys-
tems.
2
Indicates the number of subtitle lan-
guages.
3
Indicates the number of viewing an-
gles.
16 : 9 LB
Indicates the picturesize (aspect ratio:
screen width-to-height ratio) type.
1
ALL
Indicates the number of the region
where playback ispossible.
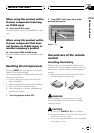
When an operation is prohibited
When you are watching a DVD and attempt to
perform an operation, it may not be performed
because of the programming on the disc.
When this happens, the icon
appears on
the screen.
! The icon
may not appear with certain
discs.
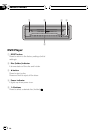
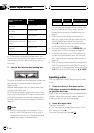
Changing the mode switch
setting
Use a pen tip or other pointed instrument to
select the correct setting of the Mode switch
on the side surface of this unit for the compo-
nent you are using it with. After changing the
setting, be sure to press RESET.
Before You Start
En
8
Section
02