


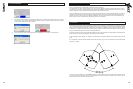
SPEAKER PROPERTIES
At the top of the panel there are several pieces of information about the connected device (which are only activated when going
On-line to a device):
Model Name
The VNET™ model number
Loudspeaker name
To uniquely identify the speaker (i.e. delay 3)
Configuration Name
A name of up to 12 characters that you may enter as a name for the current set of parameters.
Firmware Version
A 4-digit hexadecimal number, acting as a ‘signature’ for the current set of parameters. This may be used
as a quick check that the parameters loaded into an X-Pod are as they should be.
Also see (Controls and Control Panels)
Keyboard Shortcuts
PodWare supports the following ‘shortcuts’:
Tab Move to next control
In value boxes:
CTL+C Copy
CTL+V Paste
CTL+X Cut
CTL+Z Undo
On Drop-down, Spin, Push, Fader controls:
PgUp Increase value (coarsely)
PgDown Reduce value (coarsely)
Up/Right arrow Increase value (finely)
Down/Left arrow Reduce value (finely)
On push-button controls:
Space Activate
8.0 SOFTWARE OPERATION
14 15
TM
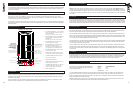
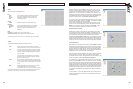
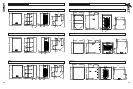
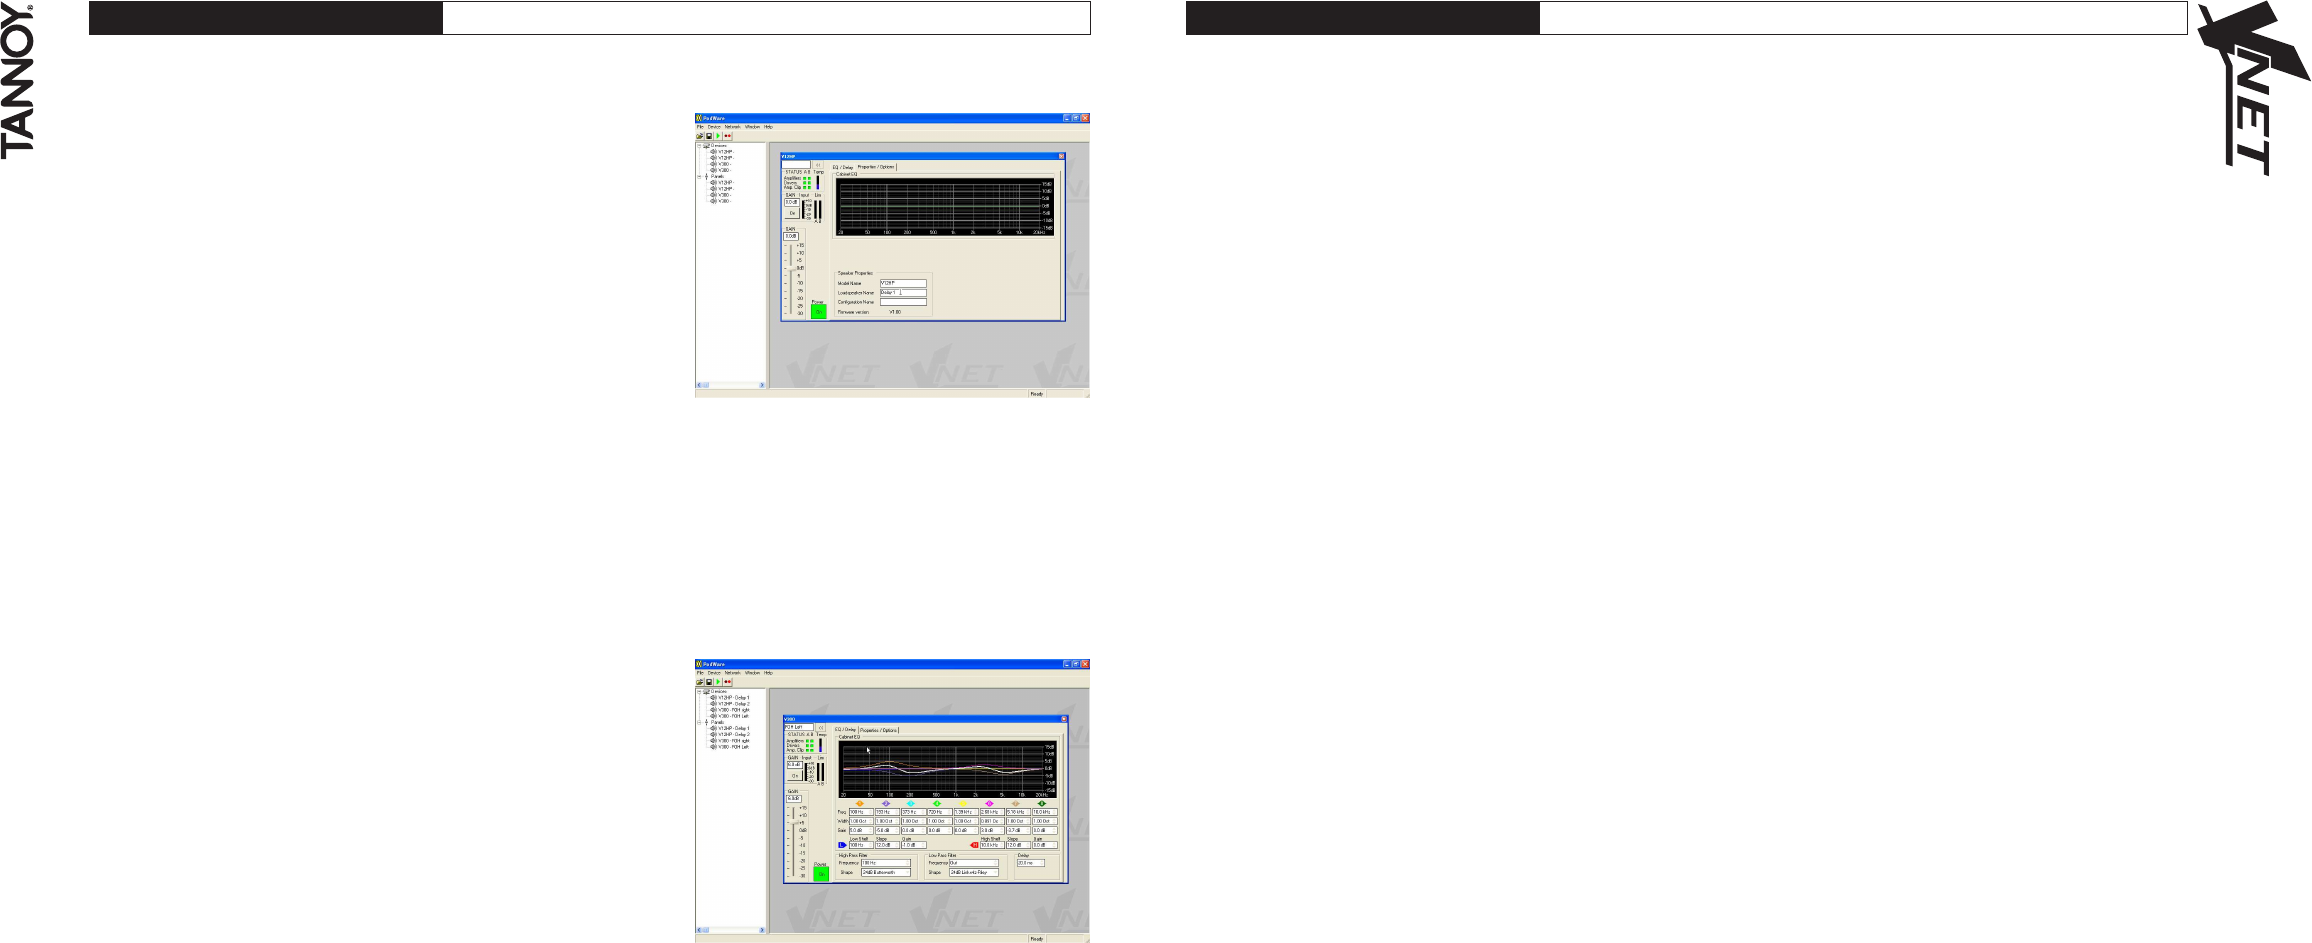
The control panel shows the model name (not editable), and firmware
version for the device. The device properties panel also have an editable
Configuration Name, and Loudspeaker name, the latter will appear in the
tree menu after editing. Each panel will in addition have a complete set
of controls relating to the adjustable parameters within the device (press
the EQ/DELAY tab to access this section). Each control will contain the
current parameter value (see parameter synchronisation).
Single parameters may be adjusted 'live' whilst ‘On-line’.
Controls have standardised properties that allow them to work in a consistent
way across various control panels for different devices. Many controls will
allow the mouse wheel to be used for fine adjustments, or the keyboard
as an alternative (see Keyboard Shortcuts). When using the keyboard or
the mouse wheel, it is necessary to have the control in question ‘in focus’.
You can bring a control into focus either by tabbing to it (using the Tab
key), or by clicking on it with the mouse. Focus is often shown as a dotted
rectangle around part of the control.
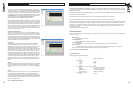
Drop-Down Selector boxes
These are for selecting one item from a number of possibilities in a list.
Click the arrow on the right-hand end of the control to cause it to display
a list of the options. Click on the text for that option to select it. If there are
many options to choose from, a scroll-bar will be shown, allowing you to
scroll up and down the list by clicking the scroll arrows. Note that once the
control is highlighted, the PGUP, PGDWN and Arrow keys or the mouse
wheel may also be used to change the selection.
Spin boxes
The value would normally be adjusted by clicking on the top button to
increase the displayed value, or on the bottom button to reduce the
displayed value. Holding the mouse button whilst on a button will after a
short delay cause the repeat mechanism to repeatedly increment or
decrement the value. Alternatively, values may be typed into the value box
directly. To do this, click in the value box and type in the new value. The
value you type in may include a minus sign, a decimal point, and/or an
engineering multiplier, such as ‘k’ to signify a multiplication of 1000. This
may appear at the end of the typed string, or may be used instead of a
decimal point (such as 6k2 to mean 6200). For the value to be accepted,
you can either click outside the control (such as on another control), or
press the Enter key. Once a control button is highlighted, the PGUP,
PGDWN and Arrow keys a mouse wheel may also be used to adjust the
value.
Buttons
Buttons generally have two states; depressed (active) and non-depressed
(inactive). Generally, the button will apply the condition that is labelled
when it is depressed. The space bar may be used to activate a highlighted
button.
Faders
Faders provide a linearly traversing button, which may be dragged using
a pressed mouse to adjust the value. These sometimes also have an
associated value box for showing the numerical value of the parameter.
Once the control is highlighted, the PGUP and PGDWN keys may be used
for coarse adjustment, and the Arrow keys or the mouse wheel may be
used to for fine adjustment.
Also see (VNET™ Control Panel)
8.0 SOFTWARE OPERATION
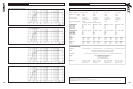
VNET CONTROL PANEL
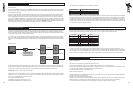
The control panel for VNET™ allows VNET™ parameters to be viewed and adjusted. The panel is organised into a monitoring
area (at the top left of the panel) where the status of VNET™ may be viewed, and a control area where all the controls to adjust
parameters are located.
Note that Parameter adjustments are automatically stored in the DSP section of each VNET™ - it is not possible to do temporary
changes then store them separately.
Parameters which can be adjusted by the user are: Crossover/Delay, EQ (Equalisation), Gain & Power.
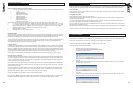
The Crossover/Delay tab allows you to adjust the crossover frequencies, crossover shapes & delays.
The EQ sections (8 bands) allow you to adjust the frequency and level (boost/cut) for each of the equalisation filters, and the
bandwidth (Q) of the bell equalisers. The latter controls allow the responsiveness of the filters to be adjusted either as bandwidth
(Octaves) or Q. The up/down buttons will change the values. Values may be typed into either the bandwidth or Q part of the
box. A 'Frequency Response' curve shows the shape of each filter individually (by colour), and the combined effect of all
equalisation (in white).
There are also High & Low shelving filters.
8.0 SOFTWARE OPERATION