


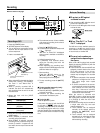
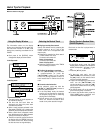
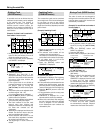
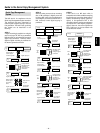
A recorded track can be divided into two
tracks and a track number can be assigned
to the second track. This function is
designed for use when a single track
contains several musical pieces (for
example with an analog-recorded MD), or
when you want to mark a point for use in
track location.
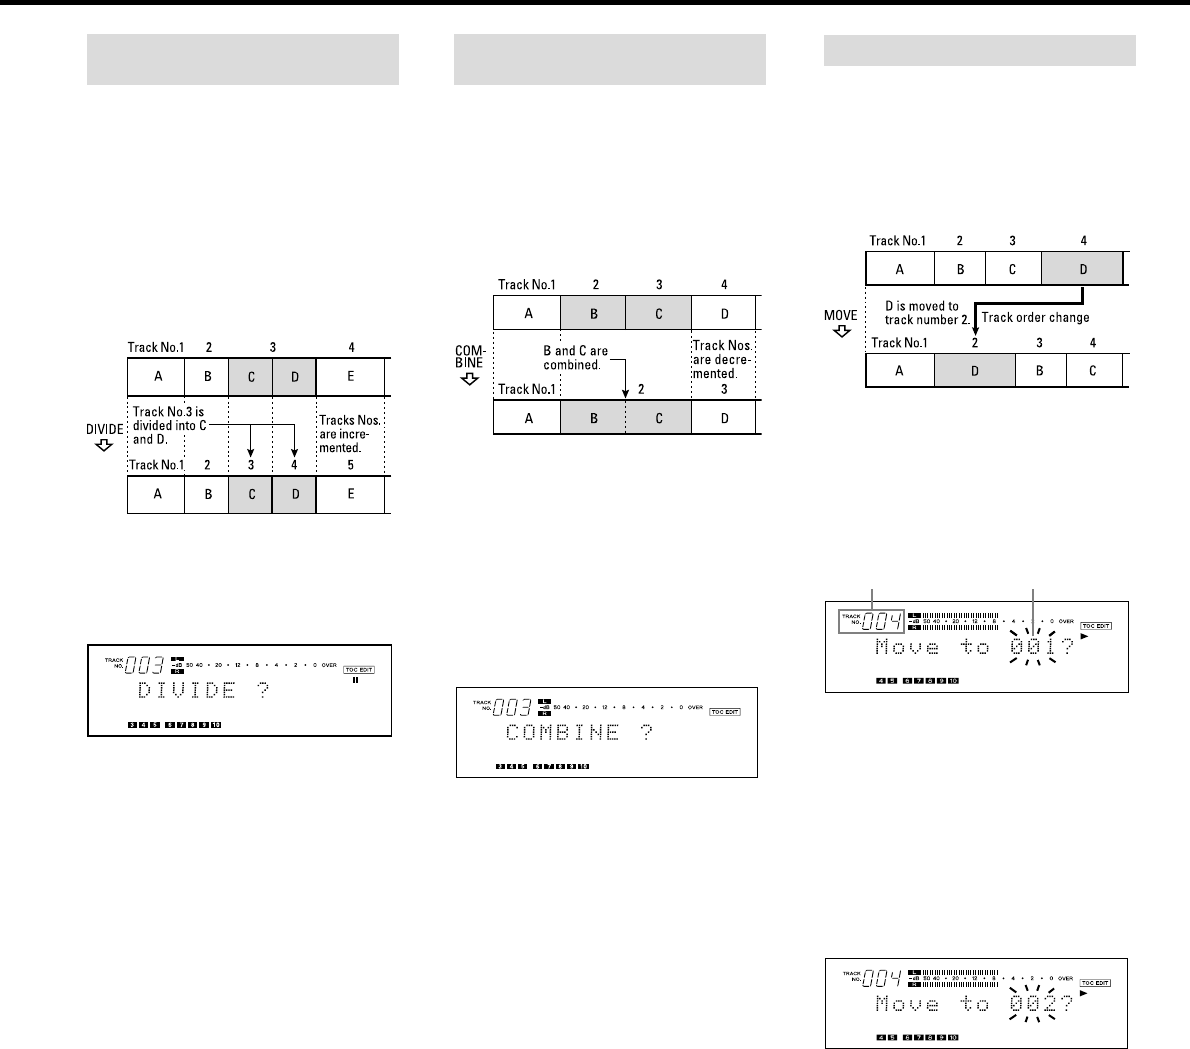
(Example): To divide C and D contained in
track number 3 into two tracks
1. During playback, press the [
πREADY]
button at the point where you want to
divide the current track into two.
2. Press the [EDIT/NO] button repeatedly
until "DIVIDE ?" is displayed.
3. Press the [YES] button.
… "Rehearsal" and "Point OK ?" are
displayed alternately while the first 4
seconds of the portion which becomes
the second track after division are
played repeatedly.
4. If the original track is not divided as
precisely as desired, you can fine-adjust
the division point by turning the
[
µTRACK≤] dial while monitoring the
sound.
… The division point can be adjusted within
an offset range of –88 ~ +127
(±1 corresponds to approx. 0.06 sec.).
… Press the [
ªSTOP] button or [EDIT/NO]
button to abort the operation.
5. When the track is divided at the desired
point, press the [YES] button again.
… The track numbers of the new track
(second track after division) and
subsequent tracks are increased by one
but these new numbers are still
continuous.
… "COMPLETE" is displayed and the track is
divided. The deck will start to play the
new track obtained after division.
… Tracks obtained after division do not
have track titles, regardless of whether
the original track had one or not.
… The beginnings of tracks cannot be
divided.
Dividing a Track
(DIVIDE Function)
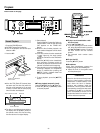
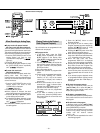
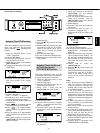
The order of tracks can be changed by
moving a track to another position. After the
track has been moved, track numbers are
automatically renumbered.
(Example): To move D from track number 4
to track number 2
1. During playback, select the track to be
moved by turning the [
µTRACK≤]
dial.
2. Press the [EDIT/NO] button until
"MOVE ?" is displayed.
3. Press the [YES] button.
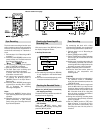
… "Move to 001?" is displayed. ("001" blinks.)
Track number Destination track
to be moved number
4. Select the destination track number with
the [
µTRACK≤] dial.
… "Move to 002 ?" is displayed.
("002" blinks.)
… When you specify the destination track
number with the numeric buttons,
"COMPLETE" is displayed, then the track
is moved and the track numbers
are automatically changed. Playback
resumes from the track’s new location.
… Press the [
ªSTOP] button or [EDIT/NO]
button to abort the operation.
5. Press the [YES] button again.
… "COMPLETE" is displayed, then the track
is moved and the track numbers
are automatically changed. Playback
resumes from the track’s new location.
Moving a Track (MOVE Function)
– 16 –
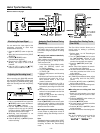
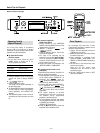
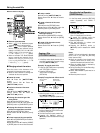
Two consecutive tracks can be combined
into a single track. This function is designed
for use when you want to play several
songs continuously or you want to make a
single track from many separately recorded
parts of music.
(Example): Combining B and C
1. Select a track number by turning the
[
µTRACK≤] dial.
… The selected track number will be
combined with the track before it.
For example, to combine track numbers 2
and 3, select track number 3 in this step.
… If you select track 1, it will not be
combined into a single track.
2. Press the [EDIT/NO] button until
"COMBINE ?" is displayed.
3. Press the [YES] button.
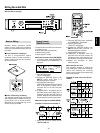
… "Rehearsal" is displayed. The beginning
of the selected track is played back
repeatedly.
… If the combination point between the two
tracks is not played properly, press the
[EDIT/NO] button to stop playback and
restart the operation from the beginning.
… Press the [
ªSTOP] button to abort the
operation.
4. If the combination point is correct, press
the [YES] button again.
… "COMPLETE" is displayed for a few
seconds and the tracks are combined.
… When both tracks have titles assigned,
the title of the track before the selected
track is assigned to the combined
track. Subsequent track numbers are
decreased by one.
Combining Tracks
(COMBINE Function)
Editing Recorded MDs