


ENGLISH
6. Select each character by turning the
[
µTRACK≤] dial and pressing
[PUSH ENTER] on the dial.
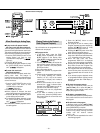
… If you are using the remote control unit,
select each character with the
[
µ TRACK≤] buttons and press the
[ENTER] button to enter it.
7. Repeat steps 5-6.
8. Press the [YES] button after assigning
the disc title.
… The title entry mode for track 1 is
automatically engaged ("001 > _" is
displayed) and the cursor blinks on the
display.
9. Repeat steps 5-6.
10. Press the [YES] button again.
… When the title entry mode for track 2 is
engaged ("002 > _" is displayed), repeat
steps 5-8.
… Repeat the character entry procedure
until all titles have been entered. The
disc title is then displayed if the deck is in
the Stop mode, or if the deck is in the
Play mode, the current track title is
displayed.
… Confirm titles by turning the
[
µTRACK≤] dial.
… Press the [
ªSTOP] button to abort the
operation.
Press the [EDIT/NO] button for more than
3 seconds (or press the [TITLE EDIT]
button on the remote control unit) to
cancel the title function and resume
playback.
Notes:
… Up to 100 characters can be entered per
track title. However, when the total
number of characters of all track titles
exceeds 1700, no more track titles can
be written onto the MD.
… If the TITLE AUTO INC function is
canceled before all titles have been
assigned, the track title currently being
entered will be erased. Only track titles
which have already been assigned will
be kept.
… If UNDO is performed after TITLE AUTO
INC is completed, the last edited track
title will be canceled.
… Disc and track titles can be assigned
during recording.
… If a track title is assigned while in the
Record-Ready mode during the overwrit-
ing of a track, the track title will be
erased when you resume recording.
… "DISC" lights while a disc title is being
entered, and "TRACK" lights while a track
title is being entered.
… Assigning titles is unavailable in the
"SHUFFLE MODE" or "PGM MODE".
– 17 –
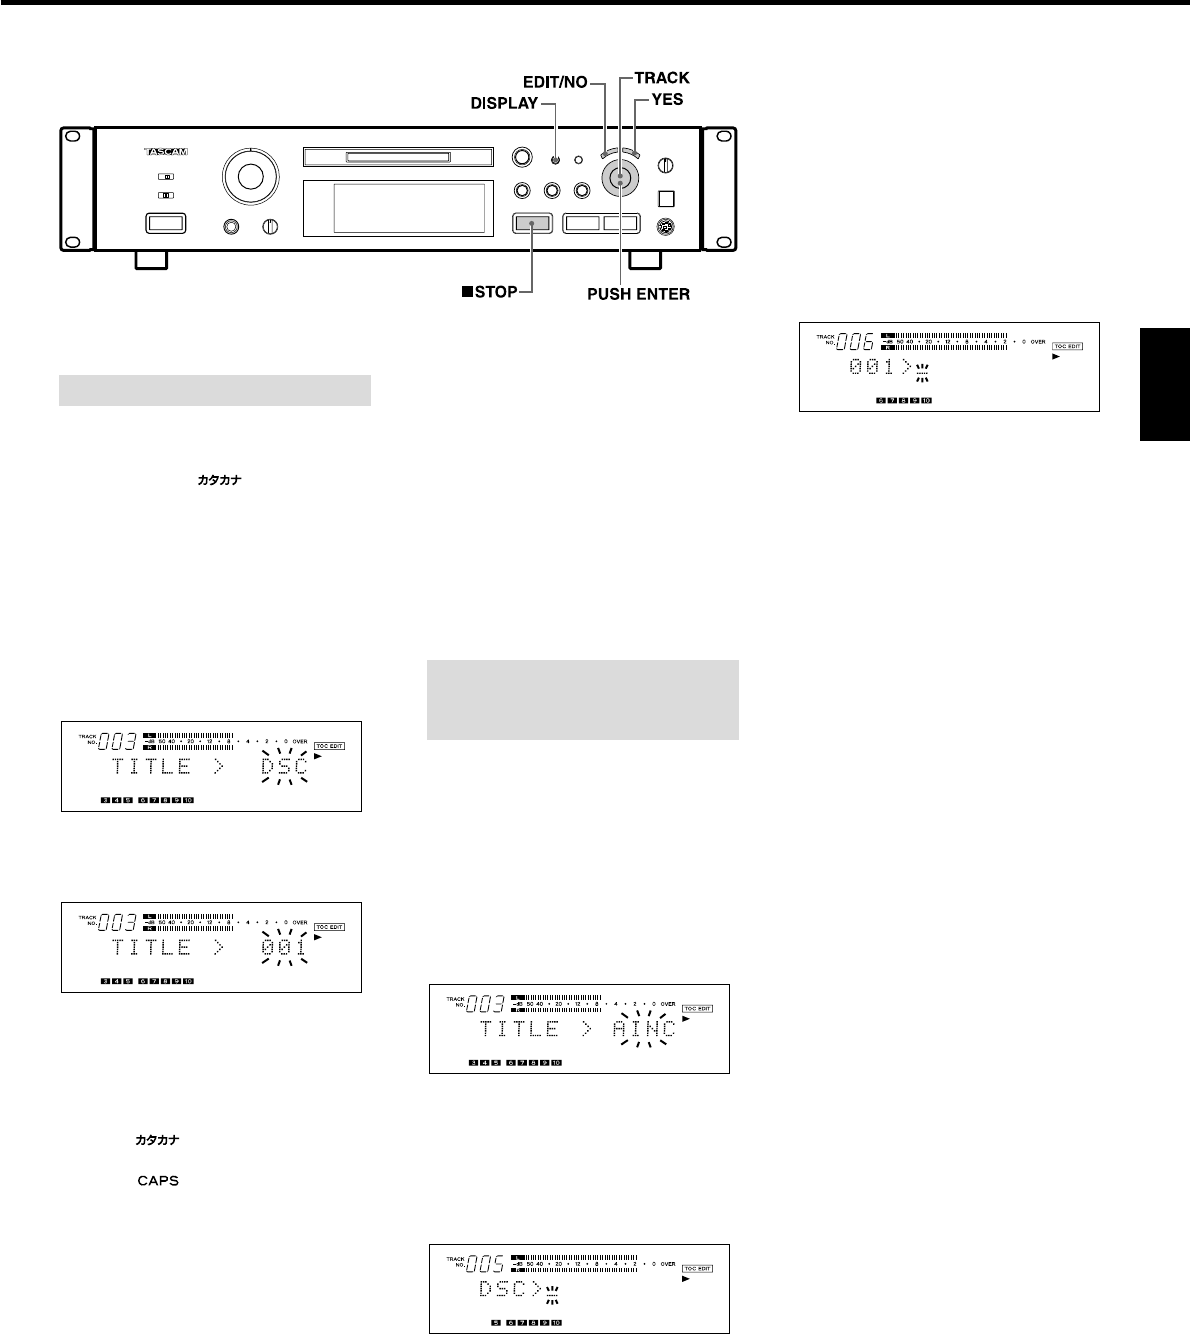
Titles can be assigned to each disc or each
track using uppercase and lowercase
letters, numbers, " " (Katakana) and
symbols.
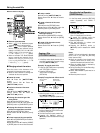
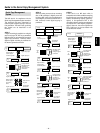
1. Press the [EDIT/NO] button so that
"TITLE ?" is displayed.
2. Press the [YES] button.
… Press the [TITLE EDIT] button if you are
using the remote control unit.
3. Select "DSC" or a track number using the
[
µTRACK≤] dial.
… To assign a disc title, select "TITLE > DSC"
("DSC" blinks).
… To assign a track title, select "TITLE >
XXX (track number)" (Track number
blinks).
4. Press the [YES] button.
"DSC > _ " or "XXX > _ " is displayed.
… The character entry mode is engaged
and the cursor blinks on the display.
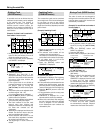
5. Press the [DISPLAY] button to select the
character type.
… When " " is lit: Katakana (square
Japanese syllabary) can be entered.
… When " " is lit: Capital alphabet
letters, numerals and symbols can be
entered.
… When no indicator is lit: Small alphabet
letters, numerals and symbols can be
entered.
6. Select each character by turning the
[
µTRACK≤] dial and pressing [PUSH
ENTER] on the dial.
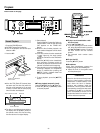
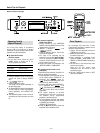
Assigning Titles (TITLE Function)
7. Repeat steps 5-6.
… Press the[
ªSTOP] button to abort the
operation.
… Press the [EDIT/NO] button for more than
3 seconds (or press the [TITLE EDIT]
button on the remote control unit) to
cancel the title function and resume
playback
8. Press the [YES] button again.
… The disc or track title is displayed again.
… Repeat steps 1-8 to assign titles to other
track numbers.
Select the "CONTINUE" mode with the
[PLAY MODE] button. Titles can be assigned
to the disc and all tracks successively.
1. Press the [EDIT/NO] button so that
"TITLE ?" is displayed.
2. Press the [YES] button.
… Press the [TITLE EDIT] button if you are
using the remote control unit.
3. Select "TITLE > AINC" with the
[
µTRACK≤] dial ("AINC" blinks).
4. Press the [YES] button.
… The disc title entry mode is engaged
("DSC > _" is displayed) and the cursor
blinks on the display.
… The cursor blinks at the first character
position even if a title has already been
assigned.
5. Press the [DISPLAY] button to select the
character type.
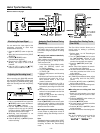
Assigning Titles to the Disc and
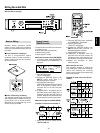
All Tracks Successively
(TITLE AUTO INC Function)
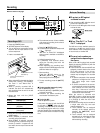
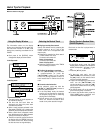
Buttons used on this page