6 © Titan Tool Inc. All rights reserved.
Pressure Relief Procedure
Be sure to follow the Pressure Relief Procedure when
shutting down the sprayer for any purpose, including
servicing or adjusting any part of the spray system,
changing or cleaning spray tips, or preparing for
cleanup.
1. Lock the gun by turning the gun trigger lock to the locked
position.
2. Turn o the sprayer by moving the pressure control knob to
the OFF position in the black zone.
3. Unlock the gun by turning the gun trigger lock to the
unlocked position.
4. Hold the metal part of the gun rmly to
the side of a metal container to ground
the gun and avoid a build up of static
electricity.
5. Trigger the gun to remove any pressure
that may still be in the hose.
6. Lock the gun by turning the gun trigger lock
to the locked position.
7. Move the PRIME/SPRAY valve down to the
PRIME position.
Spraying
NOTE: When spraying block ller, mastics or high solid
coating, remove the gun lter and high pressure
lter screens.
Spraying Technique
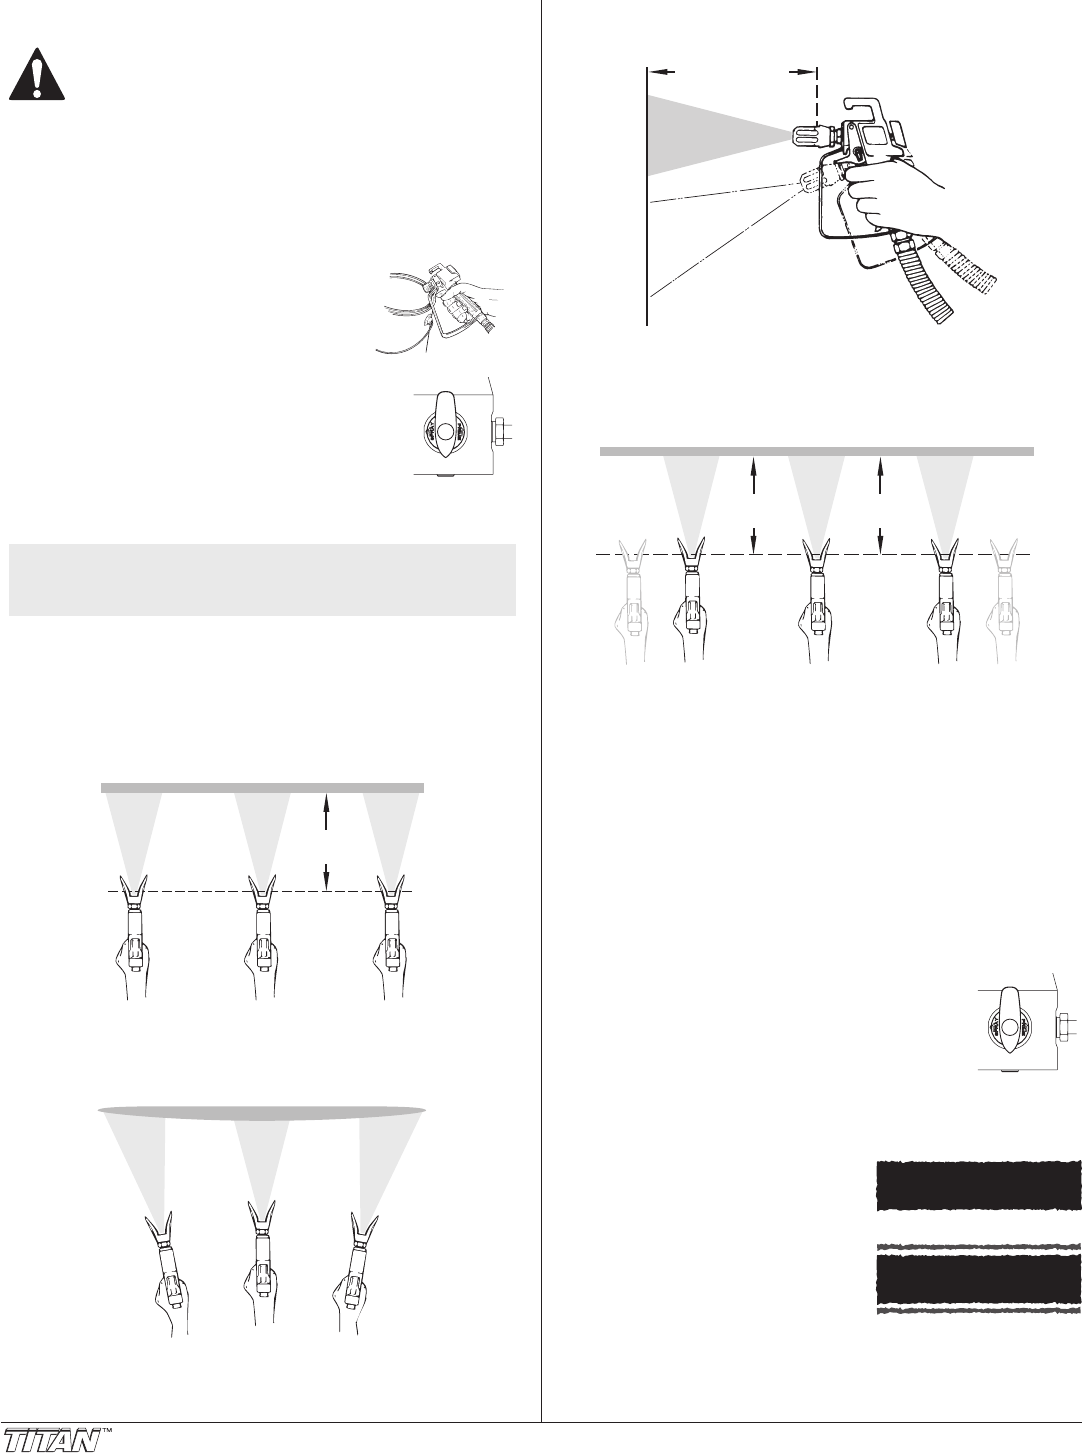
The key to a good paint job is an even coating over the entire surface.
This is done by using even strokes. Keep your arm moving at a
constant speed and keep the spray gun at a constant distance from
the surface. The best spraying distance is 10 to 12 inches between
the spray tip and the surface.
Keep stroke smooth and at an even speed.
Even coat throughout
Approximately
10 to 12 inches
Keep the spray gun at right angles to the surface. This means moving
your entire arm back and forth rather than just exing your wrist.
Heavy Coat
Do not ex wrist while spraying.
Light Coat Light Coat
Keep the spray gun perpendicular to the surface, otherwise one end
of the pattern will be thicker than the other.
10 to 12 inches
Right way
Wrong way
The spray gun should be triggered by turning it on and o with each
stroke. This will save paint and avoid paint buildup at the end of the
stroke. Do not trigger the gun during the middle of a stroke. This will
result in an uneven spray and splotchy coverage.
Proper way to trigger the spray gun
Approximately
10 to 12 inches
Keep stroke
even
Start stroke End strokePull trigger Release triggerKeep steady
Overlap each stroke by about 30%. This will ensure an even coating.
When you stop painting, lock the gun trigger lock, turn the pressure
control knob counterclockwise to its lowest setting and set the
PRIME/SPRAY valve to PRIME. Turn the ON/OFF switch to the OFF
position and unplug the sprayer.
Practice
1. Be sure that the paint hose is free of kinks and clear of objects
with sharp cutting edges.
2. Turn the unit on and set the pressure to minimum by turning
the pressure control knob to the “MIN PSI” setting in the
yellow zone.
3. Move the PRIME/SPRAY valve up to the SPRAY
position.
4. Turn the pressure control knob clockwise to its
highest setting. The paint hose should stien
as paint begins to ow through it.
5. Unlock the gun trigger lock.
6. Trigger the spray gun to bleed air out of the hose.
7. When paint reaches the spray tip, spray a test area to check
the spray pattern.
Good spray pattern
Paint tailing pattern
8. Use the lowest pressure setting
necessary to get a good spray
pattern. If the pressure is set
too high, the spray pattern will
be too light. If the pressure is
set too low, tailing will appear
or the paint will spatter out in
gobs rather than in a ne spray.


