


Page 17
Video monitor
To add a video monitor to the system. Use the composite or S-video
connections.
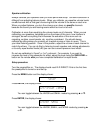
1.
Attach one end of the composite video interconnect cable to the video input on
the monitor, then attach the other end to the yellow composite video output or S-
video outputs on the AVP labeled Z1/MON for the main zone or Z2/MON for the
second zone (other room).
VCR connection
The procedure listed is for connecting a VCR player to the V1 analog input on the
AVP analog inputs. Use the same instructions for connecting another VCR to the
V2 analog input.
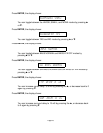
1.
Attach one end of the audio interconnect cable to the left audio output on the
VCR, then attach the other end to the white left V1 IN on the AVP.
2.
Attach one end of the audio interconnect cable to the right audio output on the
VCR, then attach the other end to the red right V1 IN on the AVP.
3.
Attach one end of the composite video interconnect cable to the video out on the
VCR, then attach the other end to the yellow video input on the AVP labeled V1.
Or
use the S-video connections.
The preamplifier will not convert S-video to
composite or composite to S-video.
This connects the VCR to the AVP for viewing tapes. Now complete this procedure to
make recordings through the AVP. Recordings can only be made from analog sources.
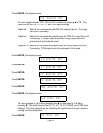
4.
Attach one end of the audio interconnect cable to the left audio input on the VCR,
then attach the other end to the white left V1 OUT on the AVP.
5.
Attach one end of the audio interconnect cable to the right audio input on the
VCR, then attach the other end to the red right V1 OUT on the AVP.
6.
Attach one end of the composite video interconnect cable to the video in on the
VCR, then attach the other end to the yellow video output on the AVP labeled V1.
Or
use the S-video connections.
The preamplifier will not convert S-video to
composite or composite to S-video.
Note: There is not a V2 out for S-video.