


VA-8xl - Controlling the VA-8xl 15
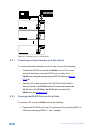
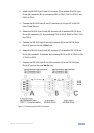
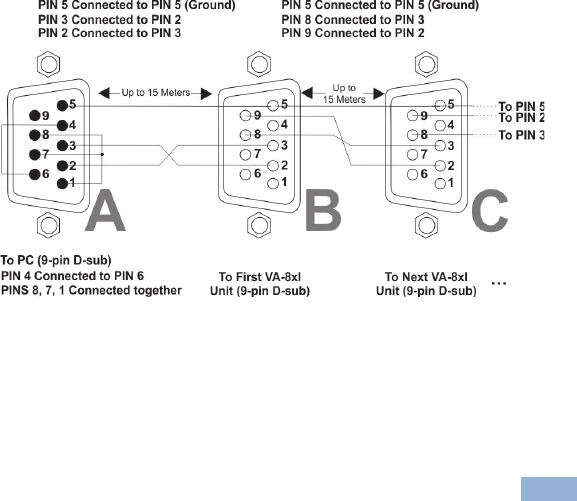
2. Attach the RS-232 9-pin D-sub (F) connector (A) to another RS-232 9-pin
D-sub (M) connector (B) by connecting PIN 5 to PIN 5, PIN 3 to PIN 2, and
PIN 2 to PIN 3.
3. Connect the RS-232 9-pin D-sub (F) connector (A) to your PC’s RS-232
9-pin D-sub (M) port.
4. Attach the RS-232 9-pin D-sub (M) connector (B) to another RS-232 9-pin
D-sub (M) connector (C), by connecting PIN 5 to PIN 5, PIN 8 to PIN 3, PIN
9 to PIN 2.
5. Connect the RS-232 9-pin D-sub (M) connector (B) to the RS-232 9-pin
D-sub (F) port on the first VA-8xl unit.
6. Attach the RS-232 9-pin D-sub (M) connector (C) to another RS-232 9-pin
D-sub (M) connector, if required, by connecting PIN 5 to PIN 5, PIN 8 to PIN
3, PIN 9 to PIN 2.
7. Connect the RS-232 9-pin D-sub (M) connector (C) to the RS-232 9-pin
D-sub (F) port on the next VA-8xl unit.
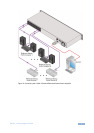
Figure 11: Preparing the RS-232 Connectors