9
Basic version Advanced version Information
ENGLISHDEUTSCHFRANÇAISITALIANOESPAÑOLNEDERLANDSSVENSKA
Simple version
2
Set up the subwoofer
If using a subwoofer capable of the
following adjustments, set up the
subwoofer as shown below.
n When using a subwoofer with a direct
mode
Set the direct mode to “On” and disable the
volume adjustment and crossover frequency
setting.
n When using a subwoofer without a
direct mode
Make the following settings:
• Volume : “12 o’clock position”
• Crossover frequency : “Maximum/Highest
Frequency”
• Low pass fi lter : “Off”
• Standby mode : “Off”
NOTE
When you use two subwoofers, please adjust
the subwoofer volume controls individually so
that each subwoofer level is as close as possible
to 75 dB using the test tone (vpage79) before
Audyssey Auto Setup.
3
Set up the remote control
unit
n Set up the operation mode
Press AMP to set the remote control unit
to ampli er operation mode.
Press AMP
Set up speakers (Audyssey
®
Auto Setup)
STEP 1
Preparation
NOTE
If “Caution” is displayed:
Go to “Error messages” (vpage 11), check
any related items, and perform the necessary
procedures.
If the problem is resolved, return and restart
“Audyssey Auto Setup”.
When performing Audyssey Auto
Setup over again
Press ui to select “Retry”, and then press ENTER.
When measuring has stopped
Press RETURN, to the “Cancel Auto Setup?”
prompt is displayed.
Press o to select “Yes”, then press ENTER.
Setting up the speakers again
Repeat the operation from step 4 of
STEP1 Preparation
.
STEP 2
Speaker Detection
• In STEP 2, you will perform measurements at the
main listening position.
• This step automatically checks the speaker
confi guration and speaker size, and calculates the
channel level, distance, and crossover frequency.
It also corrects distortion in the listening area.
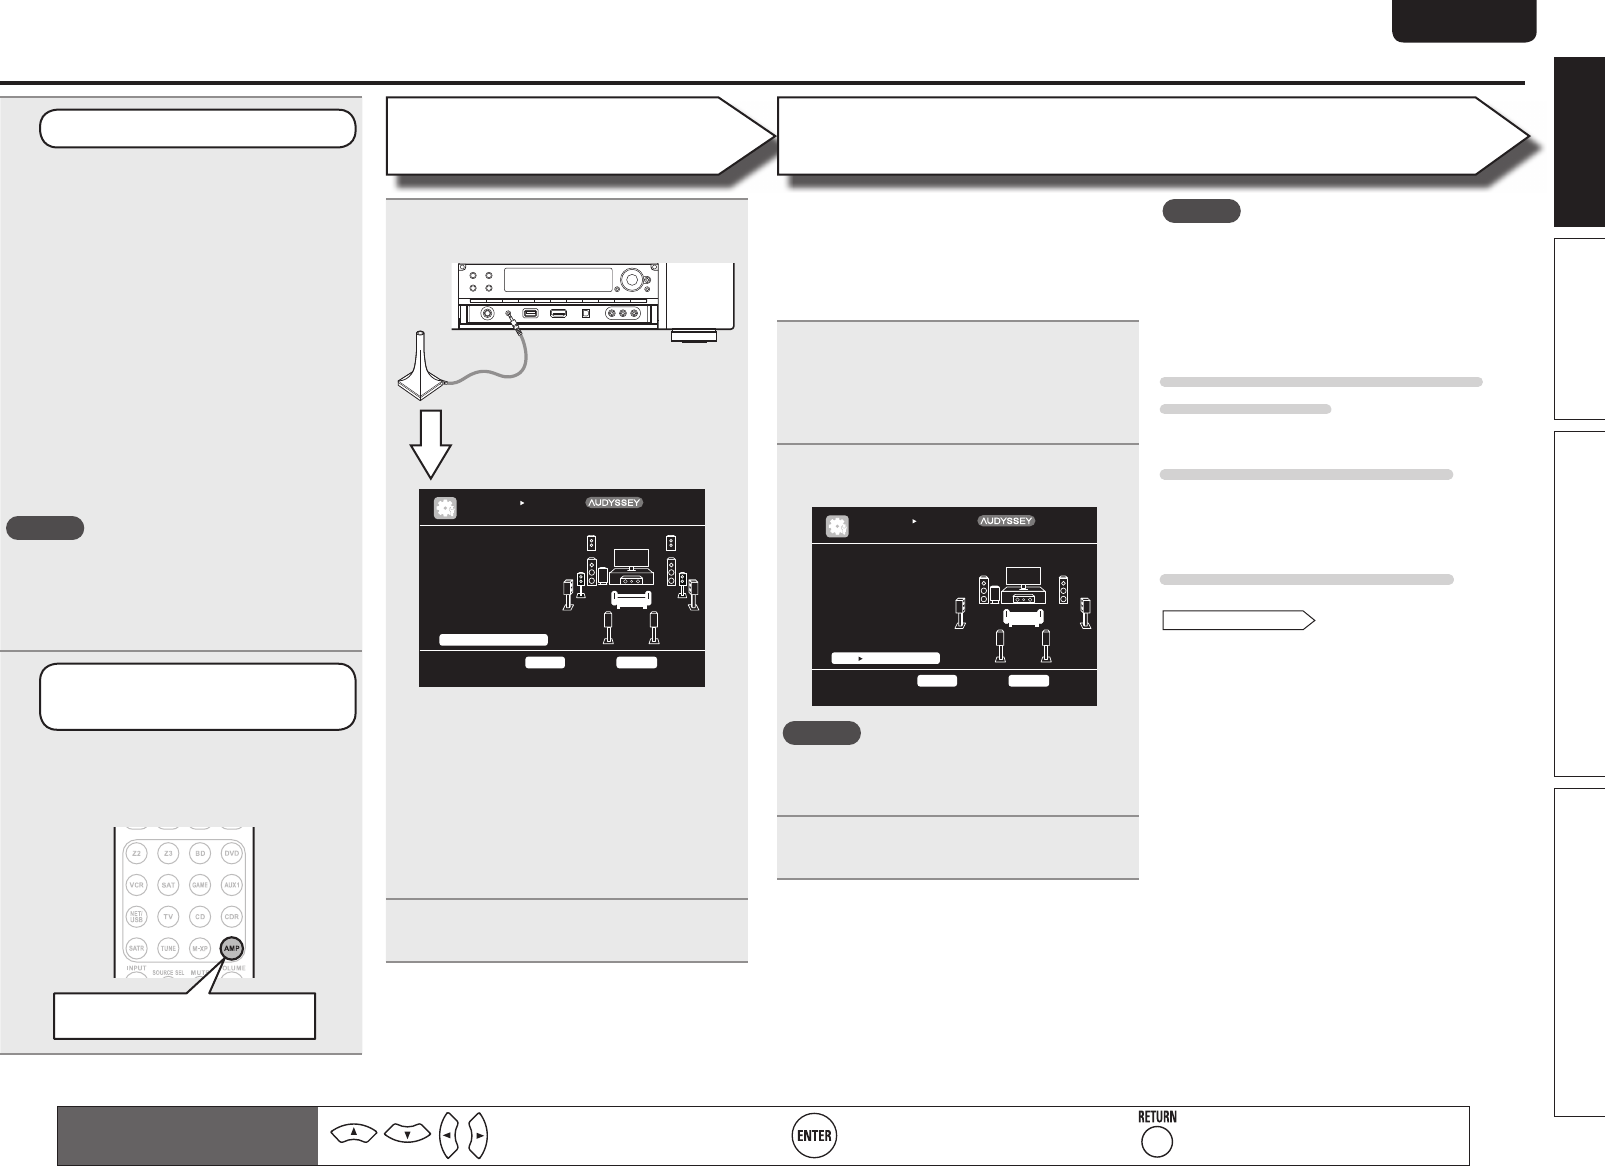
6
Select “Measure” and then press
ENTER.
When measuring begins, a test tone is
output from each speaker.
• Measurement requires several minutes.
7
The detected speakers are displayed.
[2/6]
STEP2 Spkr Detect Check
Go to Step 3 (Measurement) after speaker check
Retry
Next Measurement
Front
Center
Subwoofer
Surround
S.Back
F.Height
F.Wide
Yes
Yes
Yes
Yes
2spkrs
No
No
AUTO SETUP
AUDYSSEY AUTO SETUP
ENTER Enter RETURN Cancel
MultEQ XT
NOTE
If a connected speaker is not displayed, the
speaker may not be connected correctly. Check
the speaker connection.
8
Use ui to select “Next 1
Measurement” and then press ENTER.
4
Connect the setup microphone to the
SETUP MIC jack of this unit.
[1/6]
STEP1 Preparation
Connect the speakers
and place them accord-
ing to the recommenda-
tions in the manual.
Set the following
items if necessary.
Start Auto Setup
Amp Assign
Channel Select
Auto Setup Start
AUTO SETUP
AUDYSSEY AUTO SETUP
MultEQ XT
ENTER Enter RETURN Cancel
When the setup microphone is
connected, the following screen is
displayed.
This screen provides the method for setting
up 7.1-channel playback using surround back
speakers. For the method of setting up speakers
other than the 7.1-channel system, select “Amp
Assign” and perform step 3 and 4 of “Set up
“Amp Assign”” (vpage52).
If unused channels are set with “Channel
Select”, measuring time can be shortened. For
setting, perform steps 5 to 9 of “Set up “Channel
Select”” (vpage52).
5
Use ui to select “Auto Setup Start”
and then press ENTER.
Remote control operation
buttons
Move the cursor
(Up/Down/Left/Right)
Confi rm the setting Return to previous menu
1.AV7005U_ENG.indd 9 2010/08/23 18:32:08


