


16
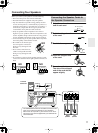
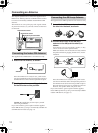
Powering Up and Setting the Clock
Before connecting the power cord, complete all connections
(see pages 11 to 15).
1
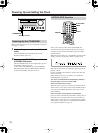
Connect the power cord to a suitable wall
outlet.
The CR-505DAB enters Standby mode, and the
Standby indicator comes on.
2
To turn on the CR-505DAB, press the
[STANDBY/ON] button.
The CR-505DAB comes on, the display lights up, and
the Standby indicator goes off.
To turn off the CR-505DAB, press the [STANDBY/
ON] button again. The CR-505DAB enters Standby
mode and the Standby indicator comes on.
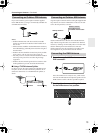
The very first time you turn on the CR-505DAB, the
ACCUCLOCK function automatically sets the clock by
using the CT (Clock Time) information present in RDS
radio broadcasts.
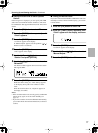
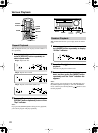
While the clock is being set, “Clock Setting” appears on the
display, as shown. It may take a while to set the clock.
When the clock has been set, “Adjusted” appears on the dis-
play for a while.
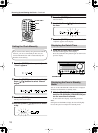
Use the [CLOCK CALL] button to check if the clock has
been set correctly.
If the clock has not been set correctly, see “Setting the
Clock Manually” on page 18.
The ACCUCLOCK function automatically calibrates
the clock daily at 2 AM, 3 AM and 2 PM.
If ACCUCLOCK does not stop:
When the radio reception is not good, the ACCUCLOCK
function may not end. To force the ACCUCLOCK function
to end, press the [DISPLAY] button. In this case, set the
clock manually.
If the wrong day or time appears on the display:
If you live close to the border with another country, the CT
information may have been taken from a radio station in
another time zone. In this case you should specify another
station and try setting again (see “Setting ACCUCLOCK to
Use a Specific Station” on page 17).
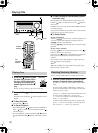
Powering Up the CR-505DAB
STANDBY
/
ON
INPUT
MENU
BASS
TREBLE
PUSH TO ENTER
PRESET
DIRECT
PHONES
VOLUME
MIN MAX
STANDBY/ON
Standby indicator
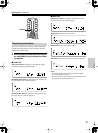
ACCUCLOCK Function
AMFMDAB
DIRECT
CD
MUTING
--
/
---
7
8
9
10/0
4
5
6
2
3
1
CLOCK
CALL
TIMER
CLEAR
REPEAT
DISPLAY
SLEEP
MODE
ENTER
INPUT
STANDBY/ ON
TIMER
ENTER
CLOCK CALL
DISPLAY