


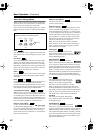
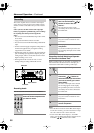

66
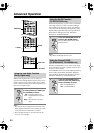
Advanced Operation
—Continued
This section explains how to record the current input
source, how to record one input source while enjoying
another, and how to dub audio onto your video record-
ings.
Unless you have the full consent of the copyright
holder, copyright laws prohibit using your recordings
for anything other than personal enjoyment!
Notes:
• The surround sound and DSP listening modes cannot
be recorded.
• Copy-protected DVDs cannot be recorded.
•You cannot record from the DVD analog multichannel
input.
•Various restrictions apply to digital recording. Refer to
the manuals supplied with your digital recording
equipment for more details.
• Digital input signals are output by only the digital out-
puts, and analog input signals are output by only the
analog outputs. There is no internal conversion from
digital to analog or vice versa.
• DTS signals will be recorded as noise, so don’t
attempt analog recording of DTS CDs or LDs.
Recording Audio
You can record the current audio source as follows.
Recording Audio & Watching a Separate
AV Source at the Same Time
While recording audio, you can watch a completely sep-
arate AV Source at the same time. For example, you
could watch a DVD while recording a CD to tape.
Notes:
• Since the Zone 2 function and the REC OUT outputs
use the same circuitry, you cannot record from a sepa-
rate source and use Zone 2 at the same time.
•To turn off the REC OUT output (i.e., the TAPE
OUT), press the [REC OUT] button, and then use the
Controller [ ] [ ] buttons to select “OFF.”
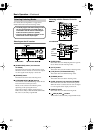
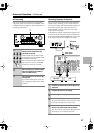
Recording
1
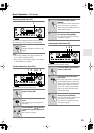
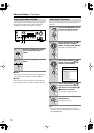
Use the input selector buttons to
select the audio component that
you want to record.
REC OUT
Input Selector
Controller
2
Press the [REC OUT] button, and
then use the Controller [ ]/[ ]
buttons to select “Rec Sel :
Source.”
The current input source can be
recorded by the recorder connected to
the TAPE OUT.
3
Start recording on the recorder.
See your recorder’s manual for more
information.
4
Start playback on the source
component.
If you select another input source dur-
ing recording, that input source will be
recorded.
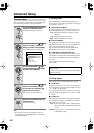
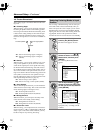
1
Press the [REC OUT] button.
2
Within five seconds, use the
Controller [ ]/[ ] buttons to
select the audio input source that
you want to record (you cannot
select TAPE).
The name of the input source selected
for recording appears on the display.
The specified input source can now be
recorded by the recorder connected to
the TAPE OUT.
3
Start recording on the recorder.
See your recorder’s manual for more
information.
4
Start playback on the audio
source component.