


32
Main Menu (continued)
33
CALIBRATION
The CALIBRATION function in this monitor measures LCD panel characteristics from low to high brightness values and uses inter-
nal monitor processing to handle calibration.
Calibration is performed using internal signals and do not rely on image quality settings. This monitor uses a color temperature of
D65 for calibration and other color temperatures are derived from this value.
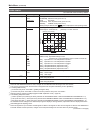
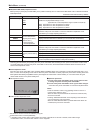
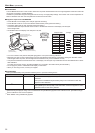
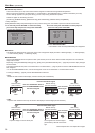
Equipment required for CALIBRATION
• Konica Minolta CA-310 display color analyzer (optional accessory)
• Konica Minolta CA-PU12 or CA-PU15 standard measurement probe (optional accessory)
• A RS-232C cable (male to male, straight) (optional accessory)
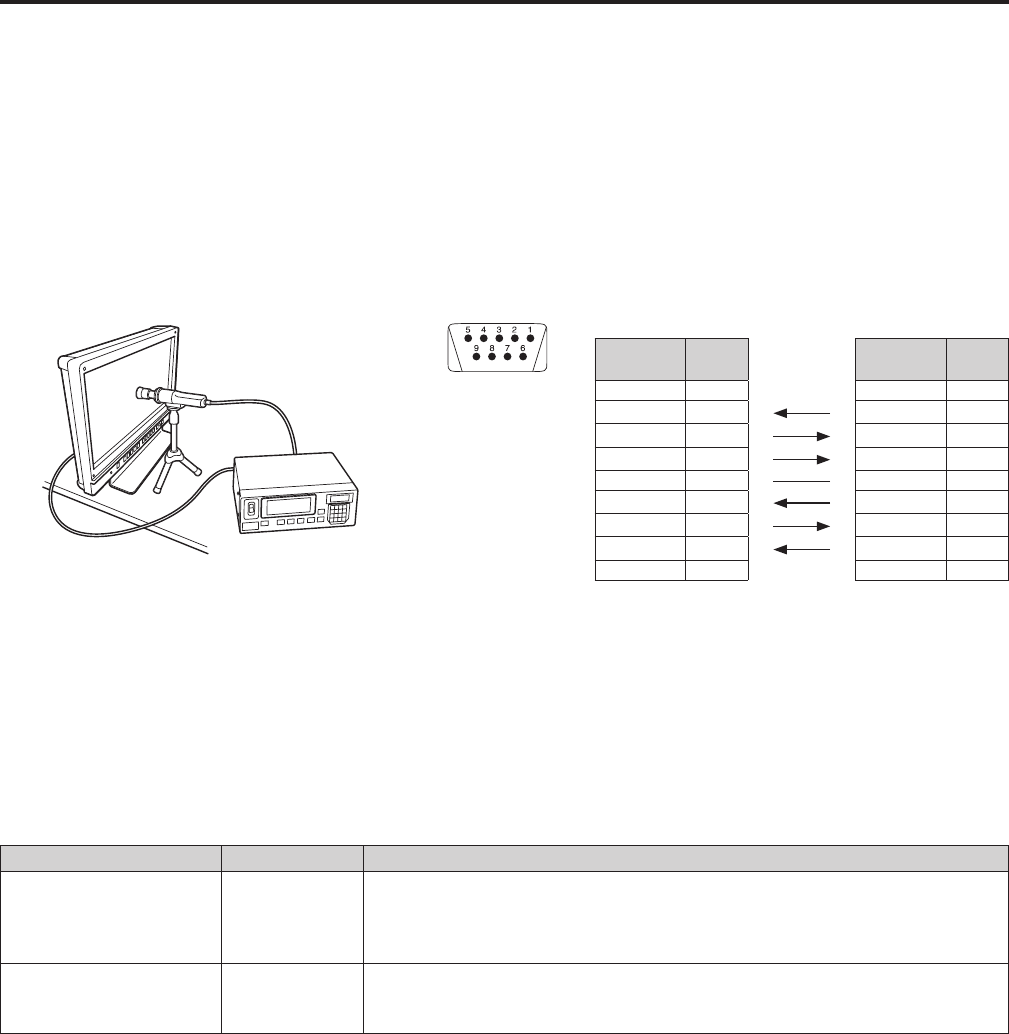
Connect the RS-232C input terminal on the monitor to the RS-232C terminal on the display color analyzer.
Use a straight cable.
• Set the Baud rate of the display color analyzer to 38,400.
This unit
Konica Minolta CA-PU15
standard measurement probe
(optional accessory)
RS-232C cable
(optional accessory)
Konica Minolta CA-310 display
color analyzer (optional accessory)
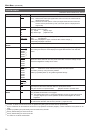
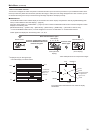
RS-232C input
terminal
(9 pins)
Analyzer Side
(Straight)
On the monitor
Pin
number
Signal
Pin
number
Signal
1 CD 1 N.C.
2 RXD
2 TXD
3 TXD
3 RXD
4 DTR
4 DSR
5 GND
5 GND
6 DSR
6 DTR
7 RTS
7 CTS
8 CTS
8 RTS
9 GND 9 N.C.
• Turn on this monitor and perform adequate aging (about 1 hour) before starting calibration.
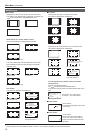
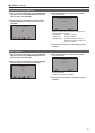
• Make the room dark so that no external light can enter the standard measurement probe before starting the calibration. When
external light enters the probe, the low brightness characteristics may not be calibrated correctly.
• LCD panel characteristics and instrument error in the display color analyzer may sometimes result in small differences in values
after calibration.
To further fine tune the monitor, set GAIN and BIAS for R, G and B in the VAR mode of [COLOR TEMP.].
• Do not apply the probe to a WFM/VECTOR display on the screen.
• When you are using CA-210, contact your supplier.
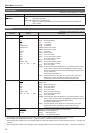
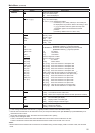
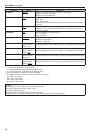
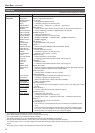
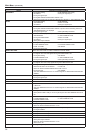
CALIBRATION
Select [CALIBRATION] in the [SYSTEM CONFIG] menu to open the following menus.
Submenu Setting Description
AUTO CALIBRATION
*
8
▼ Connect a CA-310 Display color analyzer and use this submenu to make a
calibration.
Select [AUTO CALIBRATION] and select [YES] in the confirmation screen that
appears to start calibration.
RESET
*
9
▼ Returns calibration data to their factory defaults.
Select [RESET] and select [YES] in the confirmation screen that appears to return
calibrated values to their factory defaults.
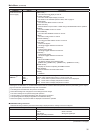
*
8
[EXECUTING] is displayed during AUTO CALIBRATION and [COMPLETE] appears when calibration ends. [INCOMPLETE] ap-
pears if calibration could not be completed.
*
9
When RESET ends, [COMPLETE] appears.