


30
English
CY-VM7203W
31
English
CY-VM7203W
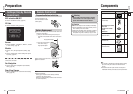
Installation
(continued)
29 30
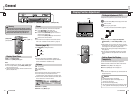
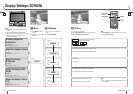
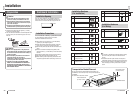
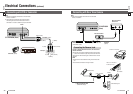
Installation Procedures (When Using Mounting Collar )
Use the brackets supplied with your car when mounting this unit. The bracket shape and mounting method vary with car
manufacturers, car types and manufacturing year. Please consult your nearest dealer or installer.
Use the supplied Spacer if mounting hole of your car is shaped like below.
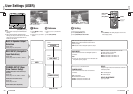
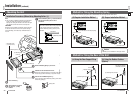
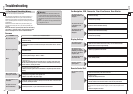
To Remove the Unit
Push the right and left clamp plates outward, one at
a time, and pull the unit toward yourself.
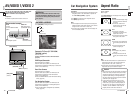
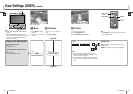
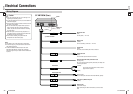
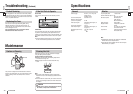
Connecting the Parking Brake (Side Brake) Connection Lead
The parking brake (side brake) switch position varies with the car
model. For details on the exact location of the parking brake (side brake)
switch in your car, contact your dealer.
Parking Brake (Side Brake) Connection
Lead
(Bright green)
When the parking brake (side brake) lever
is engaged, the unit is grounded by the
chassis.
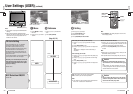
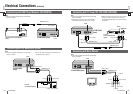
Parking Brake (Side Brake)
Connection Lead
(Bright green)
Parking brake (side brake)
switch
Brake light
Battery
Car chassis
Come up to this point.
Power source side lead
Hand brake Foot brake
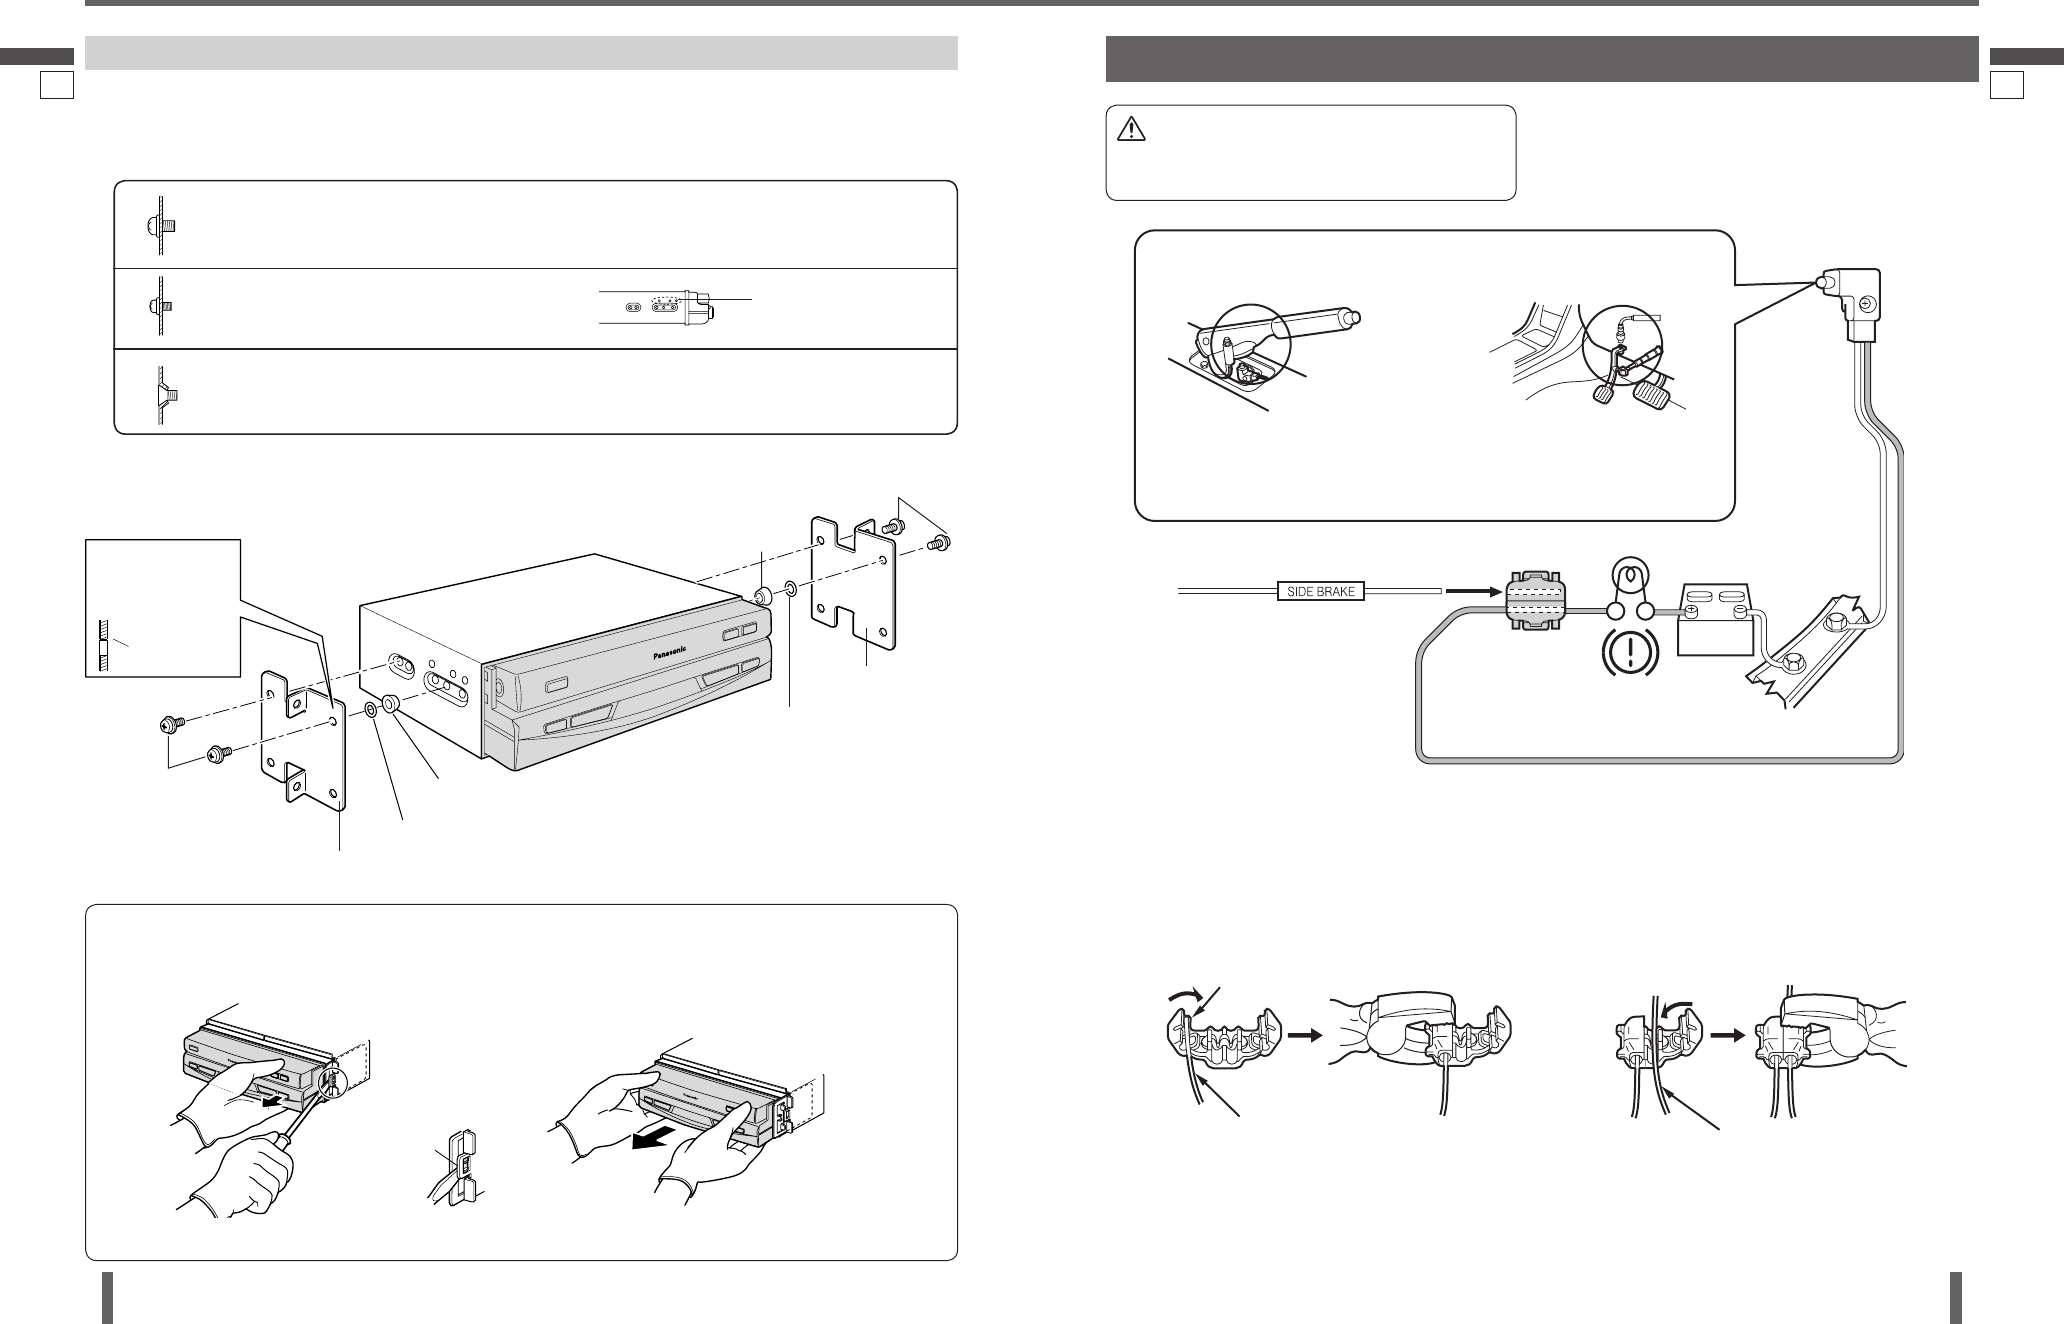
Attach a Clip Connector to the end of the parking
brake (side brake) connection lead.
The Clip Connector is connected to the power
source side lead of the parking brake (side brake)
lever.
Clip Connector
Caution
For safety, be sure to ask your nearest professional
installer to do this connection.
Select mounting screws according to the hole positions and hole shape of the bracket.
Round Head Screw (5 mm6 mm) 2 pieces
Recycle the Round Head Screws that fi xed the transportation brackets for
two more positions.
Round Head Screw (4 mm3 mm)
4 pieces
Flat-Head Screw (5 mm6 mm) 4 pieces
Mounting Hole
of a Bracket (in
section)
Round Head Screw
(5 mm6 mm)
Spacer
Double-Faced Adhesive Tape
Existing Bracket (L) (Bracket originally attached to the car)
Bracket
To remove Trim Plate , pull it from right side to left side.
Round Head Screw (5 mm6 mm)
Spacer
Double-Faced
Adhesive Tape
Existing Bracket (R)
Push here to
remove the
clamp plates.
When using these
mounting holes
After removing the right and left clamp plates, pull
the unit with both hands till it comes out.