


NOTE: Because QBASS is a boost only EQ system, it is easy to
either clip the amplifier, or overdrive a speaker past its excursion
limits. To make up for frequency response that is 10dB down (say
at 45 Hz), 10X the amplifier power is required. This may tax both
driver and amplifier. It may also exhaust the headroom in the DSP
controller. This issue is especially problematic in vented (ported)
speaker enclosures, where the cone excursion increases
considerably below the port tuning frequency. If you hear any sign
of bottoming, or other speaker or amplifier misbehavior, try
reducing the amount of bass boost. This is also possible with any
EQ band set to excessive boost.
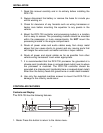
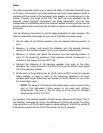
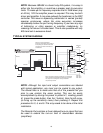
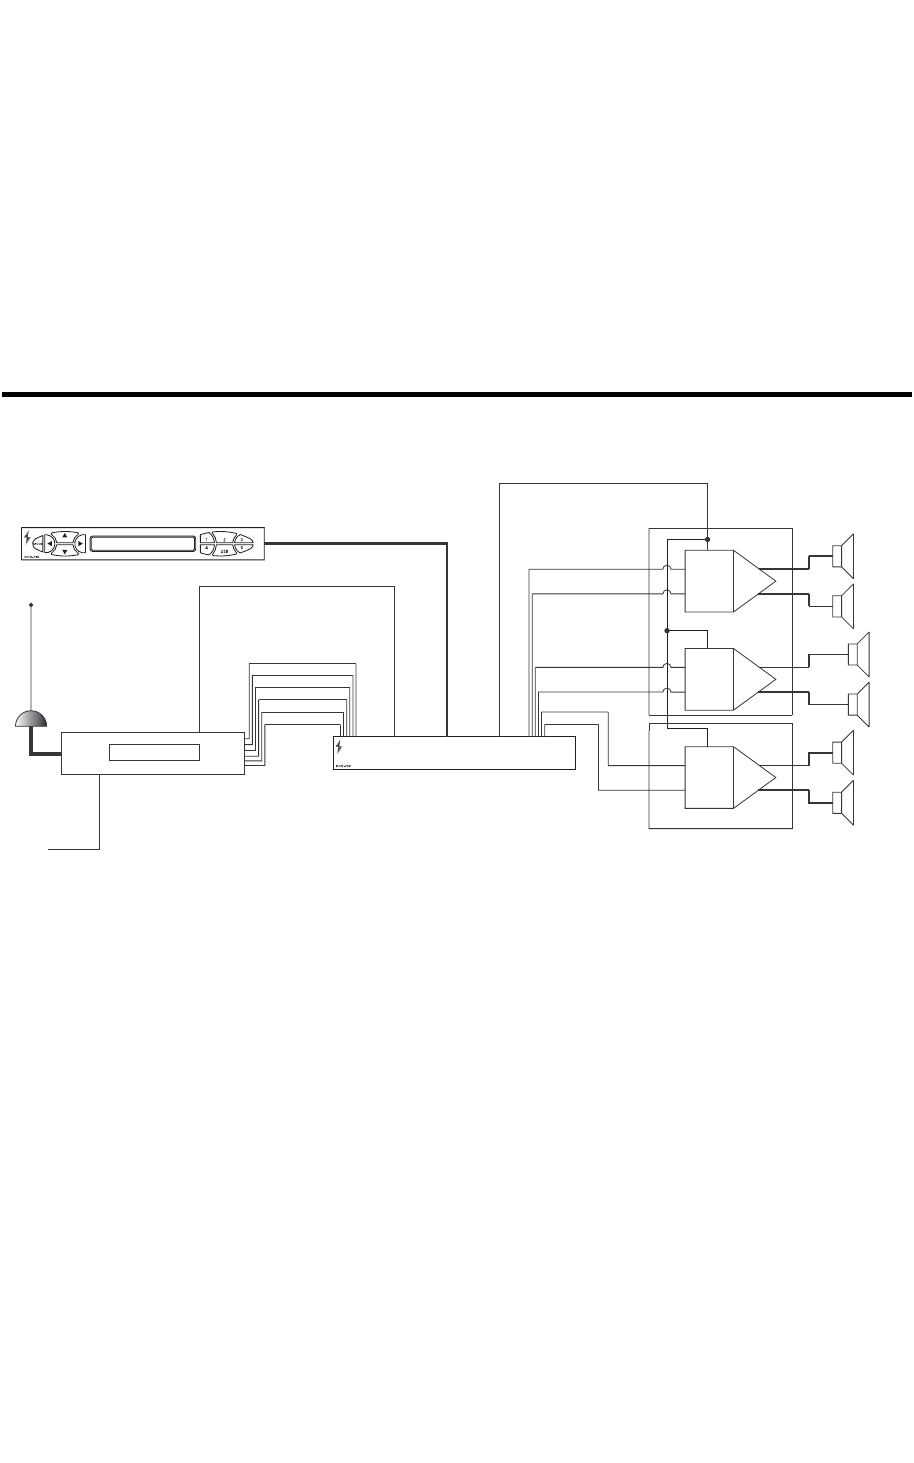
TYPICAL SYSTEM DIAGRAM
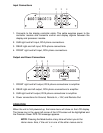
NOTE: Although the input and output connections are labeled
with typical application, any input can be routed to any output.
The caveat here is to make sure that all of the presets that you
plan to use contain the same routing. This can be easily
accomplished by storing the preset to preset #1, recalling preset
#1 (press the mode button, then the 1 button), then the left arrow,
(to bring up the sensitivity menu) then pressing 2. Repeat this
procedure for 3, 4, and 5. This only needs to be done at the initial
installation.
The Remote Out contains a 2-sec delayed turn-on signal that can
be used to extend the turn-on time of downstream devices
(amplifiers).
Head Unit
Antenna
Power
Left Front
Right Front
Left Front
Right Front
Sub Left
Sub Right
Left Front
Right Front
Left Rear
Right Rear
Left Front
Right Front
Remote Out
Remote In
DCX300.4
or
DCX600.4
DCX 500.1
DCX 1000.1
DCX 1500.1
Remote In
FRONT
SUB.
REA
R
DCX730 Processing Module
DCX730 Controller Module
Remote Out
NOTE: It is recommended that the
Remote out of the DCX730 be connected to
the amplifier(s) and the Remote Out of the
Head Unit be connected to the Remote In
of the DCX730.
NOTE: This diagram represents a typical setup. The components
shown connected to the DCX730 are optional and not provided.
Your setup must be configured to meet your installation
component requirements.
10