18
OPERATION – WIRED REMOTE (OPTIONAL)
RFX MR1 Wired Remote Control (Optional Accessory)
CAUTION:To prevent injury and/or damage to the unit and/or vehicle, read and follow all
safety precautions.
Installation
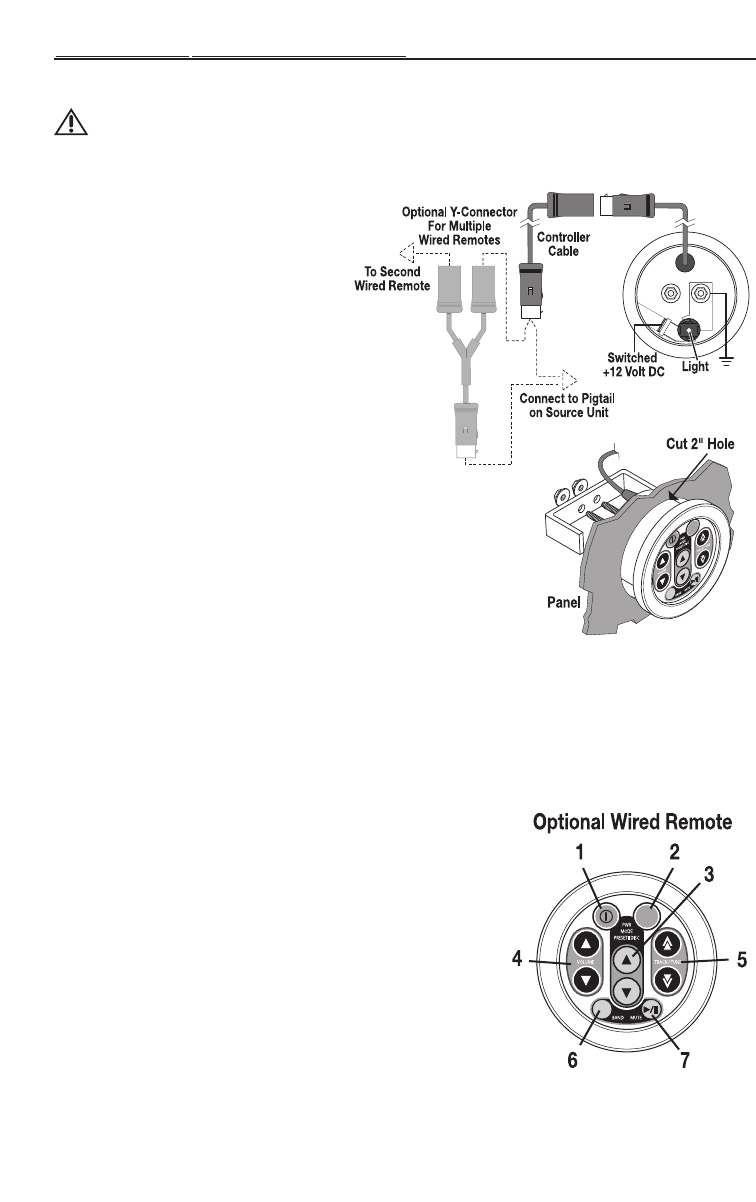
1. cut a 2" hole into the panel where the
controller will be mounted.
Light Connection
2. Connect a wire from a source of
switched +12V, is on only when
ignition key is in “accessory” or “run”
position, to the tab on the back of
remote.The switched signal is usually
taken from the ACC (accessory)
position of the ignition. If the vehicle
does not have an ACC position,
connect the wire to the switched ON
position of the ignition.
3. Connect wire from chassis ground to
one of the screw posts on the back of
the remote.
Remote Connection
3. Connect the controller cable to the
connector on the remote.
NOTE:Extra controller cables are available
for longer reach.
4. Route the cable to the source unit and
connect to the pigtail connector
hanging from the back.
NOTE:DO NOT connect the cable to the 8-Pin BUS port on the back of the source unit.This is for the
optional CD changer.
4. Mount the remote into place using the bracket and nuts.
NOTE:Multiple remotes can be connected using the optional Y-Connector.
Remote Features
1. PWR – Turns the source unit on and off.
2. MODE – Selects between TUNER/CDP/CDX/AUX1 modes.
3. PRESET / DISC – When in tuner mode,allows you to select
up and down though radio presets.When in CDX mode, allows
you to go to the previous or next disc.
4. VOLUME – Used to control volume level.
5. TRACK / TUNE – When in tuner mode,allows you to select
up and down though radio stations.When in CDP or CDX
mode, allows you to go to the previous or next track on a disc.
6. BAND – Selects which bank of tuner presets (FM1/FM2/AM)
should be active.
7. MUTE – Mutes audio in TUNER and AUX1 modes. Pauses the
disc in CDP/CDX mode.


