


11 12
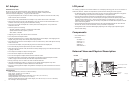
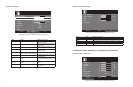
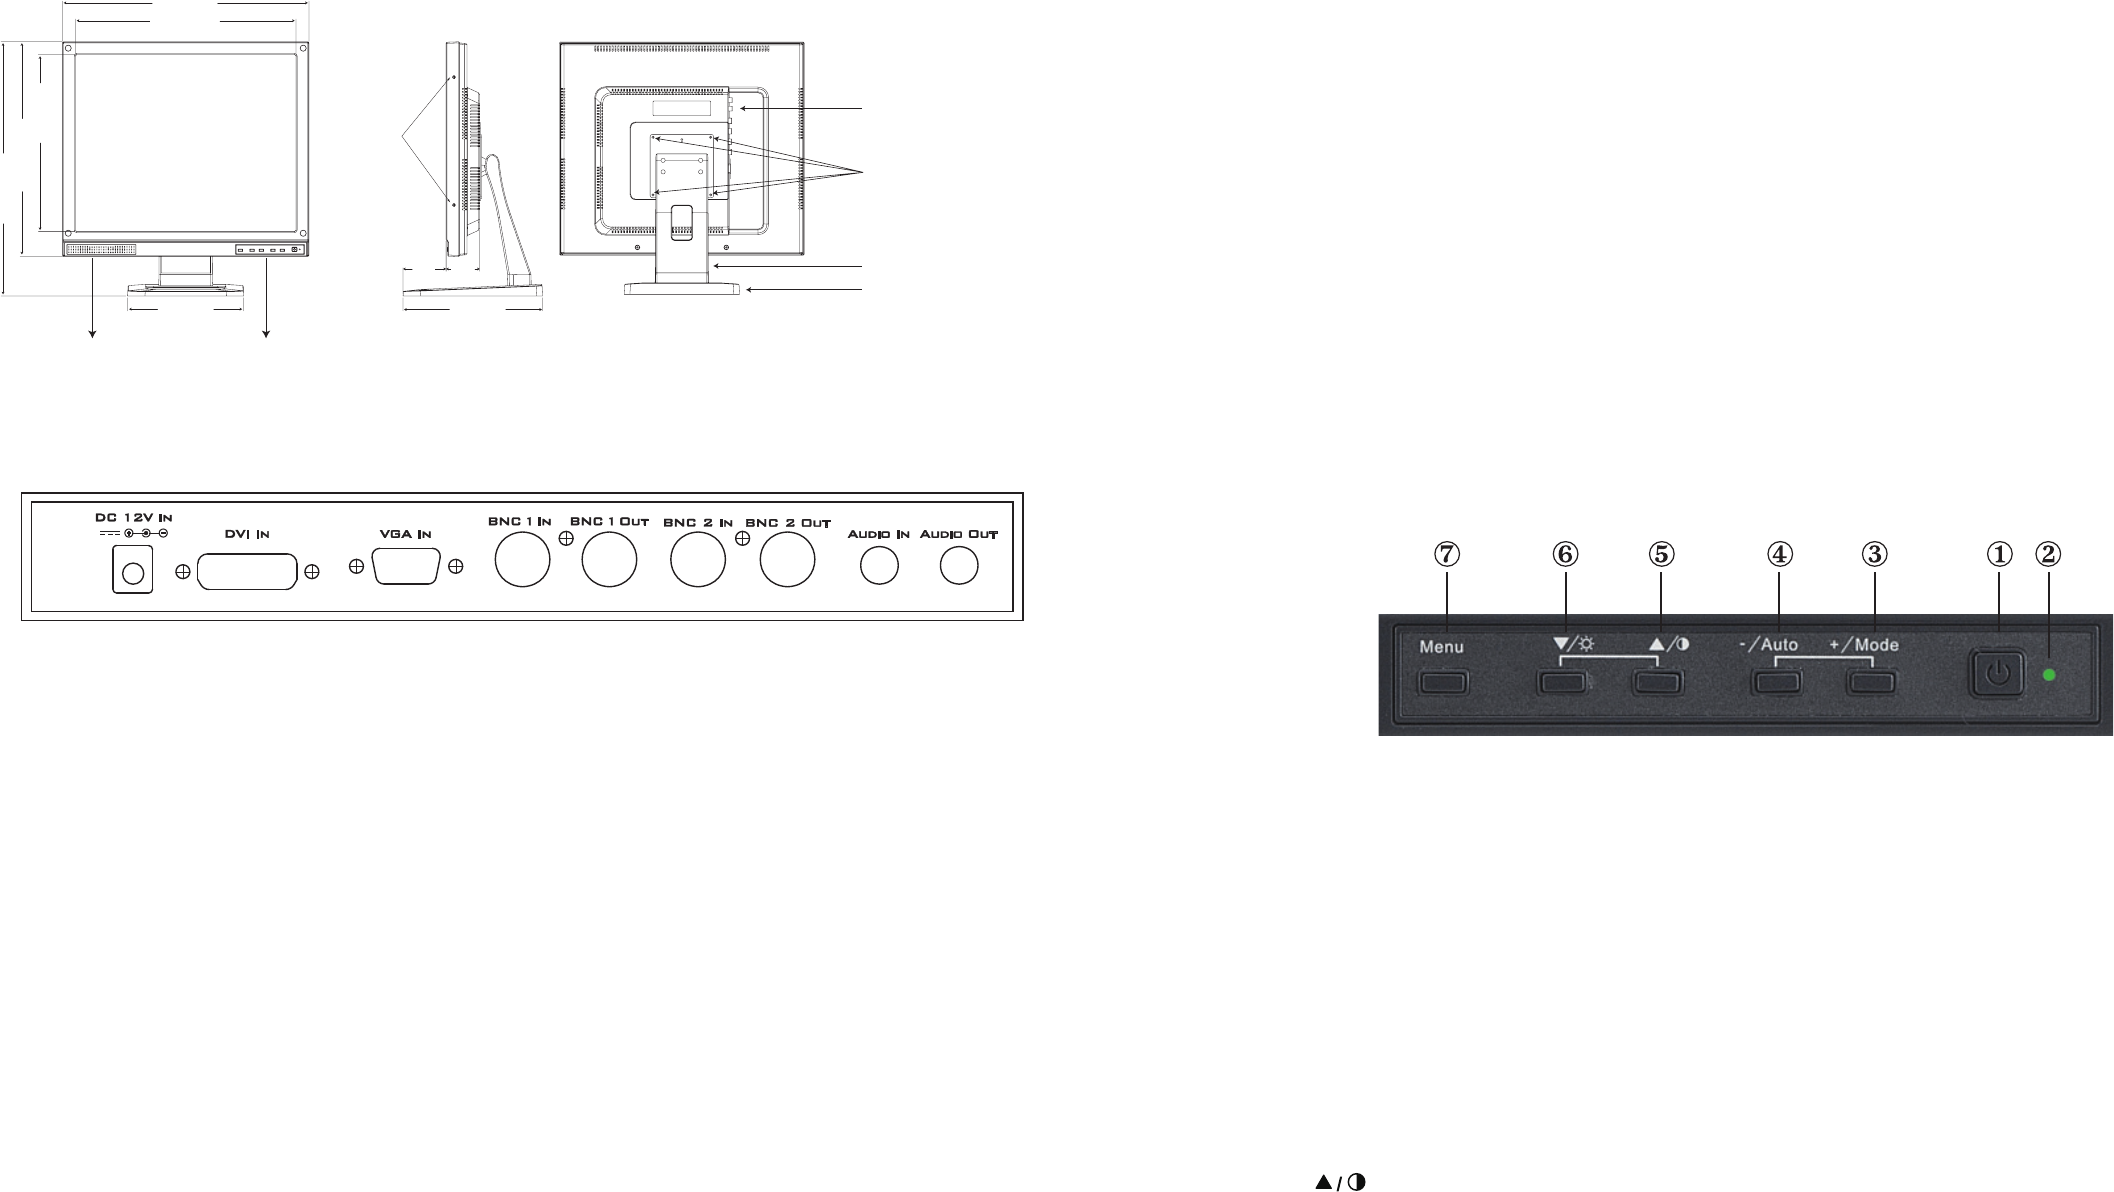
Input and Output connectors
DC 12V IN:
Input connector of power. Connect to the output cable of AC adapter.
DVI IN:
Input connector of DVI-D format RGB.
Type TDMS Digital RGB.
Input impedance 100Ω (differential)
Note:
• DVI-D doesn’t support audio signal. Connect audio cable separately.
• DVI-D doesn’t support analog RGB and digital component signals. If you convert this connector to HDMI,
it is able to support digital RGB only.
• This monitor doesn’t support HDCP(High-bandwidth Digital Content Protection) signal. Don’t connect to
the HDMI connector of DVD player.
VGA IN:
Input connector of analog RGB.
Type Analog RGB (VGA)
Input impedance 75Ω
BNC 1 IN:
Input connector of Video. (BNC connector)
Type Composite video (NTSC or PAL)
Input impedance 75Ω
Note: This video channel is shown as “AV” on the screen.
BNC 1 OUT:
Output connector of Video.(BNC connector)
Type Composite video (NTSC or PAL)
Output impedance 75Ω
BNC 2 IN:
Input connector of Video. (BNC connector)
Type Composite video (NTSC or PAL)
Input impedance 75Ω
Note: This video channel is shown as “AV1” on the screen.
BNC 2 OUT:
Output connector of Video.(BNC connector)
Type Composite video (NTSC or PAL)
Output impedance 75Ω
AUDIO IN:
Input connector of Audio. (RCA Jack)
Input 0.5Vrms @1KHz (Mono)
AUDIO OUT:
Output connector of Audio. (RCA Jack)
Output Maximum 0.85Vrms @1KHz (Mono)
Note: Audio output signal is controlled by the volume in the OSD.
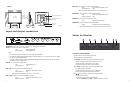
Setup for Monitor
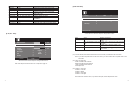
1.Front control panel
①
Power Switch: Push to switch power on/off.
②
LED Indicator: Power light indicator.
③
[+ Mode]
: This switch has multi-function mentioned below.
(1) Push to change input Source. (VGA, DVI, AV, AV1)
(2) Push to select Picture, Setup or PC in Menu.
(3) Push to increase the value of Menu selected.
④
[− Auto]
: This switch has multi-function mentioned below.
(1) VGA signal auto adjustment.
(2) Push to select Picture, Setup or PC in OSD Menu.
(3) Push to decrease the value of Menu selected.
⑤
[
]
: This switch has multi-function mentioned below.
(1) Select Menu upwards.
(2) Push this switch to adjust contrast directly,
and push
[+ Mode]
or
[− Auto]
to change the value of contrast.
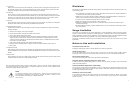
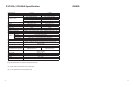
P1910A
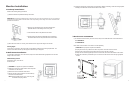
P1910A
LCD Panel
Threaded
hole for
rack mount
bracket
Input and output connectors
Threaded hole for VESA
wall bracket
Back stand
Pedestal
inch(mm)
7.874 (200)
16.7 (424.19)
14.933 (379.3)
9.449 (240)
2.913
(74)
2.283
(58)
11.969 (304)
14.547 (369.49)
17.219 (437.35)
Mono Speaker Front control panel