IPL T PC1 Interface • Software Setup
Software Setup, cont’d
3-20
IPL T PC1 Interface • Software Setup
3-21
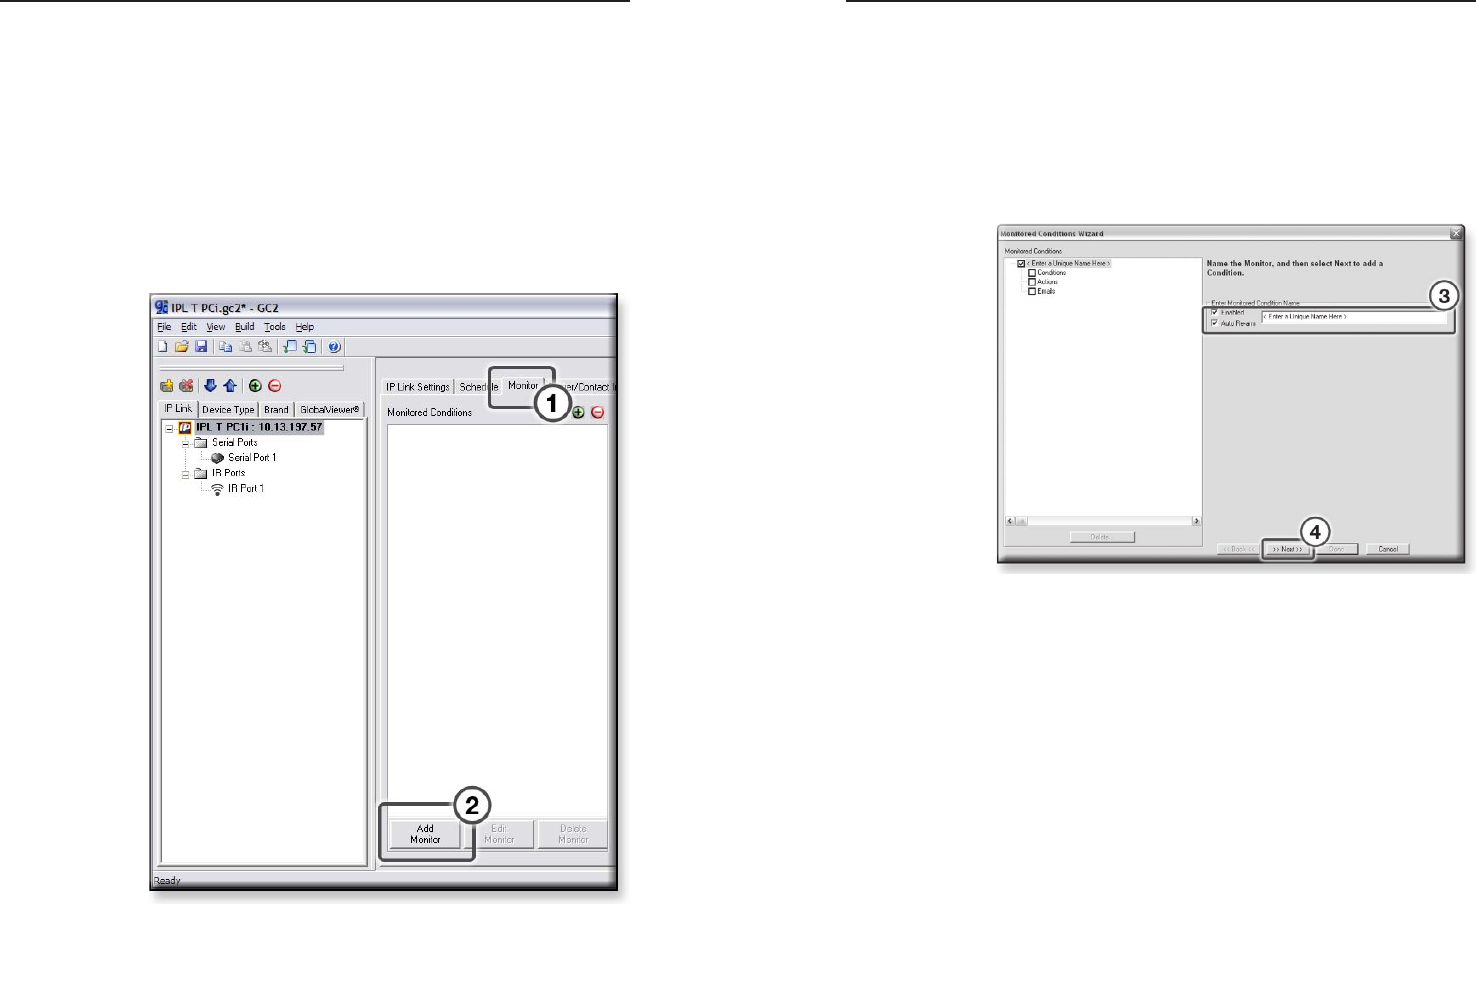
Step Eleven: Set monitored conditions.
The Monitor tab is used to set up a response (action and/or
e-mail) to a specified condition or event.
Actions vary by selected device and include options such as
Enable/Disable PINs, Lockout Front Panel, and Time Delay.
Custom e-mails can be created and sent to specified e-mail
addresses following specified conditions or events.
To add a monitored condition,
1. Select the Monitor tab.
2. Click the Add Monitor button.
The Monitored Conditions Wizard opens (see next page).
3
. Enter a unique monitored condition name. The two
check boxes next to the Enter a Monitored Condition Name
field are automatically selected:
• Enabled: When selected, indicates that monitoring is
enabled.
• Re-arm: When checked, means that the specified
action occurs every time the condition(s) are met.
4. Click Next.
5. Select a Subject Port (device).
6. Select an Available Option (condition) to monitor.
7. Edit the condition Name field (if desired).
8. Set the desired Condition Test Parameters (if available).
For an example of test parameters, see the screen on the
next page.
9. If the Apply Condition button is grayed-out, click on the
condition name in the Monitored Conditions pane.
10. Click the Apply Condition button.


