DOCUMENT CENTRE CS 50 SYSTEM ADMINISTRATION GUIDE 4–9 MAINTENANCE
1
2
4
5
6
7
4
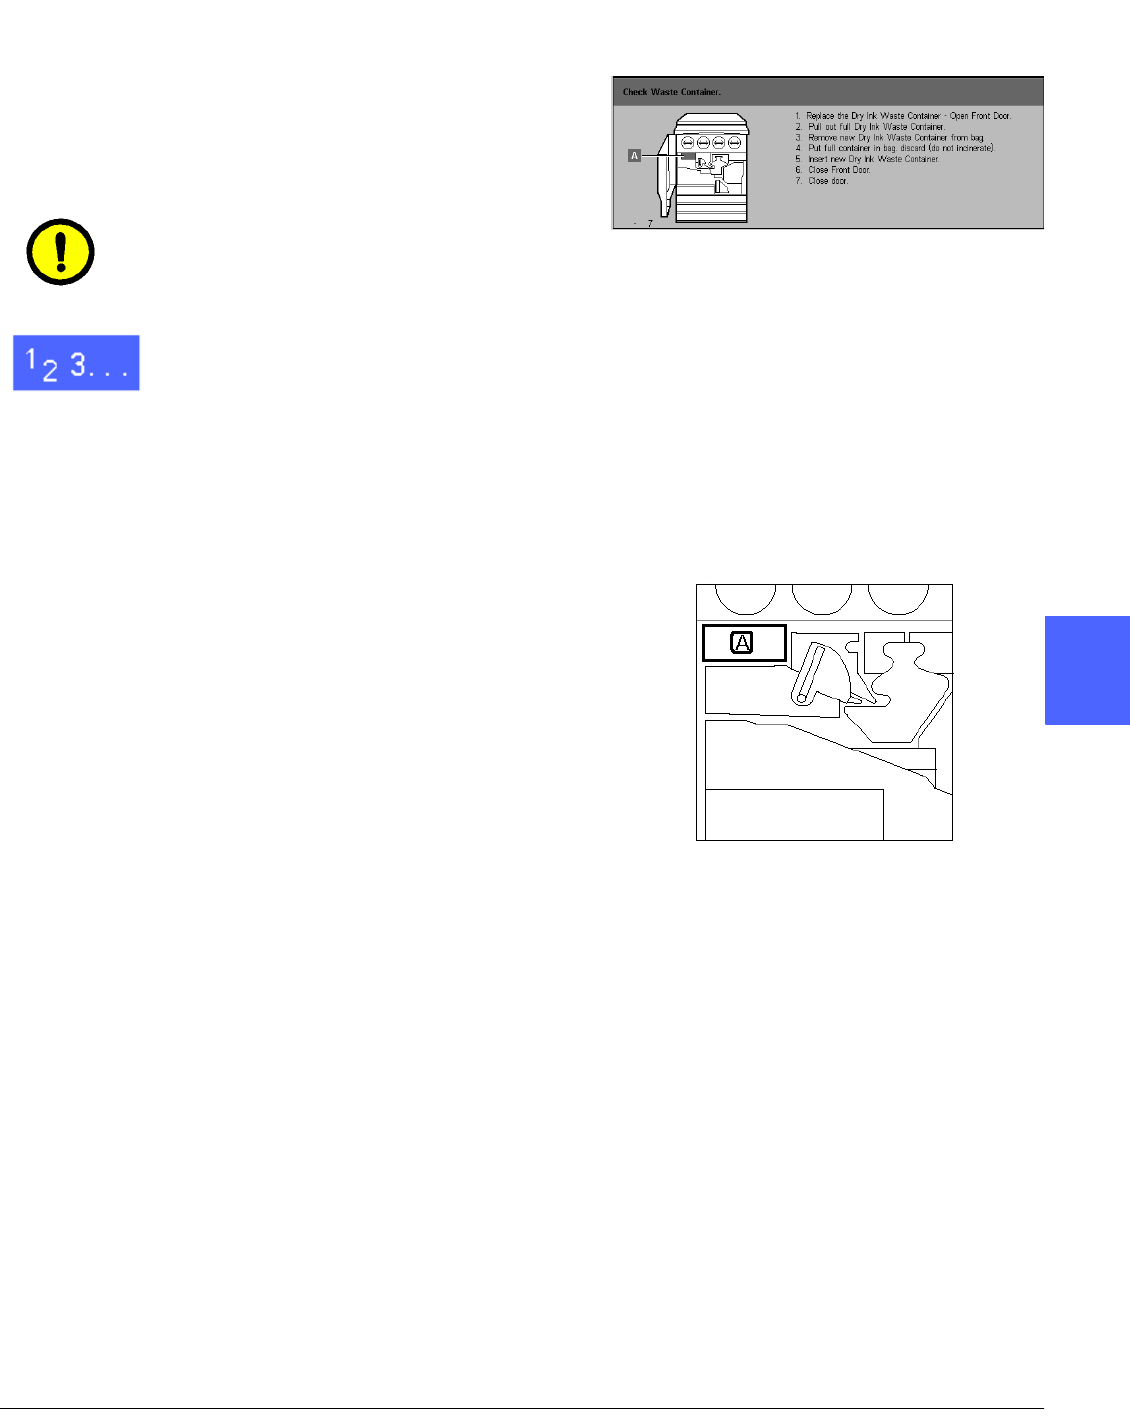
Replacing the Dry Ink Waste Container
When a message is displayed to replace a Dry Ink
Waste Container (Figure 12), follow the
instructions provided on this page in addition to
those on the labels surrounding the Dry Ink Waste
Container and affixed to the copier/printer.
CAUTION:To prevent spilling dry ink, remove the
Dry Ink Waste Container only when the “Dry Ink
Waste Container is Full" message appears on the
Touch Screen.
1
Open the Front Door of the copier/printer.
2
Place a few sheets of paper on the floor under the
Dry Ink Waste Container to catch any dry ink that
may spill.
3
Locate the Waste Container (area A in Figure 13)
in the upper left of the printer/copier.
Figure 12: Dry Ink Waste Container message
Figure 13: Locating the old
Dry Ink Waste Container


