


2
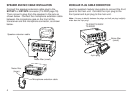
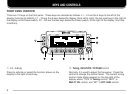
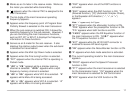
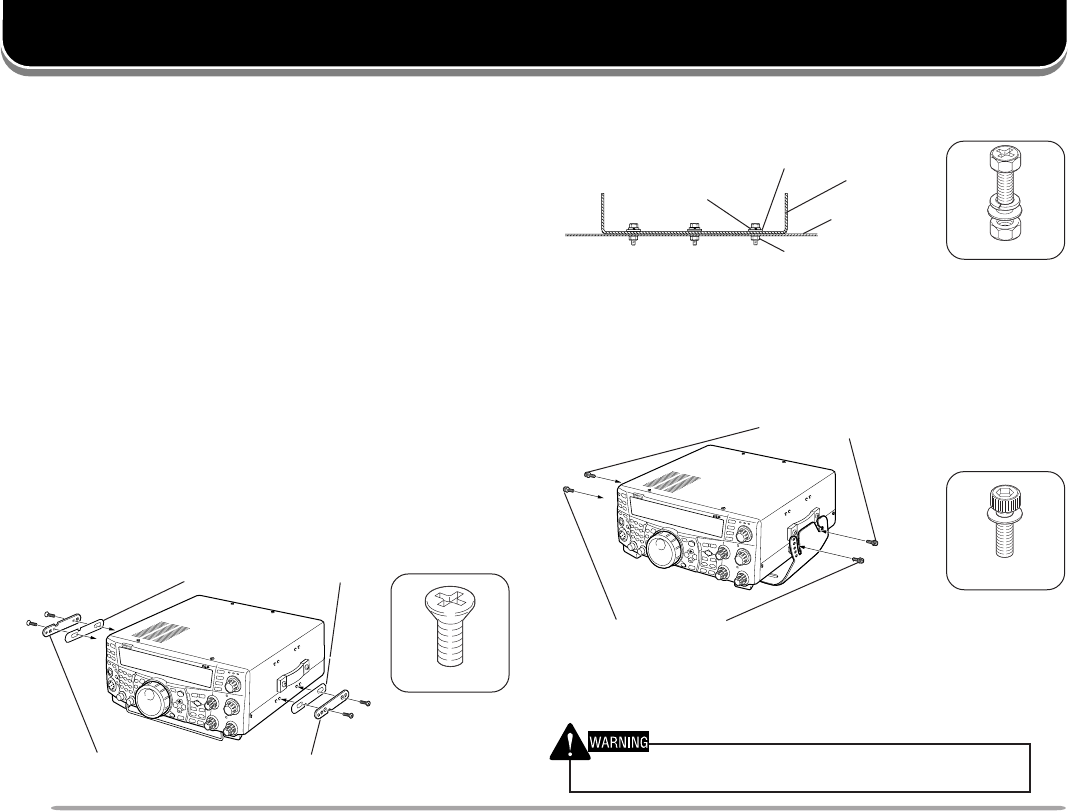
Install the bracket securely onto the vehicle, using 6 sets
of the supplied screws (N99-2024-XX).
Then, prepare the transceiver by loosely screwing in the
rear screws. Hook those screws onto the rear guide rail
of the mounting bracket, then adjust the transceiver to
your desired angle before tightening the screws. Insert
and tighten the front screws to secure the transceiver in
place.
To remove the transceiver from the bracket, first remove
the front screws, then loosen the rear screws slightly and
pull the transceiver forward to unlatch it from the bracket.
Do not install the transceiver so that it is vertically on its side.
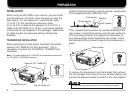
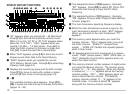
PREPARATION
INSTALLATION
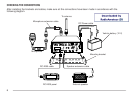
When using the RC-2000 in your vehicle, you can install
the transceiver in the trunk, under the seat or under the
dash board. On the transceiver, install the DC cable
(7 m/ 23.1 ft), the microphone extension cable
(5 m/ 16.5 ft), a cable for the speaker (5 m/ 16.5 ft), a
cable to the RC-2000 (5 m/ 16.5 ft), and coaxial cable(s)
to the antenna (not supplied in this package). Make sure
all cable lengths are adequate before installing the
brackets.
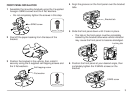
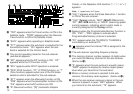
TRANSCEIVER INSTALLATION
When installing the metal plates, first attach the plastic
spacers (G11-2698-XX) to the transceiver. This is
necessary to protect the TS-2000(X)/ TS-B2000 from
scratches.
Note: The plastic spacers (G11-2698-XX) are supplied accessories for
the TS-2000(X)/ TS-B2000 transceiver.
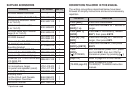
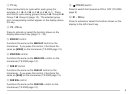
Front screws
Rear screws
Spacers (G11-2698-XX)
The tab faces out
The tab faces out
Bracket
Vehicle chassis
Spring washer
Flat washer
Nut
6 mm x 20 mm
4 mm x 10 mm
3 mm x 4 mm