System Setup (Continued)
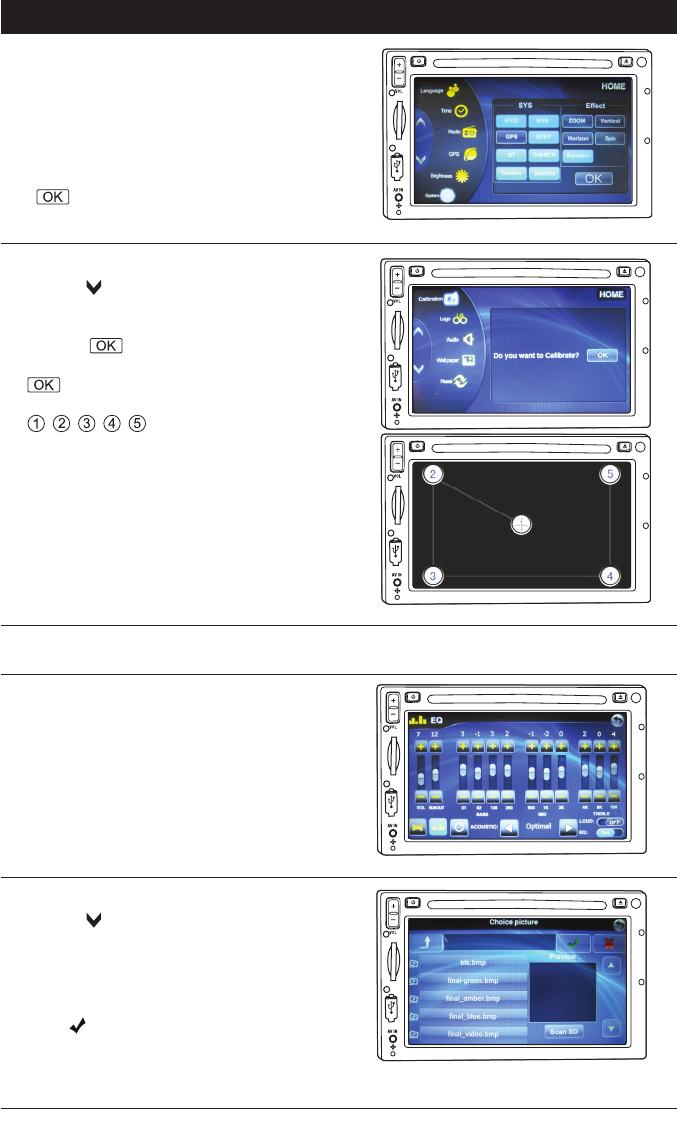
Calibration Setup:
1.
Press the button to reveal more setup features.
2. Select the Calibration icon to enter the screen
calibration setup interface.
3. Press the button.
4. Enter “5365” for the password then press the
button.
5. Touch the center of the following buttons:
, , , , in sequence. After calibrating
the screen, the unit saves your settings and
exits automatically.
NAV
Logo Setup: No user selectable function.
Audio Setup:
See “Sound Controls” section of this manual for
more information.
Wallpaper Setup (Background Image):
1.
Press the button to reveal more setup features.
2. Select the Wallpaper icon to enter the wallpa-
per selection interface.
3. Either select a file pre-stored in the system or
select Scan SD and select an image from the
rear SD GPS Card holder.
4. Touch to save the image and the unit will
automatically return to the main interface.
Note: Please use 800dpi*400dpi & 24-bit/channel
BMP format file as Wallpaper if desired.
8
NA
V
NA
V
NA
V
System Setup (Continued):
2. A. The SYS (system) buttons deactivate and
activate system features.
B. The Effect buttons changes the way the
unit transitions from one screen to another
screen.
3. Once selections have been made press the
button to exit the system setup menu.
N
AV


