37
En
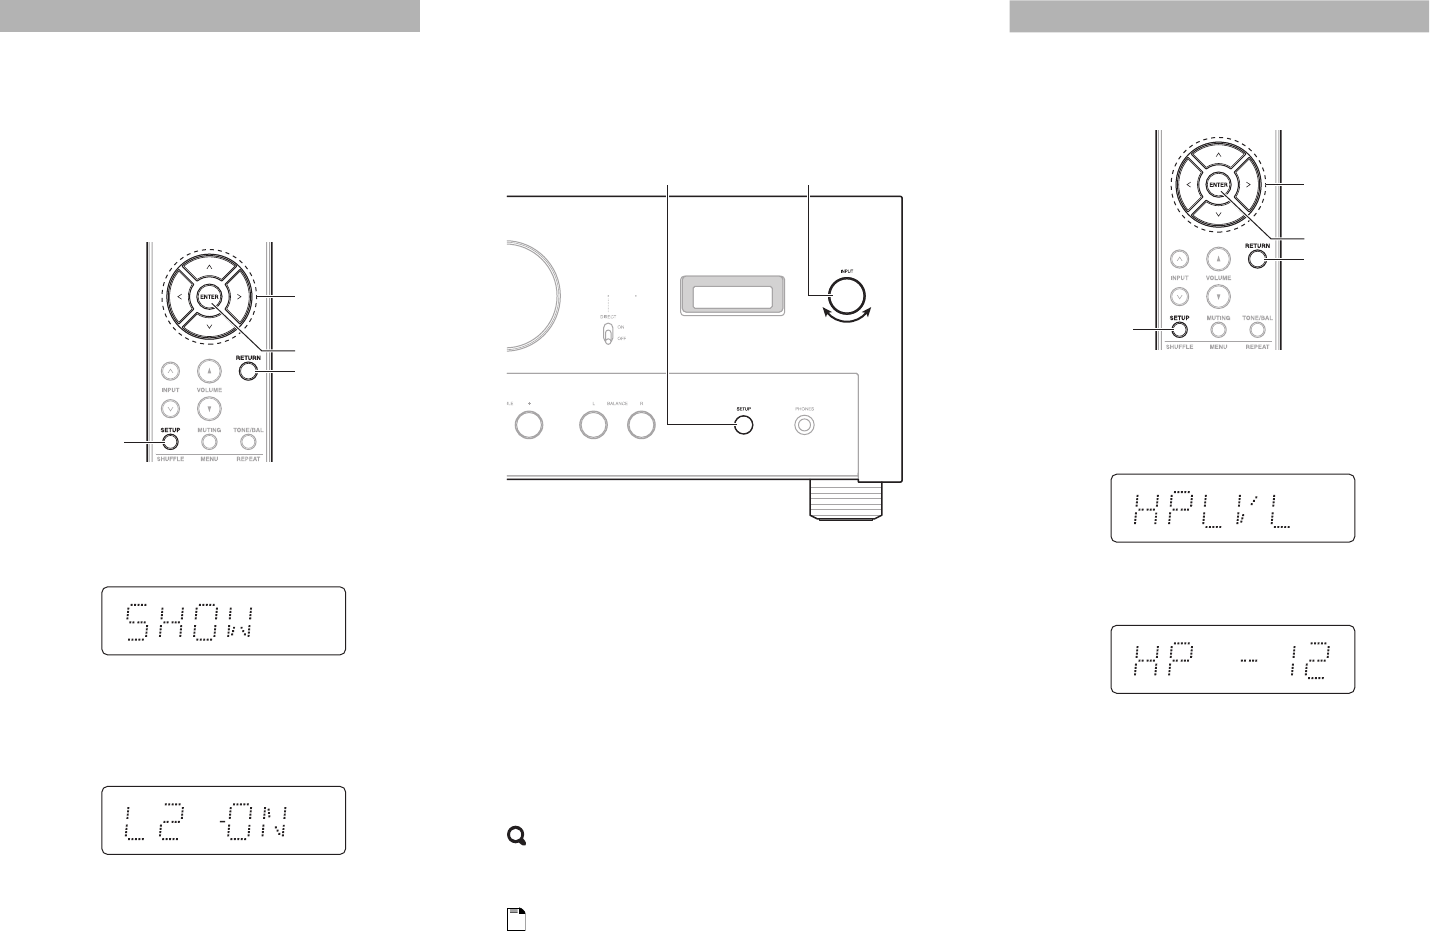
You can hide the display of those inputs that are not used,
so that they are skipped when selecting an input. Change
any input from the following: L1(LINE1), L2(LINE2),
L3(LINE3), CX1(COAX1), CX2(COAX2), OPT,
AES(AES-EBU), USB, PNO(PHONO)
■ Operating with the remote controller
■ Operating on the integrated amplifier
Tip
• The default setting is ON.
Note
• The current input doesn’t appear as selectable. For example, if
the input is currently set to “LINE1”, “L1” won’t appear as
selectable.
• The integrated amplifier will end the setup if there is no
operation for 8 seconds.
Skipping Unused Inputs
1
Press SETUP.
2
Press / repeatedly to select “SHOW”.
3
Press ENTER.
4
Press / repeatedly to select the input you want
to change.
5
Press / to switch between ON and OFF.
`ON:
Shows the display of selected input.
`OFF:
Hides the display of selected input.
The setting is automatically confirmed.
SETUP
/ / /
ENTER
RETURN
6
Press RETURN repeatedly to exit the setup.
1
Press SETUP repeatedly to select “SHOW”.
2
Use the INPUT selector to select the input you want
to change.
3
Press and hold down SETUP.
The setting is switched ON/OFF.
The setting is automatically confirmed.
4
Press SETUP repeatedly to exit the setup.
SETUP
INPUT selector
You can set the volume when using headphones.
■ Operating with the remote controller
Setting the Headphone Level
1
Press SETUP.
2
Press / repeatedly to select “HPLVL”.
3
Press ENTER.
The current level is displayed.
4
Press / repeatedly to adjust the offset level.
You can adjust the offset level from -12 dB to +12 dB
in 1 dB steps.
The setting is automatically confirmed.
5
Press RETURN repeatedly to exit the setup.
SETUP
/ / /
ENTER
RETURN


