


Basic Operations of this unit
Important
! Handle gently when removing or attaching
the front panel.
! Avoid subjecting the front panel to excessive
shock.
! Keep the front panel out of direct sunlight and
high temperatures.
! To avoid damage to the device or vehicle inter-
ior, remove any cables and devices attached
to the front panel before detaching it.
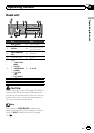
Removing thefront panel to protectyour unit from
theft
1 Pressthe detach button torelease the front
panel.
2 Grab thefront paneland remove.
3 Putthe front panelinto the provided protective
case for safekeeping.
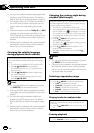
Re-attaching thefront panel
1 Slide thefront panelto the left untilit clicks.
Front panel andthe head unitare connected on
the left side.Make sure thatthe front panelhas
been properly connectedto the headunit.
2 Pressthe right sideof the front paneluntil it is
firmly seated.
If you can’ t attach the frontpanel to thehead unit
successfully,try again.However, forcingthe front
panel into placemay result indamage.
Turning theunit on
1 Press SRC/OFF to turnthe unit on.
Turning theunit off
1 Press SRC/OFFand hold untilthe unit turnsoff.
Selecting asource
1 Press SRC/OFFrepeatedly to switch betweenthe
following sources:
For SoutheastAsian models
TUNER (tuner)—DVD (built-inDVD player)—USB
(USB storage device)—AUX1 (front AUX)—AUX2
(rear RCA)
For SouthAmerican, Oceanian, Middle East
Asian, SouthAfrican models
TUNER (tuner)—DVD (built-inDVD player)—USB
(USB storage device)—AUX (AUX)
Adjusting the volume
1 Turn M.C.to adjust volume.
Notes
! Listening to the radio while connecting a USB
storage device to this unit may generate
noise. In this case disconnect the USB sto-
rage device.
! When this unit’s blue/white lead is connected
to the vehicle’s auto-antenna relay control
terminal, the vehicle’s antenna extends when
this unit’s source is turned on. To retract the
antenna, turn the source off.
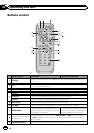
Use and care of the remote
control
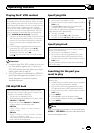
Using theremote control
1 Point theremote control in thedirection of the
front panelto operate.
When using forthe first time,pull out thefilm
protruding from thetray.
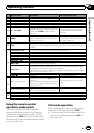
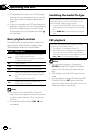
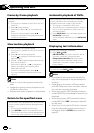
Replacing thebattery
1 Slide thetray out onthe back of theremote con-
trol.
2 Insert the battery withthe plus (+)and minus (–)
poles alignedproperly.
En
9
Section
02
Operating this unit
Operating this unit