


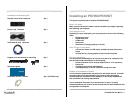

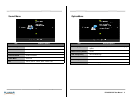

Contents of the Accessory Kit
Remote control with 2 batteries Qty 1
Power cord, 1.8 meters Qty 1
VGA cable (D-sub), 1.8 meters Qty 1
Installing an PS7050/PS7050T
This section explains how to install a PS7050/PS7050T.
Before You Begin
Make sure you have all the items in these lists before you begin unpacking
and installing your displays.
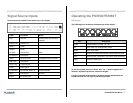
Tools/Equipment List
Depending on your installation, you may need one or more of the following
items:
• String/string level
• Digital/laser level
• Ladders/lift
• Back brace
• Stud finder (if hanging display on a wall)
Other Things You May Need
• LCD screen cleaner or LCD wipes - available at most electronics
stores
6PS7050/PS7050T User Manual
Keypad cover and screws for mounting Qty 1
Quick start guide Qty 1
USB cable (A to B), 5 meters Qty 1 (PS7050T only)
stores
• At least two very strong people to help lift units into place
Plan Your Installation
You should have a detailed plan of how the units are to be configured. The
plan should include calculations for the following:
• Power (maximum of five units per 20A circuit for 115V operation)
• Cable runs
• Ventilation and cooling requirements
• If hanging display on a wall, location of studs in the wall
Prepare Your Installation Location
You should have prepared the area where you will install the unit. If custom
enclosures are part of the installation, they must be fully designed to
accommodate the installation of the displays, as well as the installed unit
and ventilation and cooling requirements.
If your installation included a lot of construction or dust, it is highly
recommended that you clean all of the screens after the wall installation and
configuration are complete.