


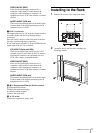
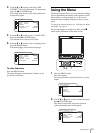

Location and Function of Parts and Controls
8
Location and Function of Parts and Controls
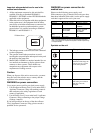
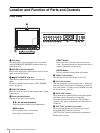
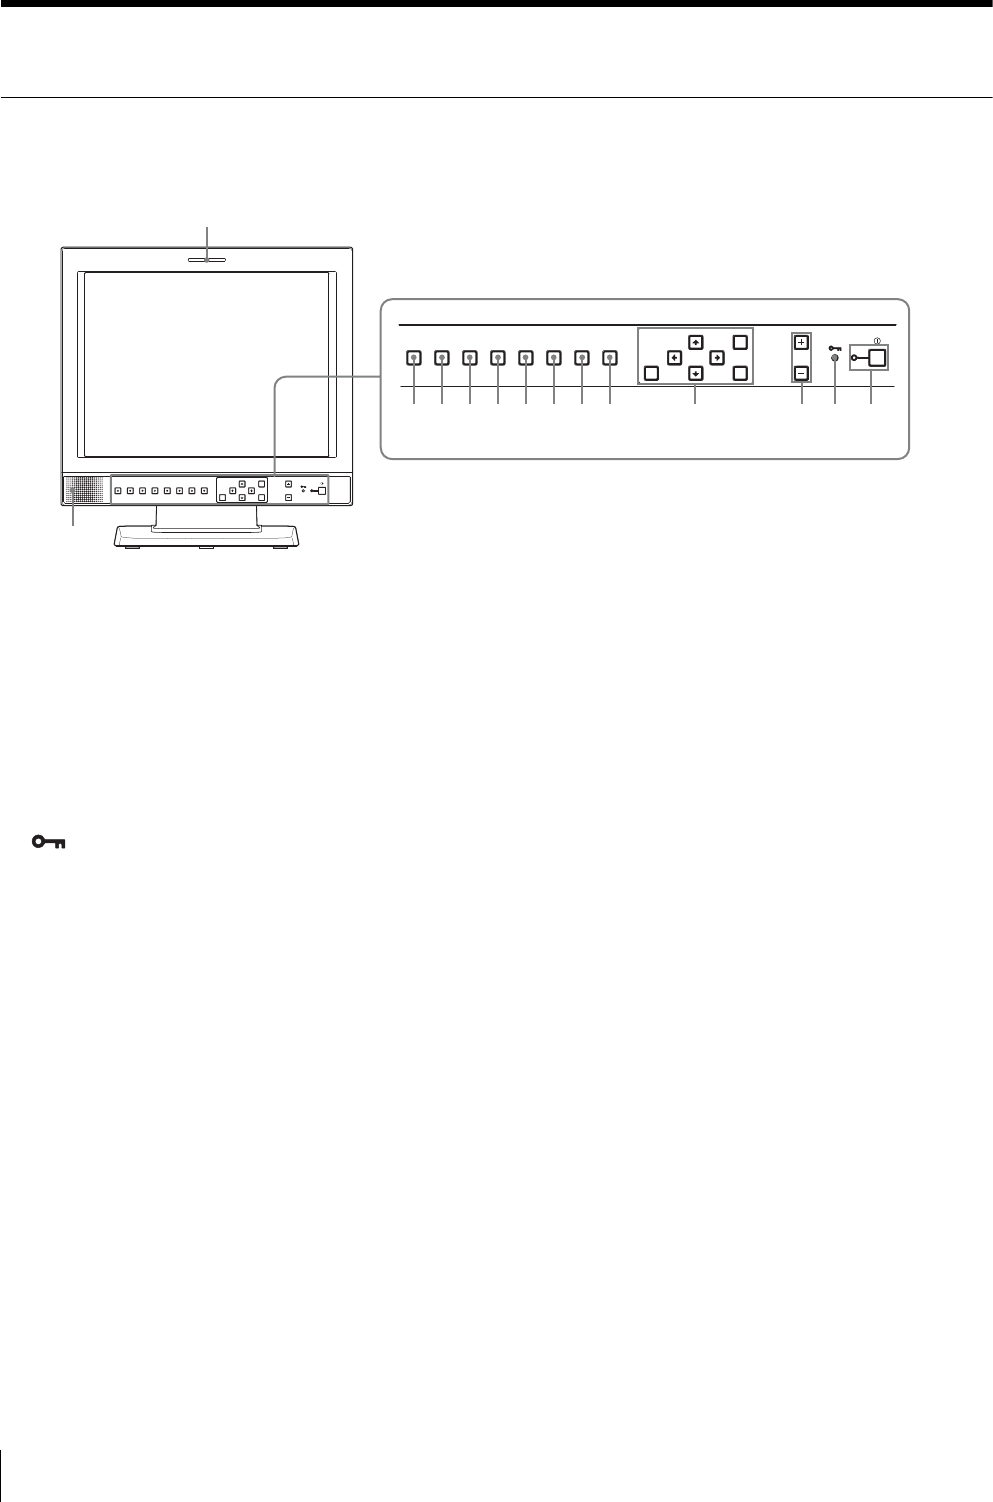
Front Panel
a Tally lamp
The lamp lights in green when this unit is controlled
from the PARALELL REMOTE terminal on the rear
panel of the unit.
b POWER switch and indicator
Press to turn on the power. The indicator turns on. Press
again to turn off the power.
c KEY INHIBIT indicator
When the key inhibit function works, the indicator
lights.
For the key inhibit function, refer to “KEY INHIBIT
menu” on page 19.
d VOLUME buttons
Press the + button to increase the volume or the – button
to decrease it.
e Menu operation buttons
Displays or sets the on-screen menu.
M/m/</, (arrow) buttons
Select the menu or make various adjustments.
MENU button
Press to display the on-screen menu.
Press again to clear the menu.
RESET button
Resets the value of an item back to the previous
value. This button functions when the menu item is
adjusted (displayed) on the screen.
ENTER button
Press to confirm a selected item on the menu.
f ASPECT select button
Sets the aspect ratio of the picture, 4:3 or 16:9.
g SCAN select button
You can change the scan size of the picture. When you
press the button, the scan size is changed to normal (5%
over scan), under (-3% under scan) or ZOOM set on the
SCAN menu (see page 18).
h BLUE ONLY button
Press this button to eliminate the red and green signals.
Only blue signal is displayed as an apparent
monochrome picture on the screen. This facilitates
“chroma” and “phase” adjustments and observation of
VCR noise.
i EXT SYNC (external sync) button
Press to operate the unit on an external sync signal
through the EXT SYNC IN connector.
The EXT SYNC button works when the component/
RGB signals are input.
LINE A LINE B SDI SCAN ASPECT
RESET
MENU VOLUME POWER
ENTER
RGB/
COMPONENT
EXT
SYNC
BLUE
ONLY
LINE A LINE B SDI SCANASPECT
RESET
MENU VOLUME POWER
ENTER
RGB/
COMPONENT
EXT
SYNC
BLUE
ONLY
qd
qf
1
qs qa 0 9 8 7 6 5 4 3 2