


4
XR-M510
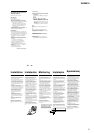
SECTION 2
GENERAL
This section is extracted from
instruction manual.
6
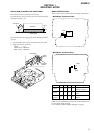
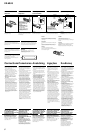
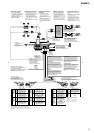
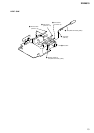
Location of controls
SOURCE
123456
CLOSE
OFF
DISC
DISC
EN
TER
SOU
ND
MEN
U
LIST
REP SHUF
D
S
P
L
P
T
Y
M
O
D
E
XR-M510
TAAF
D-BASS
Security side
Operation side
7
qk TA button 16, 17, 18
ql SOUND button
w; PRST/DISC +/– (cursor up/down) buttons
SEEK/AMS –/+ (cursor left/right) buttons
13
wa ENTER button
ws CLOSE button
wd D-BASS button
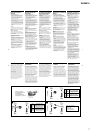
* Warning when installing in a car
without ACC (accessory) position on
the ignition key switch
Be sure to press (OFF) on the unit for
two seconds to turn off the clock display
after turning off the engine.
When you press (OFF) only momentarily,
the clock display does not turn off and this
causes battery wear.
The corresponding buttons of the unit
control the same functions as those on
the card remote commander.
10 Reset button 8
2 Main display window
3 OPEN button 38
4qa Receptor for the card remote
commander
5 Volume adjust buttons
6 DSPL/PTY (display mode change/
programme type) button
7 Sub display window
8 MENU button
9
Z (eject) button
11
qs LIST button
qd OFF button*
9
qf MODE button
qg SOURCE (TUNER/TAPE/CD/MD) button
qh AF button 16, 18
qj Number buttons
During radio reception:
Preset number select
13, 14, 17, 33, 34
During tape playback:
(1)REP 12
During CD/MD playback:
(1)REP 28
(2)SHUF 28
5
OFF
D-BASS
SEEK
PTY
SEEK
MENU LIST
SOUND
ENTER
DISC
DISC
SOURCE
DSPL AF/TA MODE
VOLATT
OPEN/CLOSE
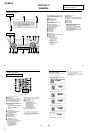
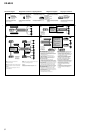
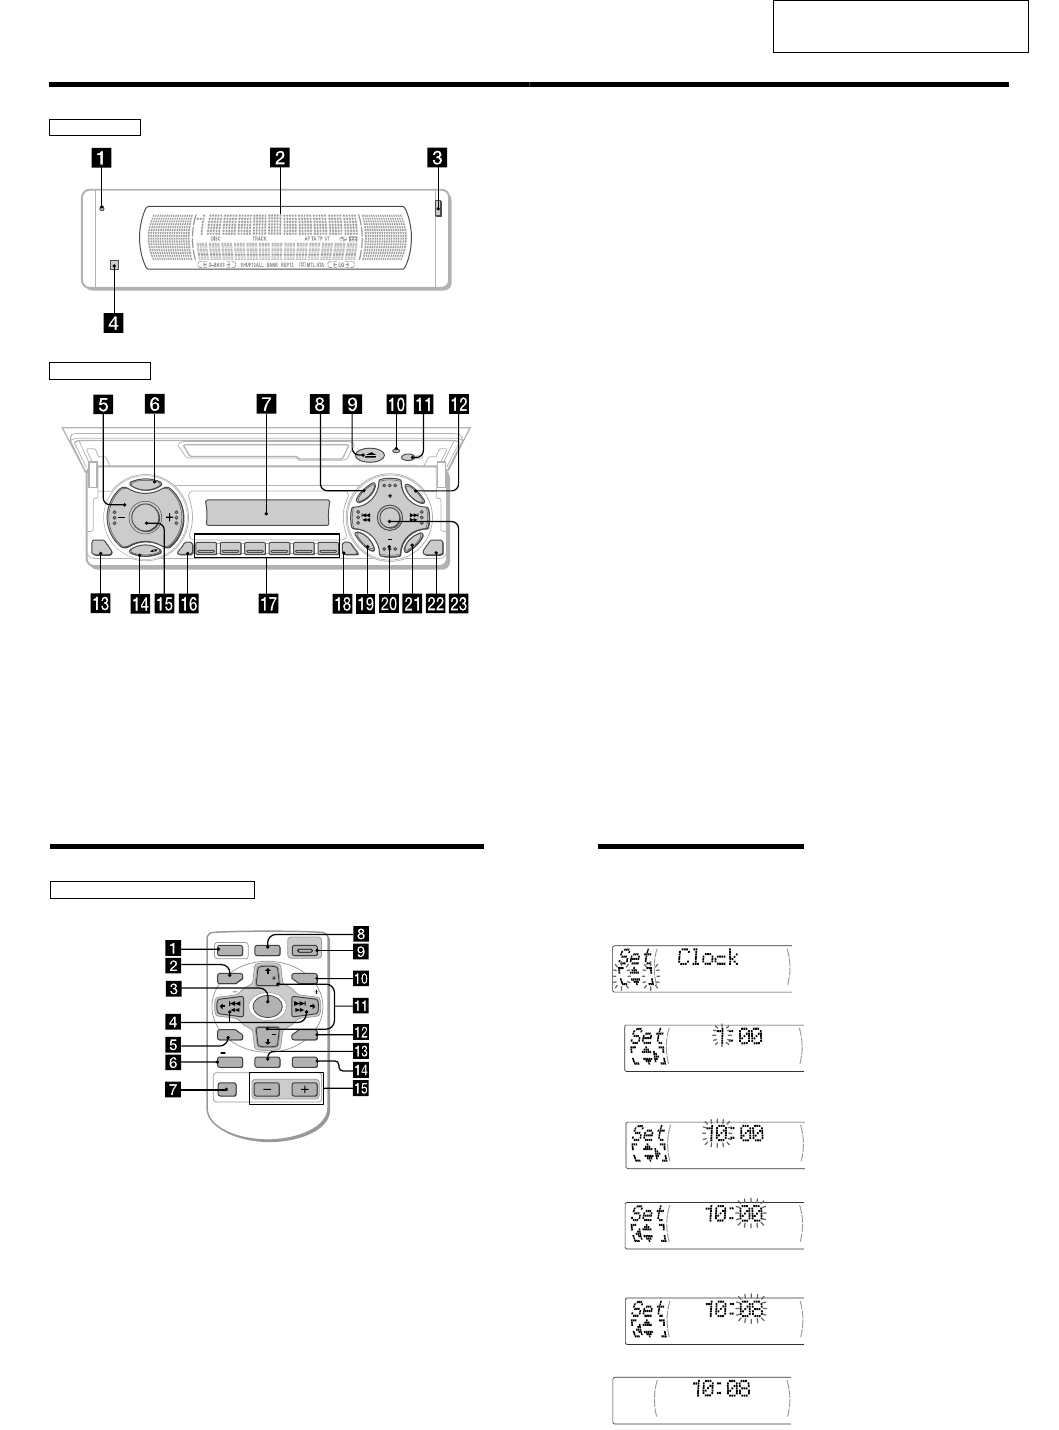
Location of controls
Refer to the pages listed for details.
1 OFF button 9, 11
2 MENU button 10, 12, 13, 14, 16, 18, 20,
24, 25, 27, 28, 29, 31, 33, 34, 36
3 SOURCE (TUNER/TAPE/CD/MD) button
9, 11, 13, 14, 25, 26, 30, 32, 33
4 </, (SEEK/AMS –/+) buttons
9, 10, 11, 12, 14, 16, 20, 23, 24, 25, 27, 28,
29, 31, 32, 34, 36
Automatic Music Sensor (./>)
11, 27
Manual search (m/M) 27
Seek 14
5 SOUND button 23
6 DSPL/PTY (display mode change/
programme type) button
19, 26, 27, 29, 36
7 ATT (attenuate) button 23
8 D-BASS button 24
9 OPEN/CLOSE button 11
0 LIST button 29, 30, 35
qa M/m (DISC/PRST +/–) buttons
9, 10, 12, 13, 14, 16, 18, 19, 20, 24, 25,
27, 28, 29, 30, 31, 32, 33, 34, 36
During radio reception:
Preset stations select 14
During CD/MD playback:
Disc change 27
qs ENTER button 10, 12, 13, 14, 16, 18, 19,
20, 24, 25, 27, 29, 30, 31, 33, 34, 35, 36
qd AF/TA button 16, 17, 18
qf MODE button
11, 12, 13, 14, 26, 30, 32, 33
During tape playback:
Playback direction change 11
During radio reception:
BAND select 13, 14
During CD/MD playback:
CD/MD unit select 26
qg VOL (Volume adjust) buttons
A unit turned off by pressing (OFF) for two
seconds cannot be operated with the card
remote commander unless (SOURCE) on the
unit is pressed or a cassette is inserted to
activate the unit first.
Card remote commander RM-X96
10
Tips
• You can use the convenient CT function to set
the clock automatically (page 20).
• When the D.Info mode is set to “ on,” the time is
always displayed (except for some functions of
SA mode) (page 23).
Setting the clock
The clock uses a 24-hour digital indication.
Example: To set the clock to 10:08
1 Press (MENU), then M or m repeatedly
until “Clock” appears.
1 Press (ENTER).
The hour indication flashes.
2 Press M or m to set the hour.
3 Press ,.
The minute indication flashes.
4 Press M or m to set the minute.
2 Press (ENTER).
The clock starts.