


13-EN
XM Radio Operation (Optional)
Storing of XM Channel Presets
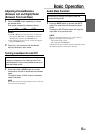
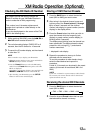
1 Press the BAND button to select the desired
band (XM1 or XM2) you want to store.
2 After tuning in the desired channel, press and
hold any one of the Preset buttons (1 through
6) for at least 2 seconds until the channel
number (sub display) or preset number (monitor
display) on the display blinks.
3 Press the Preset button into which you wish to
store the channel while the frequency (sub
display) or preset number (monitor display) is
blinking (within 5 seconds).
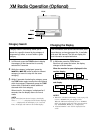
The display stops blinking once the channel has
been memorized. The display shows the band,
preset No. with a triangle (9*) and channel
number memorized.
* displayed in sub display
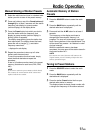
4 Repeat the procedure to store up to 5 other
channels onto the same band.
To use this procedure for other bands, simply
select the band desired and repeat the
procedure.
A total of 12 channels can be stored in the preset
memory (6 channels for each band; XM1 and
XM2).
NOTE
If you store a channel in a preset memory which already
has a station, the current channel will be cleared and
replaced with the new one.
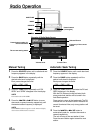
Receiving the stored XM Channels
1 Press the BAND button to select the desired
band (XM1 or XM2).
→ FM1 → FM2 → XM1 → XM2 → AM
2 Press the channel Preset button that has your
desired satellite channel in memory.
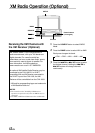
Checking the XM Radio ID Number
You need to provide XM with the unique XM
Radio ID number for your XM Radio Receiver in
order to subscribe to XM's programming.
This number is an 8 character alphanumeric
number that is printed on a lebel directly on the
XM Receiver.
It can also be displayed on the screen of the CVA-
1003 in the following way.
1 While receiving XM1/XM2, press the g DN or
f UP button to select channel "0."
2 The unit alternately displays "RADIO ID" for 2
seconds, then the ID number for 10 seconds.
3 To cancel the ID number display, set the channel
to other than "0."
NOTE
There is another way to display your ID number.
1. When the monitor display is open, press and hold the
SETUP button for at least 3 seconds.
2. Press the Preset 4 button to select the XM setting
mode. Press the Preset 4 button again to select ID.
ID No. is displayed.
When ID No, is more than 8 digits, press and hold the
g DN or f UP button to scroll the ID No.
3. After checking your ID number, press the SETUP
button to return to the normal display.