


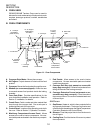
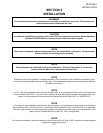
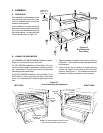

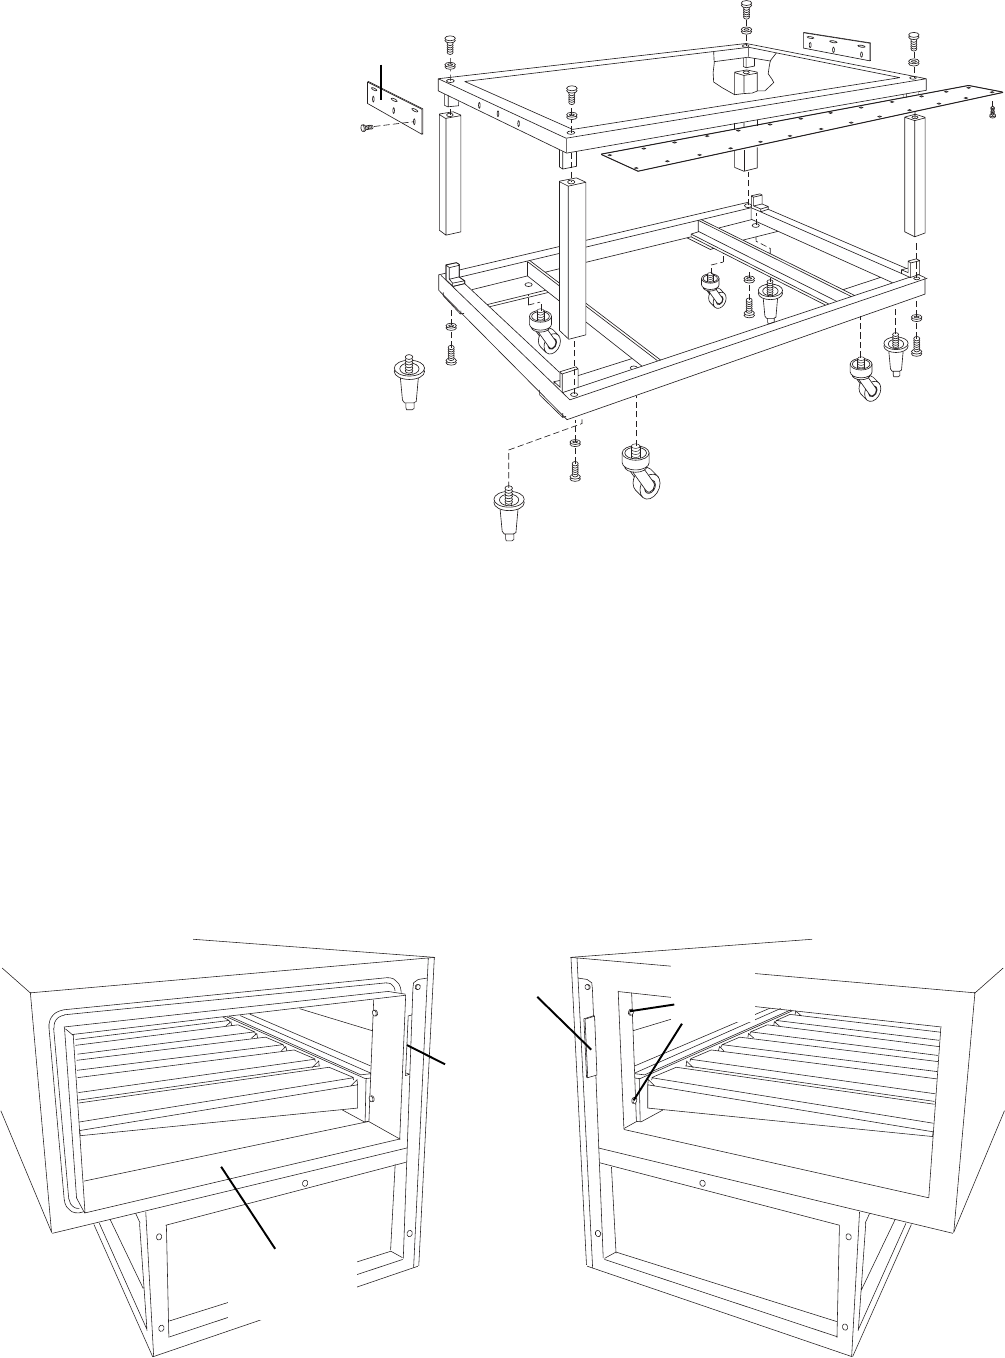
Figure 2-6
Exploded View -
Oven Stand
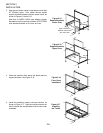
B. JOINING THE OVEN BODIES
For TANDEM and DOUBLE TANDEM installations, perform
Steps 1-8 in this section to join the ovens.
For TRI TANDEM installations, perform Steps 1-8 to join
two of the ovens together, and ensure that they are level;
then, repeat Steps 1-8 to join the third oven to the two that
have already been assembled.
For QUAD TANDEM installations, perform Steps 1-8 for
EACH PAIR of ovens, producing two sets of two joined
ovens. Do not assemble the center bridge section at this
time.
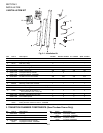
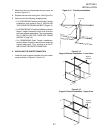
Figure 2-7
Oven Positioning and Alignment
Alignment
plate
Slot for
alignment
plate
Sealing gasket
assembly (pre-
mounted)
LEFT OVEN RIGHT OVEN
1. Determine the proper position of the ovens by referring
to Figure 2-7. Then, move the ovens to their approximate
final locations.
2. Check that the top and bottom air finger retaining
screws are present on all mating ends of the oven
sections. See Figure 2-7. The screws prevent the air
fingers from sliding in between the oven sections.
V. ASSEMBLY
A. OVEN STAND
If the installation includes upper ovens
mounted atop lower ovens, the ovens
must be stacked before joining the
tandem ovens together.
If the installation includes ovens that
are to be mounted on stands, assemble
the ovens to the stands before joining
the ovens together. An exploded view
of the stand is shown in Figure 2-6.
NOTE: The Sealing Gasket Assembly may be
pre-mounted to EITHER of the two ovens.
Air finger
retaining
screws
Attachment
plates inc. w/
upper oven