


14
Adjustments
Sliding Table Parallel to Blade
The position of the sliding table relative to the
machine is factory set, but should be checked
periodically as the saw receives use. To ensure
a clean cut, the sliding table must be set parallel
to the saw blade. If adjustment is ever needed,
proceed as follows:
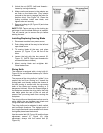
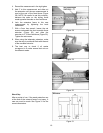
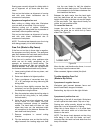
1. The bolts (B, Figure 20) are used to adjust
the height of the sliding table. They are pre-
set at the factory.
2. Use bolts (A, Figure 20) to correct
parallelism between sliding table and saw
blade.
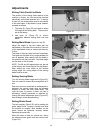
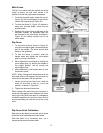
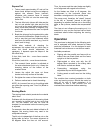
Setting Main Blade (Figures 21 and 22)
Adjust the height of the saw blade with the
handwheel on the side of the machine. One turn
of the handwheel raises or lowers the blade by
2.5mm.
The blade is tilted by using the front handwheel.
The blade can be tilted at any angle between 90
and 45 degrees. After setting, lock the blade in
this position with the lock lever. The blade angle
can be read on the tilt scale.
NOTE: The 90 and 45 degree stops are pre-set
at the factory and should require no adjustment.
After setting the main blade at the desired
cutting angle, the cutting depth of the scoring
blade must be re-set.
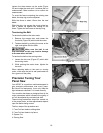
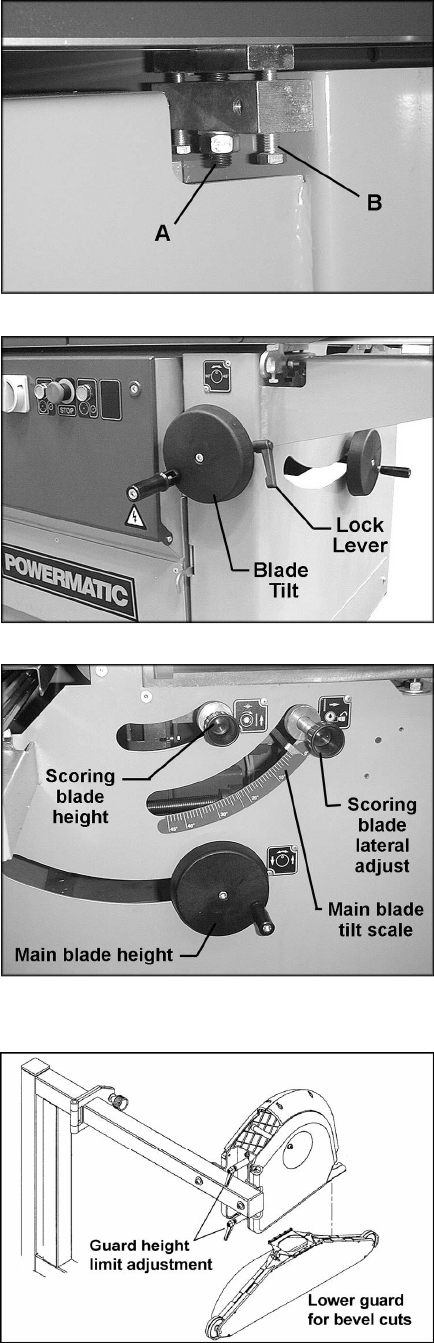
Setting Scoring Blade
Turn the scoring blade height knob (Figure 22).
One turn raises or lowers the scoring blade by 3
mm.
Each time the main saw blade is resharpened or
replaced, the scoring blade must be adjusted
laterally to match the main blade teeth. This
must be done to ensure a clean cut free of
splintering. Lateral movement is obtained by
turning the lateral adjustment knob (Figure 22),
then locking it at the desired setting.
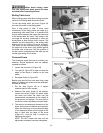
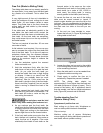
Setting Blade Guard
The two handles (Figure 23) are for setting the
guard height limits. Loosen a handle and slide
the bracket as needed. Both handles on the
guard should be tightened securely before
operating the panel saw.
When the arbor is tilted for a bevel cut, mount
the alternate lower guard with the convex back
(Figure 23).
Figure 20
Figure 21
Figure 22
Figure 23