


Chapter 2: Getting Started & Adjusting the Display 2-17
Offsetting the
Center
Offsetting the Center
3. Press the required zoom option soft key, INTO WIN or FROM WIN.
The soft keys are cleared, and the cursor has control of the zoom box that
indicates the area to be enlarged. This is indicated by the letters
ZMB in
inverse video, and the four-headed cursor symbol. The zoom box defaults
to its last-used position since power-on.
4. Use the trackpad to move the zoom box to the required area, and press
ENTER.
The selected area is shown in an enlarged format, either in the quarter-
screen Zoom window (
INTO WIN) or in the main window (FROM WIN).
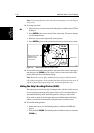
➤ To move the enlarged area in view in the window:
1. Move the cursor over the edge of the zoom box in the original radar picture,
until the letters
ZMB appear under the cursor.
2. Press
ENTER to take control of the zoom box. The cursor shape changes to
a four-way arrow.
3. Use the ltrackpad to move the zoom box over the required area.
4. Press
ENTER again to drop the zoom box, update the enlarged version, and
return the cursor to normal control.
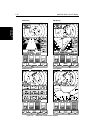
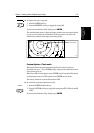
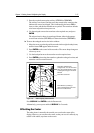
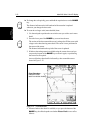
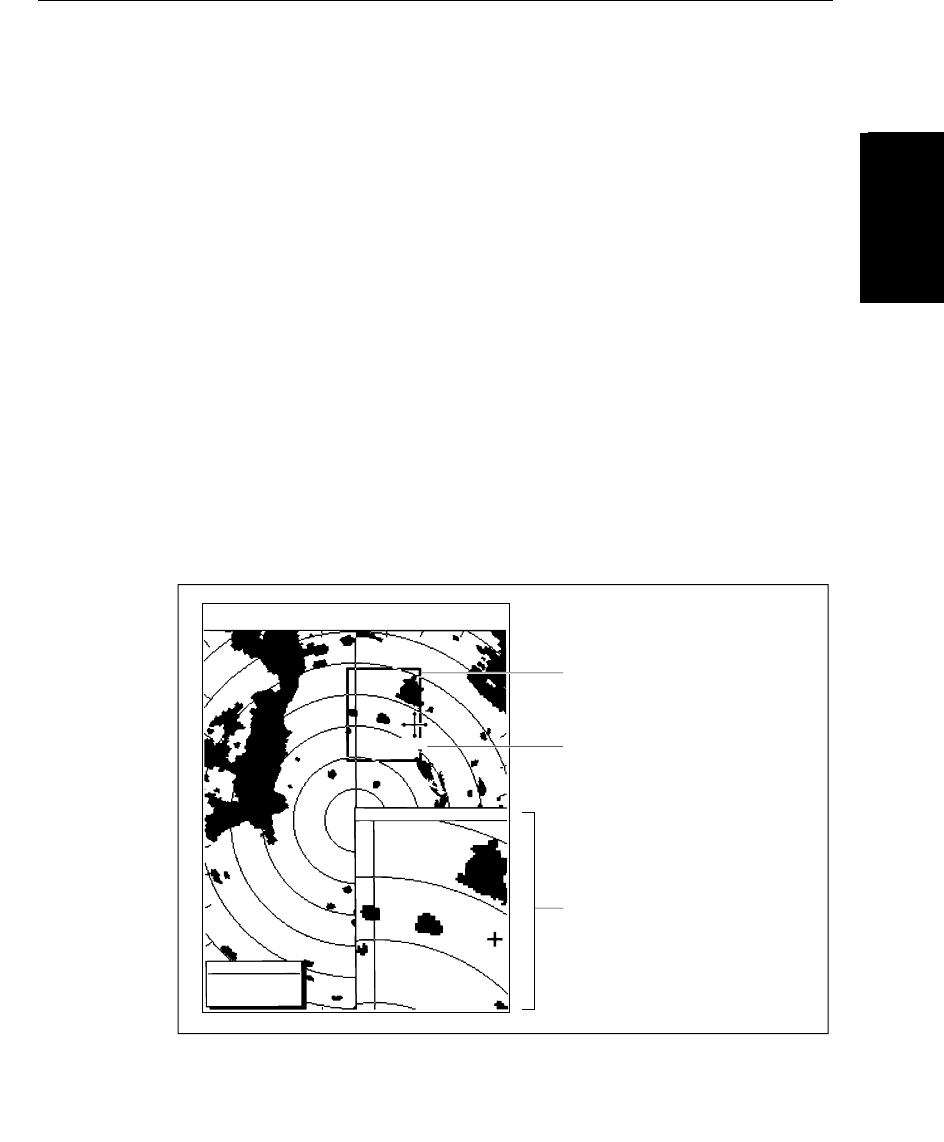
Figure 2-8: Radar Display Zoom Window
Press DISPLAY then ENTER to exit the Zoom mode.
Alternatively, you can press and hold
DISPLAY for 2 seconds.
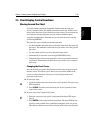
Offsetting the Center
The radar picture is normally shown with your vessel at the center of the
display. However, you can move the center, so that your vessel is offset by up
to 66% of the radius, anywhere on the screen.
D3972-2
Zoom Box, indicating the
enlarged area. You can move this
using the context-sensitive cursor,
to change the image in the Zoom
Window
Zoom Box cursor text
Zoom Window, providing a
times 2 enlargement of the area
shown in the Zoom Box
T
AUTO
IR
3nm
RINGS
1/2
H-UP
126°T
RADAR ZOOM ( x2 )
CURSOR
BRG
033° R
RNG
1.78nm
ZMB
RM RV3