


10
SONAMP
®
875D SE 8-CHANNEL AMPLIFIER
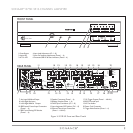
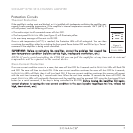
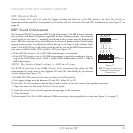
Input Sensitivity Adjustment
There are two ways to adjust the individual channel input sensitivity (volume) on the 875D SE:
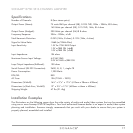
• The front panel has recessed adjustment potentiometers (see
Figure 9
). These can be adjusted
using a small screwdriver.
• Input sensitivity can also be adjusted by serial command via the amplifier’s RS-232 connection
(see page 14).
NOTE: When the 875D SE is being serial-controlled, serial V
OLUME
commands
will override the front-panel input sensitivity settings. However, if the front-
panel controls are manually adjusted after the serial V
OLUME
commands are
sent, they will override the volume set by the serial commands.
Speaker Connections
IIMMPPOORRTTAANNTT::
AAllwwaayyss
uunnpplluugg
tthhee
aammpplliiffiieerr’’ss
ppoowweerr
ccoorrdd
ffrroomm
tthhee
wwaallll
oouuttlleett
bbeeffoorree
mmaakkiinngg
ssoouurrccee
ssiiggnnaall
oorr
ssppeeaakkeerr
ccoonnnneeccttiioonnss..
Use Good Speaker Wire
For the best sound you should never use thin-gauge speaker wire – it will constrict the sound and diminish bass response.
We recommend that you use premium Sonance MediaLinQ speaker cable, which also complies with UL fire rating codes.
You may also experiment with audiophile brands of speaker cable and interconnects, but be sure to check local codes
governing wire that may be installed within walls or ceilings. Different brands of wire can have different characteristic
sounds and some may be more compatible with the sonic “signature” of your various audio system components.
Your Sonamp 875D SE is stable with any reputable brand of speaker wire or cable.
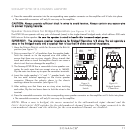
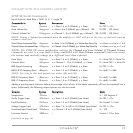
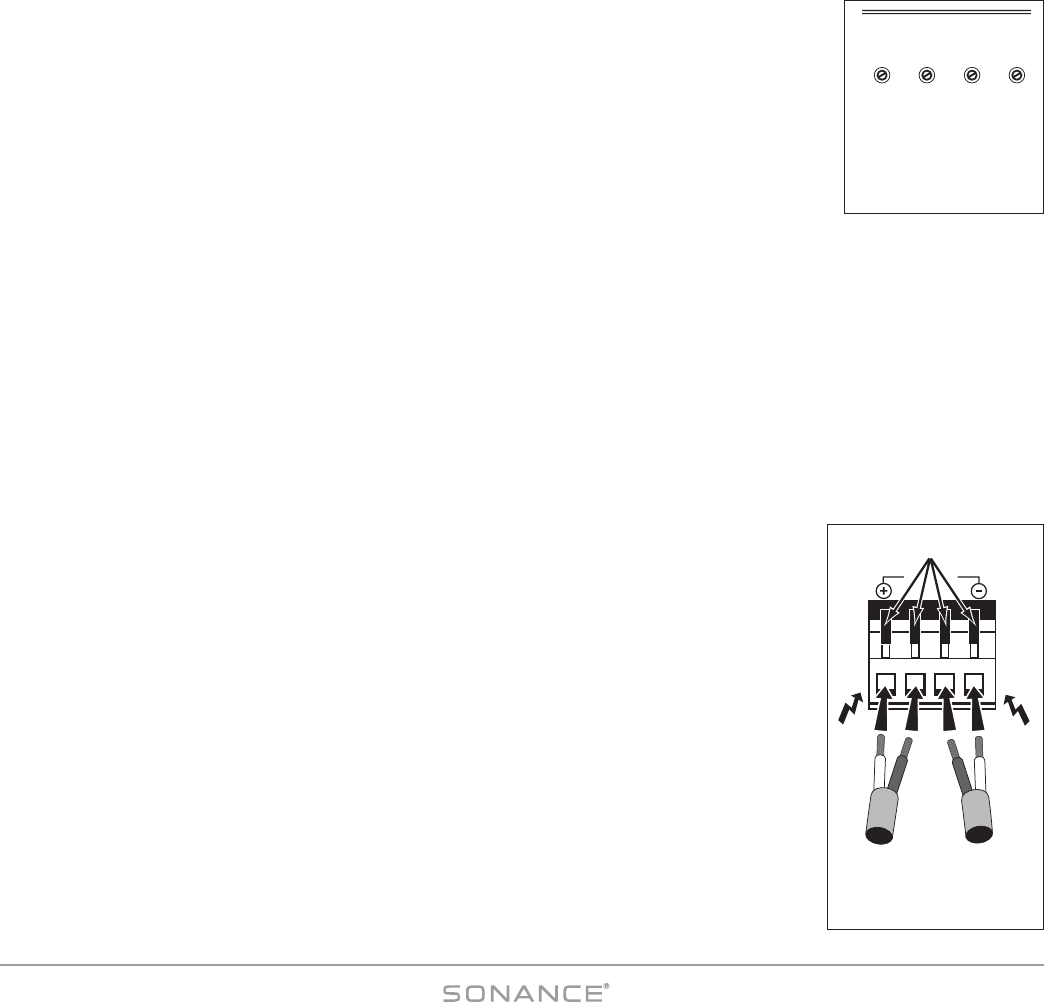
Speaker Connections for Stereo Operation (see Figure 10)
1. Run speaker wire from each speaker to the amplifier location. We recommend that you
mark each wire’s positive (‘+’) and negative (‘–’) leads, its channel (left or right) and which
zone it is from so that you can connect it to the proper speaker terminals.
2. Strip no more than ¼” of insulation from each speaker lead. Twist the strands or tin the
exposed wire with solder to ensure that there are no stray strands. (Stray strands that touch
each other or touch the amplifier chassis can cause a short-circuit that can damage the
amplifier.)
3. The Sonamp 875D SE has removable 4-wire speaker connectors (one for each zone) that
can accept wire up to 14AWG. Flip the four levers up to open the connector terminals.
4. Insert the exposed portions of the speaker wires into the terminal openings. Make sure to
insert the ‘+’ and ‘–’ leads into the correct openings, as indicated in the chassis markings
below
the connector.
5. After making sure that there are no stray wires touching each other, flip the four levers
down to lock the wires in the terminals.
+ 1 – – 2 +
BRIDGED
8Ω MIN
++
––
Flip all 4 Levers UP
Figure 10:
Stereo Speaker
Connections
LRLR
3 – 4 5 – 6
Figure 9:
Input Sensitivity
Adjustments
(Ch 3– 6 shown)