


E-1
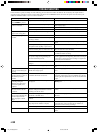
■ Required specifications of the HDD
Interface .................................................................... IDE/ATA type
Data Transfer Mode ........................................ PIO mode 0 to 4 and
Multi-word DMA mode 0 to 2 compatible
Size ............................................................................. 3.5-inch type
Capacity ..................................................................... 20 to 137 GB
■ Installation procedures
Before installation
• Turn off the power of this unit and unplug the AC power
cable from the wall outlet.
• Disconnect all the connections.
• Set the HDD to SLAVE (see description below).
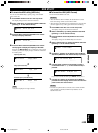
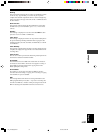
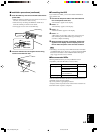
MASTER or SLAVE setting on the HDD
It is necessary to set the HDD to MASTER or SLAVE when
connecting the HDD to the component you plan to use. This
unit is designed to operate HDD when it is set to SLAVE.
Usually, setting procedure is written on the HDD itself.
INSTALLING THE HDD
There are some models that do not have a built-in hard disk drive (HDD) depending on the sales location. Please purchase a commercially
available HDD for internal use and install it on this unit correctly, referring to the instruction below.
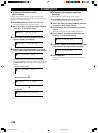
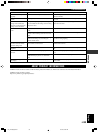
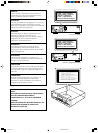
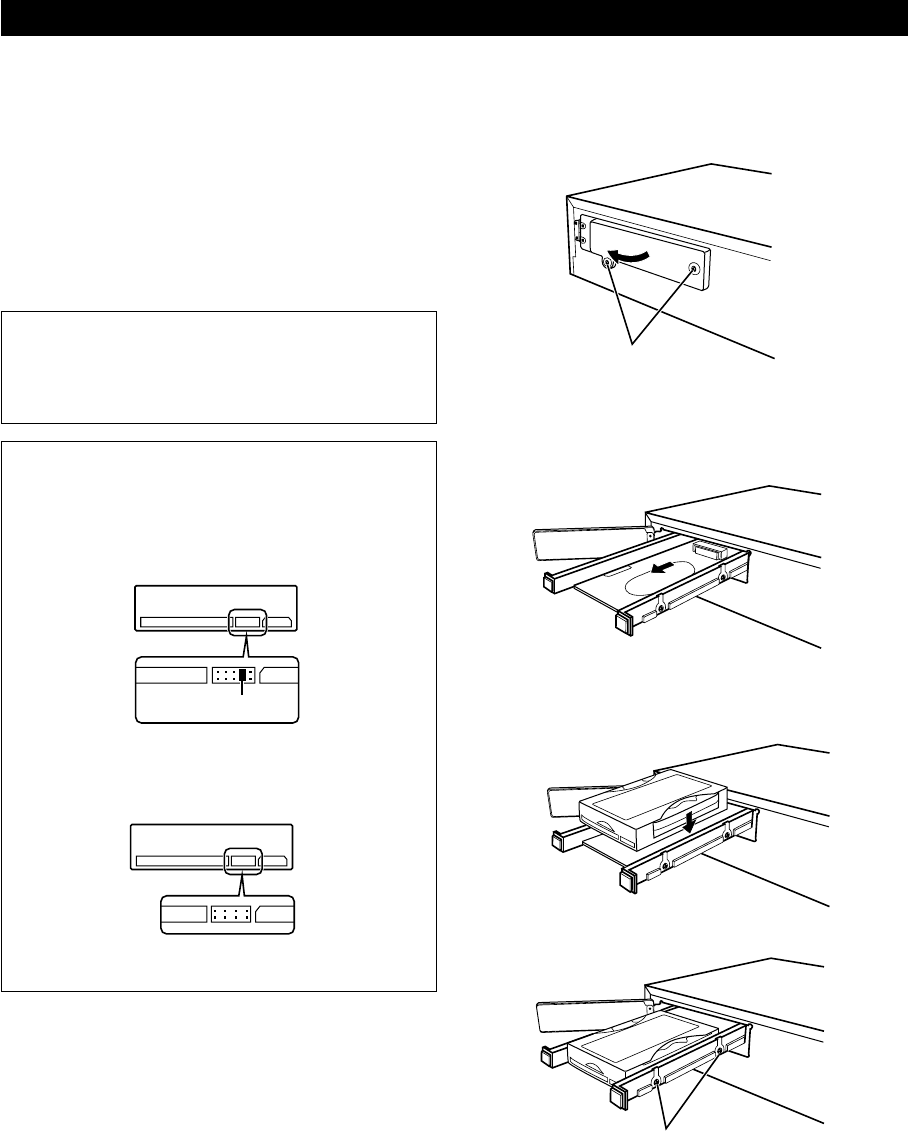
1. Loosen the two fixing screws on the HDD slot door
and open the HDD slot door.
2. Pull out the HDD tray.
• Be careful not to hook the IDE cable and the power cable
over the HDD tray.
• Do not apply the excessive force on the HDD tray.
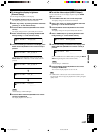
3. Place the HDD on the HDD tray.
• HDD is a very sensitive device. Be careful not to give any
shock to it.
4. Tighten the four fixing screws.
Fixing screws
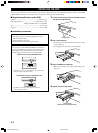
Example: When setting the WD800AB model
The HDD is set to slave by setting the plastic shunt at the second
position from right of the jumper switch.
Plastic shunt
Fixing screws
(Screws are on the opposite side)
Example: When setting the ST340810A model
The HDD is set to slave by setting no plastic shunt at any
position of the jumper switch.
999_HD1300(HDD)_GB 02.6.28, 9:19 AM2