


28-EN
i-Personalize™ Operation
About i-Personalize™
You can download data (from Alpine’s website) to a CD-R, and
download and store the data to the CDA-9855R/CDA-9853R.
To start i-Personalize, access the URL below and follow the on-screen
instructions.
http://www.alpine.com or http://www.alpine-europe.com
or http://www.alpine.com.au
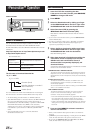
Downloadable data
The file name of download data shall be
“A_U*****.MP3.”
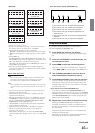
A_U∗∗∗∗∗.MP3
Extender (fixed)
Identifier (alphabet or number 5
letters maximum)
Header (fixed)
You can create a file name via the website. Do not change a
file name once it has been created. Malfunction may result.
•For downloading procedure details, see ALPINE’s Web site.
• If the HDA-5460 model is connected to this unit, the HDA-5460 hard
disc can be used. Data that has been stored in the hard disc is
downloaded by the “Data Downloading” operation to CDA-9855R/
CDA-9853R. The hard disc drive (HDD) can be selected by
switching the source in step 1. For details on how to download data
to the hard disc, refer to the Owner’s Manual of the HDA-5460
model.
• If an external audio processor is connected, data that is
downloaded cannot be used.
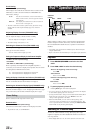
Data Downloading
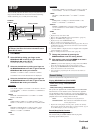
1
Insert the CD-R disc containing the data.
If the source is not the CD mode, press SOURCE/
POWER to change to CD mode.
2
Press MENU.
3
Select the Download mode by sliding your finger
on the GlideTouch bar to the left or right. Press
the GlideTouch bar under the Download mode.
4
Select Download (YES) by pressing the
GlideTouch bar under Download (YES).
Data search of the disc starts and the first file name is
displayed.
• If you want to cancel the data search, press the GlideTouch bar
under CANCEL (NO).
• If a file is not found by a data search, “NO FILE” is indicated.
• The “NO FILE” display will automatically disappear if no
operation is performed for 5 seconds.
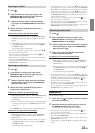
5
Select the file to download by sliding your finger
on the GlideTouch bar to the left or right. Press
the GlideTouch bar under the desired file.
Data downloading starts.
6
When data download is finished successfully, the
confirmation screen is displayed (for the CDA-
9853R model, each confirmation screen of
download data is sequentially displayed), and
download finishes.
Successfully downloaded items are indicated as checked
boxes on the confirmation screen.
PARAMETRIC EQ or GRAPHIC EQ data
*
The data is memorized in Preset 6 of Parametric EQ mode or
Graphic EQ mode. The memorized data settings in Preset 6
(Parametric EQ mode or Graphic EQ mode) are automatically
applied.
X-OVER (Crossover) data
The data is memorized in Preset 6 of X-OVER mode. The
memorized data settings in Preset 6 (X-OVER mode) are
automatically applied.
You cannot download the data if the setting of the 2WAY/3WAY
switch is not suitable for the data.
TIME CORRECTION data
The data is memorized in Preset 6 of the Time correction
mode. The memorized data settings in Preset 6 (Time
Correction mode) are automatically applied.
* If the downloaded parametric EQ or graphic EQ differs from
the current EQ mode, Preset 6 setting will not change
automatically. Change the EQ mode and recall Preset 6.
* If data is downloaded while setting DEFEAT to ON, Preset 6
setting will not change automatically. Recall Preset 6 in the
EQ mode.
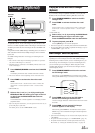
7
Press and hold MENU for at least 2 seconds to
return to normal mode.
• When you download the data again, the data is overwritten in
Preset 6.
• If MENU is pressed while adjusting or setting items in the MENU
mode, the unit will return to the previous selection screen.
• By pressing the GlideTouch bar under RETURN in the MENU
mode, the unit returns to the normal mode.
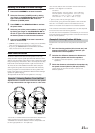
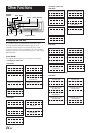
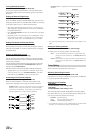
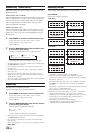
Data is memorized in Preset 6 of the
Parametric EQ Mode or Graphic EQ
mode.
Data is memorized in Preset 6 of the
Time Correction Mode.
Data is memorized in Preset 6 of the
crossover mode.
Parametric
equalizer or
Graphic equalizer
Time correction
Crossover
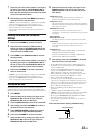
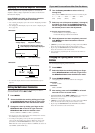
SOURCE/POWER
GlideTouch barMENU