


29-EN
SETUP
You can flexibly customize the unit to suit your own preferences and
usage. From the SETUP menu, choose from Sound Customizing,
Visual Customizing, etc., to make your desired setting.
A typical SETUP procedure is shown in steps 1 to 4
as follows. See below for further information about
each SETUP menu.
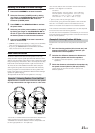
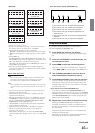
1
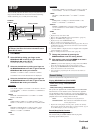
Press MENU.
2
Select SETUP by sliding your finger on the
GlideTouch bar to the left or right. Press the
GlideTouch bar under SETUP.
The main SETUP menu is displayed.
3
Select the desired item by sliding your finger on
the GlideTouch bar to the left or right. Press the
GlideTouch bar under your selection.
GENERAL ↔ TUNER ↔ AUDIO ↔ DISPLAY ↔ DEMO
The SETUP menu of the selected item is displayed.
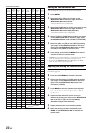
4
Select the desired item by sliding your finger on
the GlideTouch bar to the left or right. Press the
GlideTouch bar under your selection.
CDA-9855R:
GENERAL
PLAY MODE ↔ BEEP ↔ INT MUTE ↔ INT AUDIO ↔ AUX IN
↔ (AUX NAME)*
1
↔ D-AUX ↔ POWER-IC ↔ STEERING ↔
PLAY MODE
TUNER
FM LEVEL ↔ RDS REGIONAL*
2
↔ PI SEEK*
3
↔ TUNER
MODE ↔ FM LEVEL
AUDIO
SUBWOOFER ↔ SUBW CH ↔ SUBW SYSTEM*
4
↔ EQ
MODE*
5
↔ TW SETUP*
6
↔ A.PROC TYPE ↔ SUBWOOFER
DISP
DIMMER ↔ DIMMER LEVEL ↔ SCROLL TYPE ↔ TEXT
SCROLL ↔ FONT SELECT ↔ A-LINK TEMP*
7
↔ BGV
SELECT ↔ T.CORR*
8
↔ DIMMER
DEMO
DEMO
CDA-9853R:
GENERAL
PLAY MODE ↔ BEEP ↔ INT MUTE ↔ INT AUDIO ↔ AUX IN
↔ (AUX NAME)*
1
↔ D-AUX ↔ POWER-IC ↔ STEERING
TUNER
FM LEVEL ↔ RDS REGIONAL*
2
↔ PI SEEK*
3
↔ TUNER
MODE
AUDIO
SUBWOOFER ↔ SUBW CH ↔ SUBW SYSTEM*
4
↔ EQ
MODE*
5
↔ TW SETUP*
6
↔ AP SELECT
DISPLAY
DIMMER ↔ DIMMER LEV ↔ SCROLL TYPE ↔ TEXT SCROLL
↔ LCD CONTRAST ↔ A-LINK TEMP*
7
↔ AUDIO LEVEL ↔
T.CORR PAR*
8
DEMO
DEMO
*
1
Displayed only when AUX is ON.
*
2
Refer to “Receiving RDS Regional (Local) Stations” (page 10).
*
3
Refer to “PI SEEK Setting” (page 11).
*
4
Displayed only when SUBWOOFER is ON.
*
5
Refer to “Setting User's EQ mode” (page 17).
*
6
Displayed only when the 2WAY/3WAY switch (pages 42 to 44) is set
to 3WAY. This function cannot be selected when an external audio
processor is connected.
*
7
“A-LINK TEMP” is displayed when an Amplifier Link compatible
external amplifier is connected.
*
8
Refer to “Setting the Time Correction Unit” (page 22).
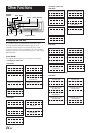
5
Change the parameter by pressing the
GlideTouch bar under the setting desired.
6
After setting, press and hold MENU for at least 2
seconds to return to normal mode.
• If MENU is pressed while adjusting or setting items in the MENU
mode, the unit will return to the previous selection screen.
• By pressing the GlideTouch bar under RETURN in the MENU
mode, the unit returns to the normal mode.
• If no operation is performed for 60 seconds, the unit returns to
normal mode.
General Setting
General is selected on the setup main menu in step 3.
Playing MP3/WMA Data (PLAY MODE)
CDA-9855R:
CD-DA (Initial setting) / CDDA&MP3/WMA
CDA-9853R:
CDDA (Initial setting) / CDDA&MP3/WMA
This product can playback CDs containing both CD and MP3/WMA
data. However, in some situations (some enhanced CDs), playback
may be difficult. For these special cases, you can select playback of
CD data only. When a disc contains both CD or the MP3/WMA data,
playback starts from the CD data portion of the disc.
CDDA : Only CD data can be played back.
CDDA&MP3/WMA : Both CD data and MP3/WMA file tracks
can be played back.
•Perform this setting before inserting a disc. If a disc has already
been inserted, perform the setting after you remove the disc. (If you
use an MP3 changer, you have to change discs.)
Sound (Beep) Guide Function
BEEP ON (Initial setting) / BEEP OFF
This function will give audible feedback with varying tones
depending upon the button pressed.
Continued
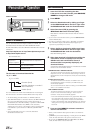
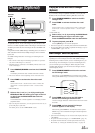
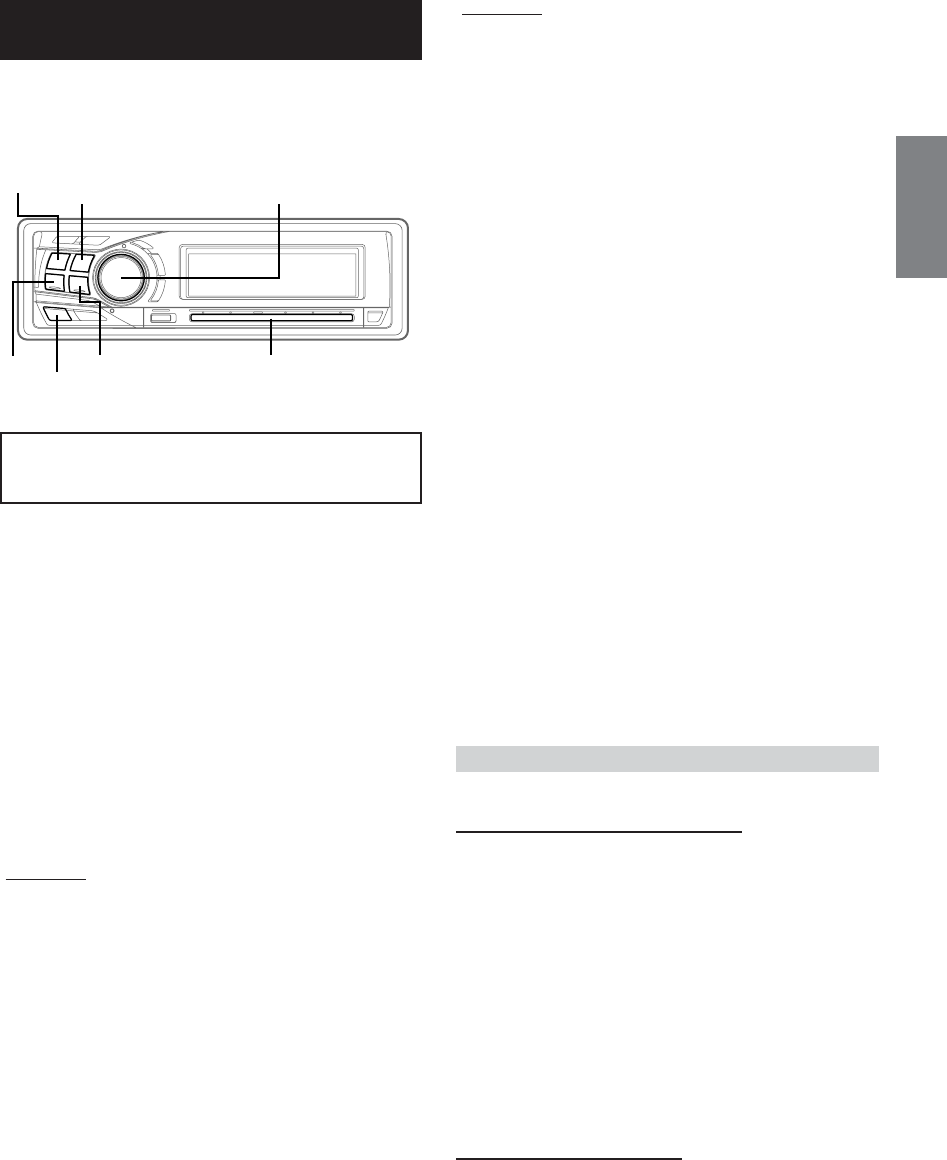
BAND
SOURCE/
POWER
g
f
GlideTouch bar
Rotary encoder
MENU