


BASIC OPERATIONS (CONT.)
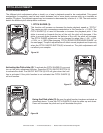
Figure 23
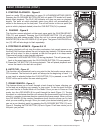
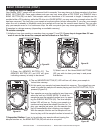
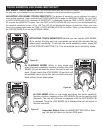
Figure 22
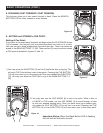
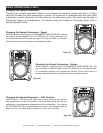
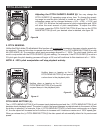
Figure 24
6) Your sample can now be recalled at any time even
when the unit is in PAUSE MODE. To recall the
sample be sure the sample function is on, by press-
ing the SAMPLE BUTTON (25). The blue sample
button LED will turn on. To play your sample in a
continuos loop leave the sample function on. To
play your sample just once, turn the sample func-
tion off immediately after initiating your sample.
With the sample function on the sample will con-
tinue to play until the sample function is turned off.
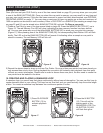
7) Important Notice: If you try to activate your sample without turning the
sample function on, the BANK BUTTON (26) will act as a cue point!
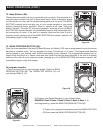
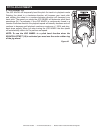
Figure 25
©American Audio® - www.AmericanAudio.us - Radius 1000™ Instruction Manual Page 23
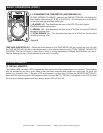
2) Press the MEMORY BUTTON (27). The
MEMORY BUTTON (27) red LED will glow
indicating memory is ready to be stored.
3) Select one of the three BANK BUTTONS
(26) you wish to store your loop in and press
that button.
11. Using the Built In Sampler:
Your Radius 1000™ comes with an advanced built in sampler. You may store up to three samples in the three
BANK BUTTONS (26). Once again please note you may only store either a CUE POINT or a SAMPLE into a
BANK BUTTON (26), not both. Your sample can be a maximum of 5.5 seconds in length. A sample can be
recalled while a CD is playing, while the CD drive is in PAUSE MODE, you may even play a sample when the CD
has been removed. You may play your sample at anytime without music interruption. If you play your sample
when the unit is already in playback mode your sample will over lap the current music source. You can also
play your sample once or in a continuous loop. As with cue points you may store approximately 1500 (500 x
3) samples in a drives memory (depending on available memory).
To create a sample:
1) Initialize a loop (see creating a seamless loop on page 21 and 22). If your loop is longer than 5.5 sec-
onds it can not be stored as a sample and will stored as a Cue Point.
4) The red MEMORY BUTTON (27) LED will turn off, when your sample is
locked into memory.
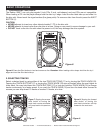
5) At this point your sample has been stored into memory. The original loop you
used to create the sample will remain playing until the OUT BUTTON (15) is
pressed (Figure 24).