


ENGLISH 57
CONNECTION/INSTALLATION
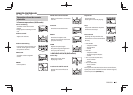
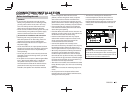
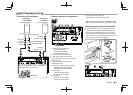
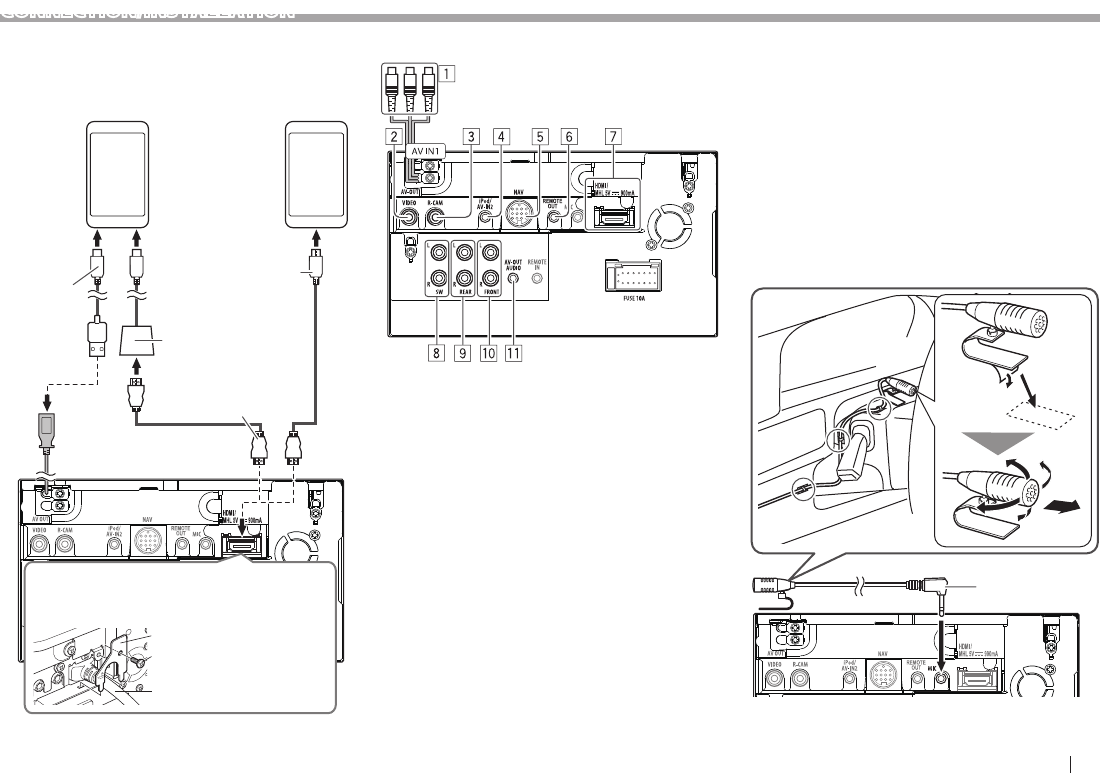
❏ Connecting a Smartphone
Android, etc.
(with HDMI)
(commercially available)
Android, etc.
(with MHL)
(commercially available)
Micro USB
Micro HDMI (Type D)
Micro HDMI to HDMI adapter
(commercially available)
KCA-HD100
(optional accessory)
Micro USB to
USB cable
(commercially
available)
KCA-MH100
(optional accessory)
HDMI/MHL cable
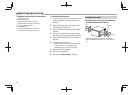
8
9
If you connect the HDMI/MHL connector, fix the HDMI/MHL
cable using the fixture (8) and screw (9).
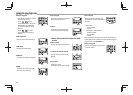
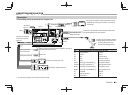
❏ Connecting external components
1 Audio Video input (AV-IN1)
• Visual input (Yellow)
• Audio left input (White)
• Audio right input (Red)
2 AV-OUT/Video output (Yellow)
3 Rear view camera input (Yellow)
4 iPod/Audio Visual input (iPod/AV-IN2)*
5 NAVI I/F input
6 TV tuner remote control output
7 HDMI/MHL input
8 Subwoofer preout (monaural output)
• Subwoofer left output (White)
• Subwoofer right output (Red)
9 Rear preout
• Audio left output (White)
• Audio right output (Red)
p Front preout
• Audio left output (White)
• Audio right output (Red)
q Audio output (ø3.5 mini jack)
Resistance-free stereo type mini plug
* When connecting the component to play on “AV-IN1” or “AV-
IN2”, use the Audio and Video cable CA-C3AV (optional accessory).
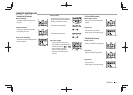
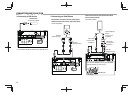
❏ Connecting microphone for Bluetooth
Connect the microphone (6) to the MIC terminal.
• To install the microphone, peel off the adhesive
tape, fix on the installation position, then adjust
the direction of the microphone to face the driver.
After installing, fix the microphone cable to the car
with clamps (commercially available).
6