


2
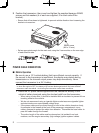
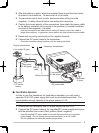
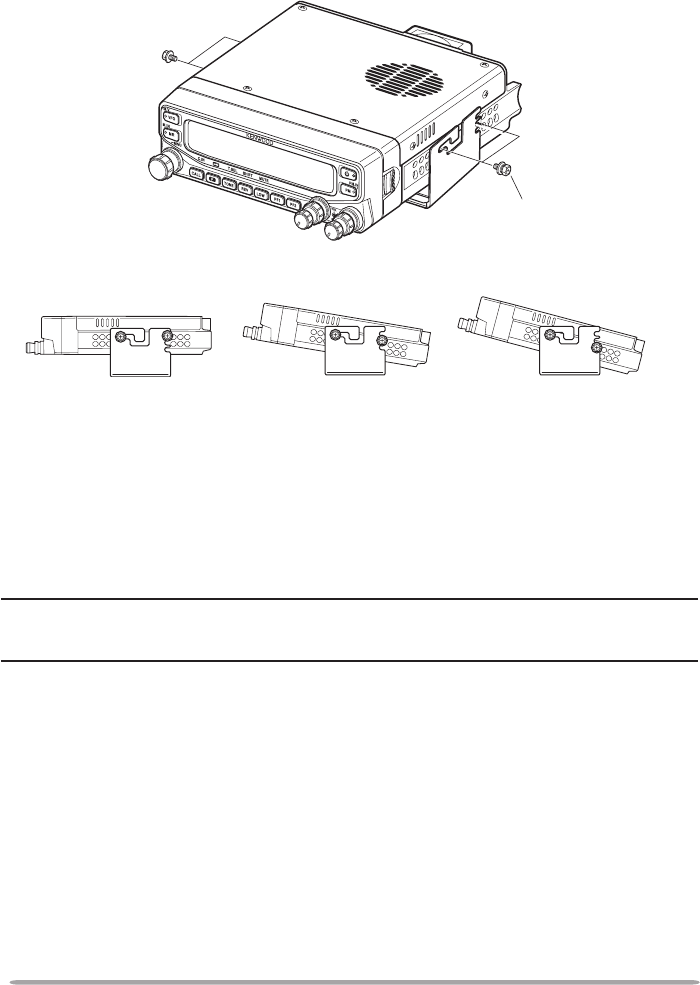
2 Position the transceiver, then insert and tighten the supplied hexagon SEMS
screws and flat washers (4 of each are supplied, 2 for each side of the
bracket).
• Ensure that all hardware is tightened, to prevent vehicle vibration from loosening the
bracket or transceiver.
• Set an appropriate angle for the main unit, using the 3 screw slots on the rear edge
of each bracket side.
POWER CABLE CONNECTION
n Mobile Operation
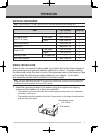
Be sure to use a 12 V vehicle battery that has sufficient current capacity. If
the current to the transceiver is insufficient, the display may darken during
transmission or the transmit output power may drop excessively. Never
connect the transceiver to a 24 V battery
Note: If you use the transceiver for a long period when the vehicle battery is not fully charged
or when the engine is OFF, the battery may become discharged and will not have sufficient
reserves to start the vehicle. Avoid using the transceiver under these conditions.
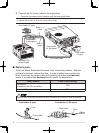
1 Route the DC power cable supplied with the transceiver directly to the
vehicle’s battery terminals using the shortest path from the transceiver.
• When using a noise filter, it should be installed with an insulator to prevent it from
touching metal on the vehicle.
• We do not recommend using a cigarette lighter socket as some cigarette lighter
sockets introduce an unacceptable voltage drop.
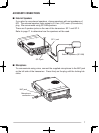
• If the power cable must be routed through a hole in the vehicle chassis or body,
for example in the firewall at the front of the passenger compartment, use a
rubber grommet to protect the cable from abrasion. Dismantle the fuse holder to
pass the cable through the firewall.
• The entire length of the cable must be dressed so it is isolated from heat,
moisture, and the engine secondary (high voltage) ignition system/ cables.
SEMS screw
(M4 x 10 mm)