


Black plate (29,1)
<CRD3740-A>29
CTM1 (CUSTOM 1)CTM2 (CUSTOM 2)
FLAT (FLAT)
# You can also select an equalizer curve by
pressing EQ.
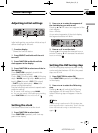
Adjusting equalizer curves
The factory supplied equalizer curves, with the
exception of FLAT (FLAT), can be adjusted to a
fine degree (nuance control).
1 Recall an equalizer curve.
See Recalling equalizer curves on the previous
page.
2 Press a or b to adjust the equalizer
curve.
Each press of a or b increases or decreases
the equalizer curve respectively.
+6 6 is displayed as the equalizer curve is
increased or decreased.
# The actual range of the adjustments are differ-
ent depending on which equalizer curve is se-
lected.
# The equalizer curve with all frequencies set to
0 cannot be adjusted.
Adjusting 9-band graphic equalizer
For CTM1 (CUSTOM 1) and
CTM2 (CUSTOM 2) equalizer curves, you can
adjust the level of each band.
! A separate CTM1 (CUSTOM 1) curve can
be created for each source. If you make ad-
justments when a curve other than
CTM2 (CUSTOM 2) is selected, the equali-
zer curve settings will be memorized in
CTM1 (CUSTOM 1).
! A CTM2 (CUSTOM 2) curve can be created
common to all sources. If you make adjust-
ments when the CTM2 (CUSTOM 2) curve
is selected, the CTM2 (CUSTOM 2) curve
will be updated.
1 Recall the equalizer curve you want to
adjust.
See Recalling equalizer curves on the previous
page.
2 Press DSP to select 9-band graphic
equalizer.
Press DSP until 50 appears in the display.
# If 9-band graphic equalizer has been pre-
viously adjusted, the frequency of that previously
selected will be displayed instead of 50.
3 Press c or d to select the equalizer
band to adjust.
Each press of c or d selects equalizer bands
in the following order:
501002004008001.6 k3.15 k
6.3 k12.5 k (Hz)
4 Press a or b to adjust the level of the
equalizer band.
Each press of a or b increases or decreases
the level of the equalization band.
+6 6 is displayed as the level is increased
or decreased.
# You can then select another band and adjust
the level.
Using the position selector
One way to assure a more natural sound is to
clearly position the stereo image, putting you
right in the center of the sound field. The posi-
tion selector adjusts the volume level of sound
from each speaker to match seat positions
and the number of people in the car and lets
you recall settings at the touch of a button.
Here is a list of the positions:
Button Display Indicator Position
a Front
Front seat
b All
All seats
Digital Signal Processor
En
29
English
Section
08
HHHHHHHHHHHHHH