Black plate (19,1)
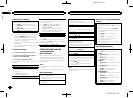
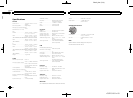
Setting Parental Control
The SiriusXM Parental Control feature allows
you to control access to channels thatyou con-
sider inappropriate for younger listener.
When enabled, the Parental Control feature re-
quires you to enter a passcode totune to the
locked channels.
Locked channels are indicated by a CHLOCKED
symbol.
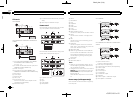
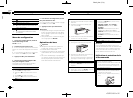
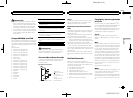
1 Display PARENTAL CTRL.
2 Press M.C. to display the passcodeinput
screen.
The default passcode is 0000.
3 Turn M.C. to select a number.
4 Press M.C. to move thecursor to the next
position.
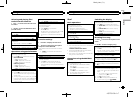
5 After inputting passcode, press M.C.
You will be able to proceed to the next stepif you
enter the correct passcode.
6 Turn M.C. to select the function.
Once selected, the following functions can be
adjusted.
LOCKED CH(locking the channels)
Access tothe current broadcast channelcan be
locked. You willneed to enter yourpasscode in
order toaccess a lockedchannel.
1 Press M.C. toselect the desiredsetting.
2 Press M.C. toturn the lockon or off.
CLEAR ALL(clearing all channellocks)
You can clearthe locks fromall locked channels
at thesame time.
1 Press M.C. toselect the desiredsetting.
2 TurnM.C. to switchto YES.
3 Press M.C.
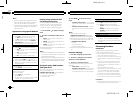
EDIT CODE(changing the passcode)
You can changeyour passcode.
1 Press M.C. todisplay the settingmode.
Enter your current passcode.
! The defaultpasscode is 0000.
2 TurnM.C. to selecta number.
3 Press M.C. tomove the cursorto the nextposi-
tion.
4 After inputting passcode,press M.C.
Enter anew passcode.
5 TurnM.C. to selecta number.
6 Press M.C. tomove the cursorto the nextposi-
tion.
7 After inputting passcode,press M.C.
The newpasscode is saved.
Resetting to default
The SiriusXM settings will be reset tothe default
settings.
For details,refer to SXM RESET (SiriusXM Reset)
on page 17.
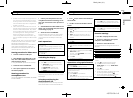
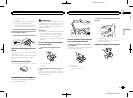
Connections
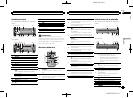
WARNING
! Use speakers over 50 W (output value)and
between 4 W to 8 W (impedance value).Do
not use 1 W to 3 W speakers forthis unit.
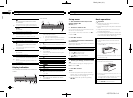
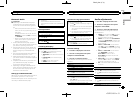
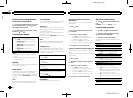
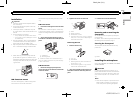
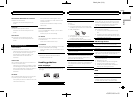
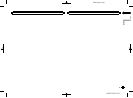
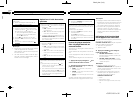
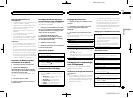
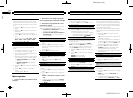
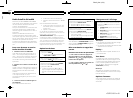
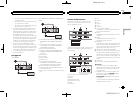
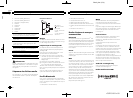
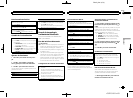
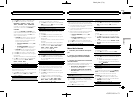
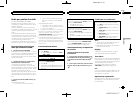
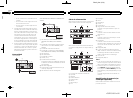
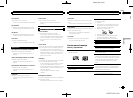
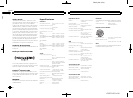
! The black cable is ground. When installing
this unit or power amp (sold separately),
make sure to connect the ground wirefirst.
Ensure that the ground wire is properly con-
nected to metal parts of the car’s body. The
ground wire of the power amp and the oneof
this unit or any other device must becon-
nected to the car separately with different
screws. If the screw for the ground wire loos-
ens or falls out, it could result in fire, genera-
tion of smoke or malfunction.
Ground wire
Metal parts of car’s body
POWER AMP
Other devices
(Another electronic
device in the car)
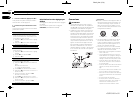
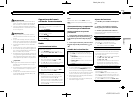
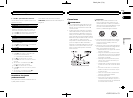
Important
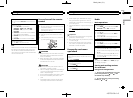
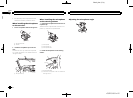
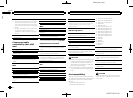
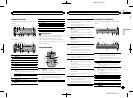
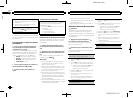
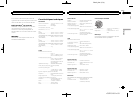
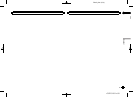
! When installing this unit in a vehicle without
an ACC (accessory) position on the ignition
switch, failure to connect the red cableto the
terminal that detectsoperation of the ignition
key may result in battery drain.
O
N
S
T
A
R
T
O
F
F
ACC position NoACC position
! Use this unit with a 12-volt battery and nega-
tive grounding only. Failureto do so may re-
sult in a fire or malfunction.
! To prevent a short-circuit, overheatingor mal-
function, be sure to follow thedirections
below.
— Disconnect thenegative terminal ofthe bat-
tery before installation.
— Secure thewiring with cableclamps or adhe-
sive tape.Wrap adhesivetape around wiring
that comesinto contact withmetal parts to
protect thewiring.
— Placeall cables away frommoving parts,
such asthe shift lever andseat rails.
— Placeall cables away fromhot places, such
as nearthe heater outlet.
— Donot connect theyellow cable tothe battery
by passingit through thehole to the engine
compartment.
— Coverany disconnected cable connectors
with insulatingtape.
— Do notshorten any cables.
— Nevercut the insulation ofthe power cableof
this unitin order to sharethe power with
other devices.The current capacityof the
cable islimited.
— Usea fuse of therating prescribed.
— Never wirethe negative speakercable directly
to ground.
— Neverband together negative cablesof multi-
ple speakers.
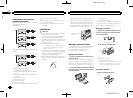
! When this unit is on, control signalsare sent
through the blue/white cable. Connect this
cable to the system remote control of anex-
ternal power amp or the vehicle’s auto-anten-
na relay control terminal (max. 300mA
12VDC). If the vehicle is equipped with a
glass antenna, connect it to the antenna
booster power supply terminal.
! Never connect the blue/white cable tothe
power terminal of an external power amp.
Also, never connect it to thepower terminal
of the auto antenna. Doing so may result in
battery drain or a malfunction.
English
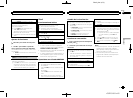
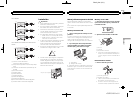
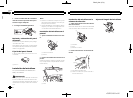
Available accessories
19
Section
Installation
En
03
04
<QRD3195-A>19