


Black plate (4,1)
i
DEH-X6600BS/DEH-X6600BT/DEH-X66BT/
DEH-X4600BT
Press to enda call, reject an incomingcall,
or reject a callwaiting while on another call.
AUDIO
DEH-X3600S
Press to selectan audio function.
j
DISP/SCRL
Press to selectdifferent displays.
Press and holdto turn dimmer on oroff.
k
e
Press to pauseor resume playback.
l
DEH-X6600BS/DEH-X6600BT/DEH-X66BT/
DEH-X4600BT
Press to starttalking to the caller while
using the phone.
FUNCTION
DEH-X3600S
Press to selectfunctions.
m
LIST/ENTER
Press to displaythe list depending on the
source.
While in the operatingmenu, press to con-
trol functions.
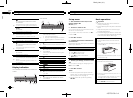
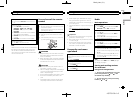
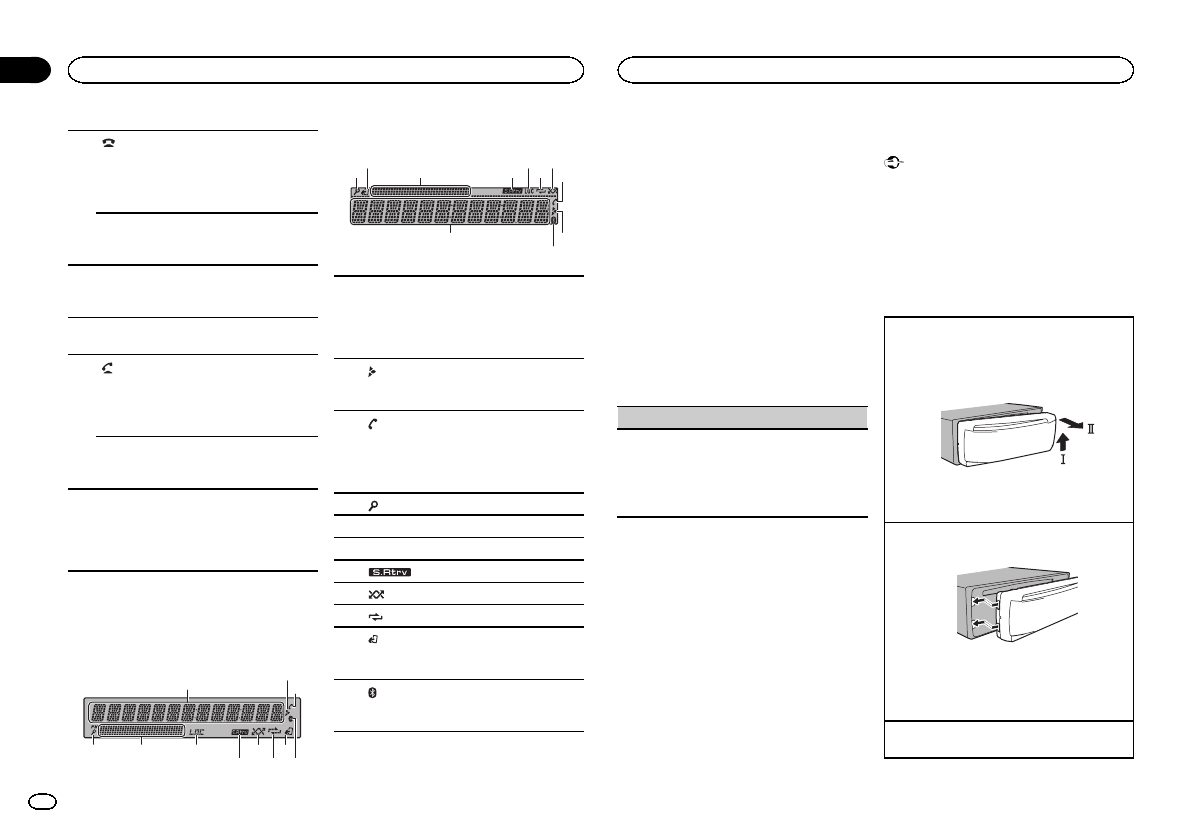
Display indication
DEH-X6600BS/DEH-X6600BT/DEH-X66BT/DEH-
X3600S
1
a8
7 9 b
65
2
3
4
DEH-X4600BT
54 97
21
a 6 8
3
b
1
Main information section
! Tuner: band andfrequency
! CD player, USBstorage device and iPod:
elapsed playback timeand textinforma-
tion
2
Appears whena lower tierof folder or menu
exists.
3
(auto answer)
DEH-X6600BS/DEH-X6600BT/DEH-X66BT/
DEH-X4600BT
Shows whenthe automatic answeringfunc-
tion ison.
4
(list)
5 Sub informationsection
6 LOC (localseek tuning)
7
(sound retriever)
8
(random/shuffle)
9
(repeat)
a
(iPod control)
This unit’siPod functionis operated from
your iPod.
b
(Bluetooth indicator)
DEH-X6600BS/DEH-X6600BT/DEH-X66BT/
DEH-X4600BT
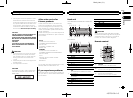
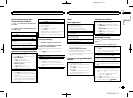
Set up menu
1 After installation of this unit, turn the
ignition switch to ON.
SET UP appears.
2 Turn M.C. to switch to YES.
# If youdo not use theunit for 30seconds, the set
up menuwill not bedisplayed.
# If youprefer not to setup at thistime, turn M.C.
to switchto NO.
3 Press M.C. to select.
4 Complete the procedureoutlined below
to set the menu.
To proceed tothe next menu option,you need to
confirm your selection.
CLOCK SET(setting the clock)
1 TurnM.C. to adjusthour.
2 Press M.C. toselect minute.
3 TurnM.C. to adjustminute.
4 Press M.C. toconfirm the selection.
QUITappears.
5 To finishyour settings, turn M.C. to select
YES.
# If youprefer to change yoursetting again, turn
M.C. toswitch to NO.
6 Press M.C. to select.
Notes
! You can set up the menu options from the
system menu. For details about the settings,
refer to System menu on page 14.
! You can cancel set up menu by pressing
SRC/OFF.
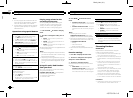
Basic operations
Important
! Handle the front panel with care whenre-
moving or attaching it.
! Avoid subjecting the front panel to excessive
shock.
! Keep the front panel out of directsunlight
and high temperatures.
! To avoid damaging thedevice or vehicle inte-
rior, remove any cablesand devices attached
to the front panel before detaching it.
Removingthe front panel
1 Press the detachbutton to releasethe front
panel.
2 Push the frontpanel upward (M)and then pull
it toward(N) you.
3 Always store the detachedfront panel ina pro-
tective caseor bag.
Re-attaching thefront panel
1 Slide the front panelto the left.
2 Press the rightside of thefront panel until itis
firmly seated.
Forcingthe front panelinto place mayresult in
damage tothe front panelor head unit.
Turning theunit on
1 Press SRC/OFFto turn the uniton.
Using this unit
4
Section
Using this unit
En
02
<QRD3195-A>4