


Playing Video CDs on
the built-in player
En
33
Basic operation of Video CD
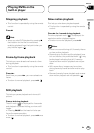
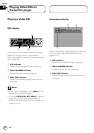
1 Press
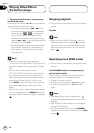
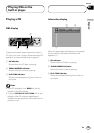
OPEN on the head unit to open the
front panel.
Disc loading slot appears.
• After inserting a Video CD, press
SOURCE to
select the built-in player.
• Pressing SOURCE on the head unit also per-
forms the same operation.
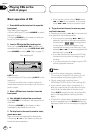
2 Insert a Video CD into the Disc loading
slot.
When you set
AUTO PLAY :ON, playback will
automatically start. If you set AUTO PLAY :OFF,
press SOURCE to select DVD (refer to page 17).
Disc loading slot
EJECT button
• You can eject a Video CD by pressing EJECT
on the head unit.
• To avoid a malfunction, make sure that no
metal object comes into contact with the front
panel is open.
3 After a Video CD has been inserted, close
the front panel.
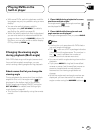
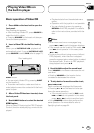
4 Use
NUMBER buttons to select the desired
MENU option.
When a Video CD featuring the PBC (Playback
Control) function starts playing, a menu is dis-
played.
• Playback starts from the selected menu
option.
• Operation with the joystick is not possible.
• You can display the menu by pressing
RETURN while PBC playback. For details,
refer to the instructions provided with the
disc.
Notes
• When menu are two or more pages long,
press 4 or ¢ to switch between displays.
• If the remote control is set to DVH mode, 4
and ¢ do not operate. In this case, press
1 or ¡.
• To play a disc without using a menu (without
PBC playback), when the disc is stopped
press the appropriate number button to select
the desired track. To return to PBC playback,
stop playback and press 6.
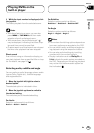
5 Use VOLUME to adjust the sound level.
Press VOLUME to increase or decrease the vol-
ume level.
• Rotating VOLUME on the head unit also
increases or decreases the volume.
6 To skip back or forward to another track,
press 4 or ¢.
Track numbers are displayed for 8 seconds.
• Pressing 2 or 3 on the head unit also per-
forms the same operation.
• If the remote control is set to DVH mode,
4 and ¢ do not operate. In this case,
press 1 or ¡ to skip to another track.
• Using NUMBER buttons also performs the
same operation. For more details, refer to
Specifying track on page 34.
English
Español
Deutsch
Français
Italiano
Nederlands
05
Section