


1. MOUNTING, WIRING
6
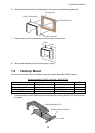
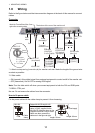
3. Screw the wing bolts and the wing nuts of the flush mount fixture 19 so that the protector for
screw moves to the fixing plate.
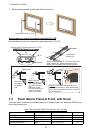
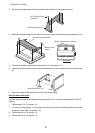
4. Connect all cables at the back of the monitor unit. See section 1.8.
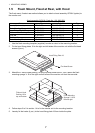
5. Set the monitor unit to the cutout.
6. Fasten the flush mount fixture 19 to the right and left sides of the rear of the monitor unit with
the washer head screws B (6 pcs.).
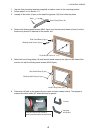
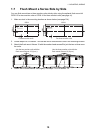
7. Fasten each wing bolt in the order shown in the figure below so that the protector for screw
touches the mounting panel.
8. Fasten the wing bolts tightly to secure the monitor unit.
9. Fasten the wing nuts tightly.
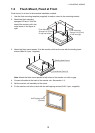
Flush Mount Fixture 19
Wing Bolt
Fixing Plate
Protector for
Screw
Move to the fixing plate.
Wing Nut
Washer Head Screw B
(6 places)
Flush Mount Fixture 19
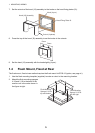
Mounting
Panel
Fixing Plate
Wing Bolt
Wing Nut
Protector for Screw