


2
160 91.3
100
30˚
Dashboard
20
4
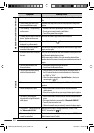
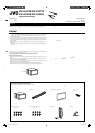
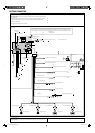
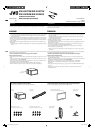
INSTALLATION (IN-DASH MOUNTING)
The following illustration shows a typical installation. However, you should make adjustments
corresponding to your specific car. If you have any questions or require information regarding installation
kits, consult your JVC car audio dealer or a company supplying kits.
• If you are not sure how to install this unit correctly, have it installed by a qualified technician.
Before installing the unit
• When mounting the unit, be sure to use the screws provided, as instructed. If other screws are used,
parts could become loose or damaged.
• When tightening screws or bolts, be careful not to pinch any connection cord.
• Make sure not to block the fan on the rear to maintain proper ventilation when installing the unit.
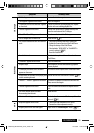
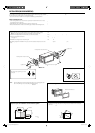
1 Remove the audio system originally installed in the car, together with its mounting brackets.
Note: Be sure to keep all the screws and parts removed from your car for future use.
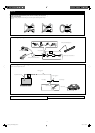
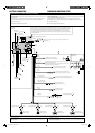
2 Attach the mounting brackets (removed from the car), to this unit (see below).
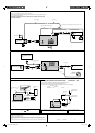
3 Do the required electrical connections.
• See pages 3 – 6.
4 Install this unit using the screws removed in step 1.
The following example is for installation in a Toyota car. For more details, consult your JVC car audio
dealer.
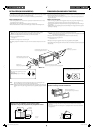
If necessary, restore the protruding tabs.
Supplied screws
Note : When installing the unit on the mounting bracket, make sure to use the supplied screws
(M5 × 8 mm). If longer screws are used, they could damage the unit.
M5 × 8 mm
.
JVC
•
•
•
•
1
2 ( ) ( )
3
• 3 6
4 1
Toyota JVC
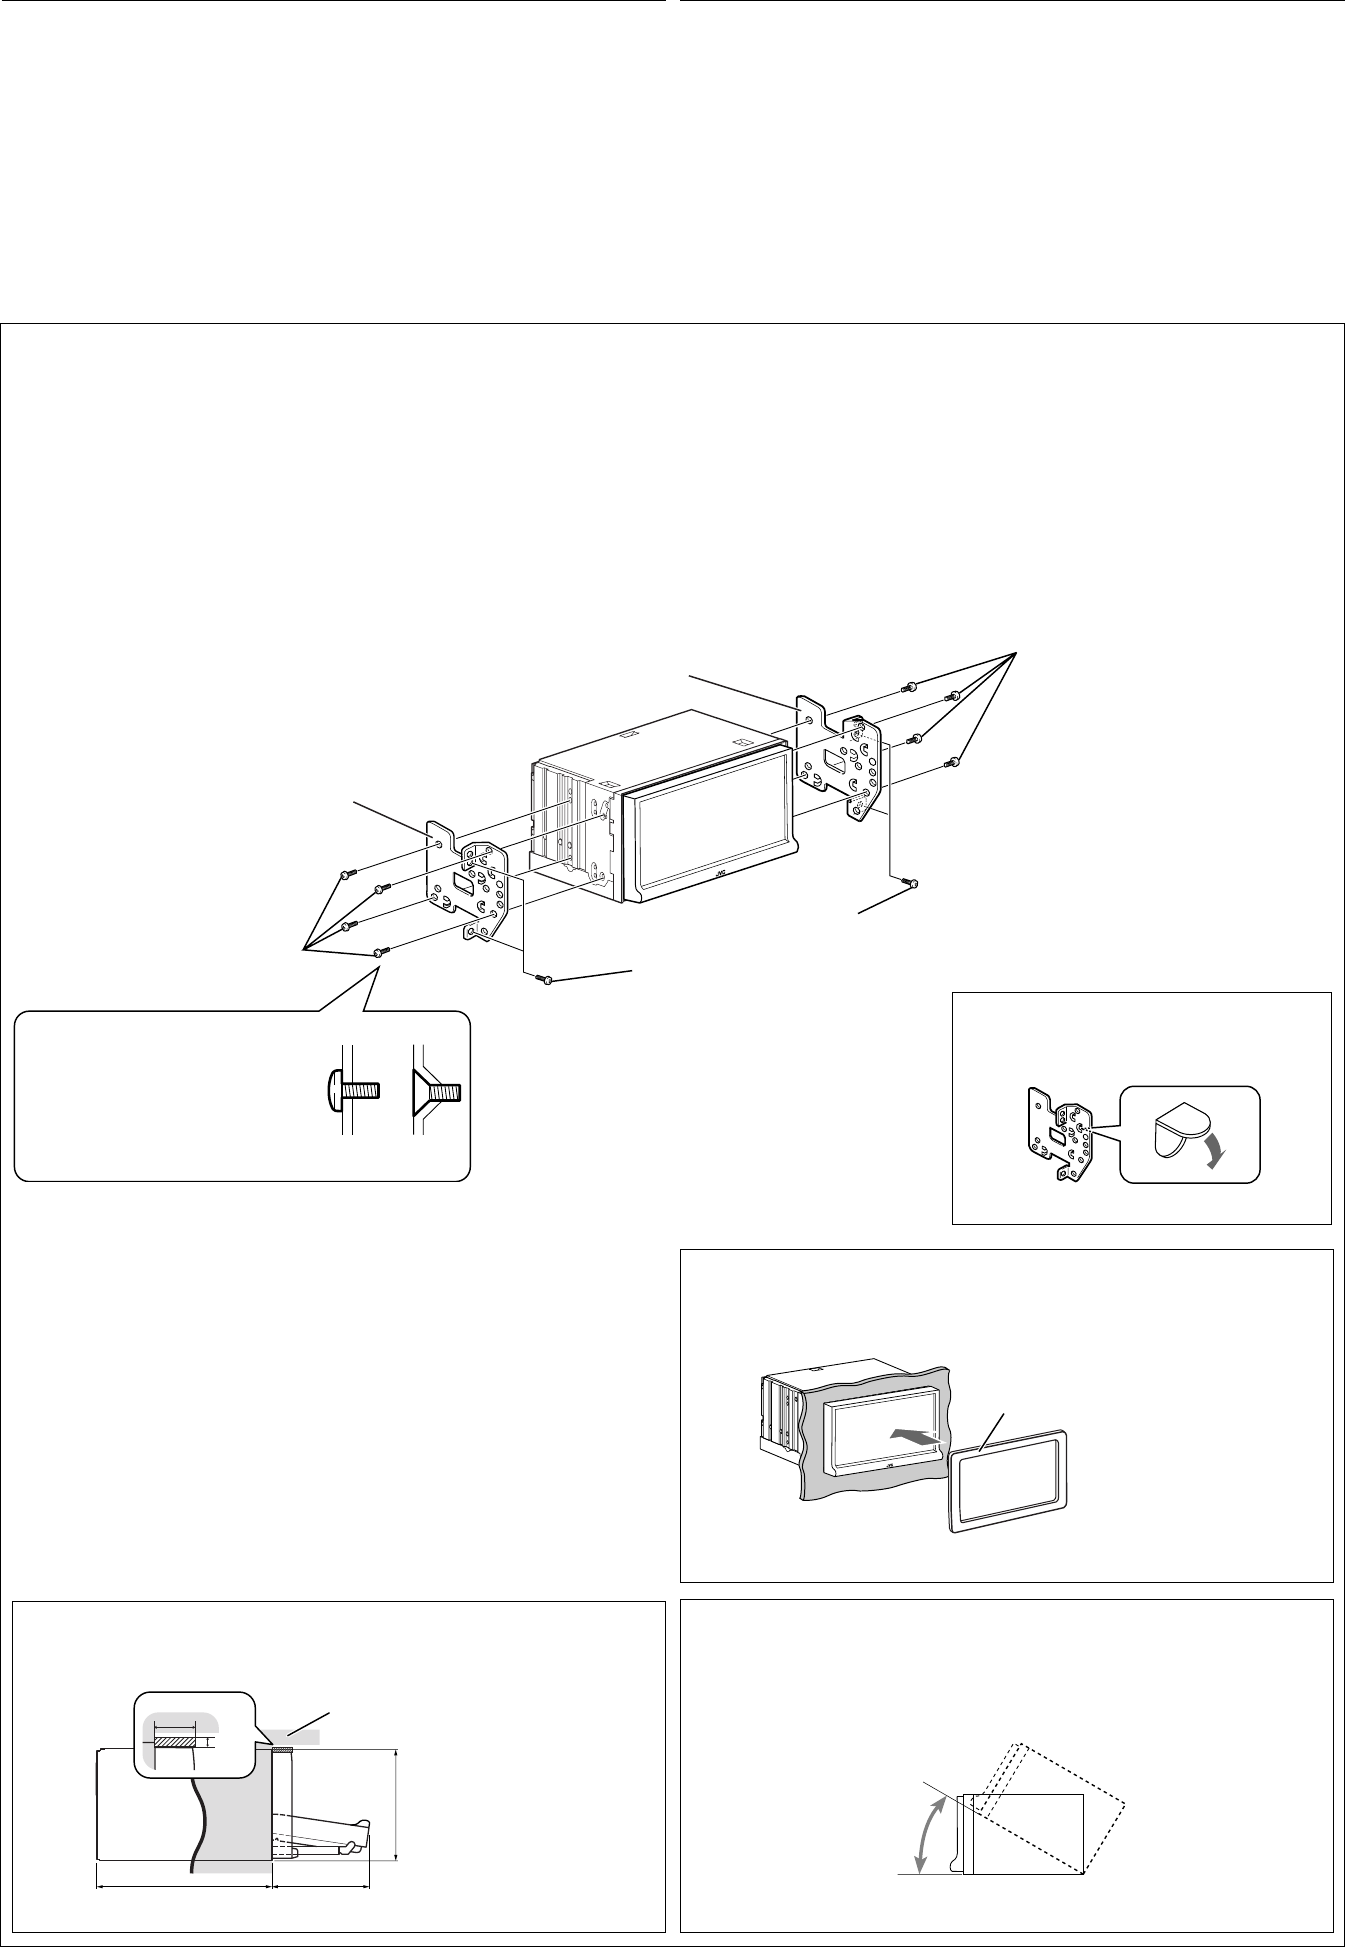
When installing the unit in a Nissan car
Install the unit at an angle of less than 30˚, taking it into account that the monitor would eject
when in use.
30˚
Required space for installation and the monitor ejection
Unit: mm
mm
Mounting bracket removed from the car
Screws removed from the car in step
1
1
Supplied screws
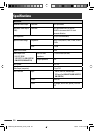
Select the appropriate type fitting to your audio
system space.
Mounting bracket removed from the car
Plate for use with a Nissan car
CT_Instal_KW-AVX726[UT]2.indb 2CT_Instal_KW-AVX726[UT]2.indb 2 08/12/25 16:33:1208/12/25 16:33:12